If you’ve ever woken up to a missed chat and zero messages, you know the feeling.
Someone visited your site, saw your widget, and got nothing back. No reply. No next step. Just silence. And they left.
That’s a lead you’ll never get back.
Other chat plugins talk about the basic setup, but skip what happens to messages when you’re offline.
Where do they go? Will the widget switch off automatically, or do you have to do it yourself?
I went through WPChat’s full settings to answer those questions. Every step comes from hands-on testing inside the plugin dashboard, not guesswork.
You’ll set your availability hours, write an offline message that keeps visitors from leaving, and close the gaps that let leads slip through while you’re away.
- The Quick Answer: Yes, WPChat Can Handle This
- Why Your Chat Widget Needs Availability Hours
- How to Install WPChat on WordPress
- Part 1: Connect Your Messaging Channels
- Part 2: Enable Agent Timings in WPChat Settings
- Does WPChat Save Messages When You're Offline?
- How to Write an Offline Message That Actually Converts
- Frequently Asked Questions
- Start Capturing Leads Even When You're Away
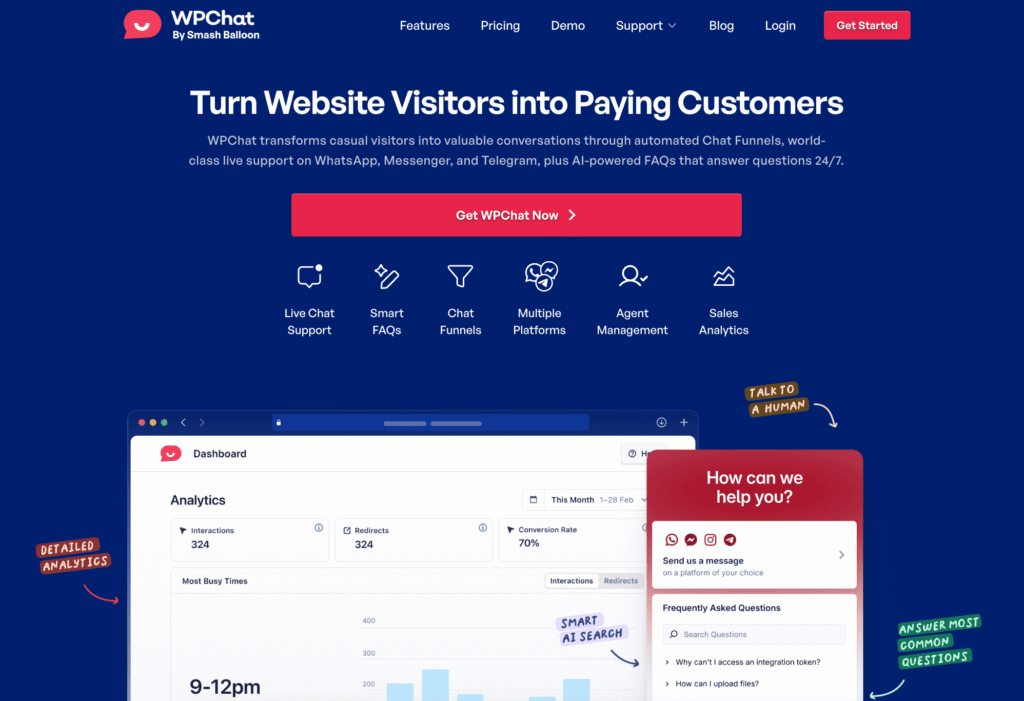
The Quick Answer: Yes, WPChat Can Handle This
WPChat gives you full control over when your chat widget shows as online. Visitors only see it as available when you’re actually there.
- Availability Hours Per Agent: You set your schedule directly on each agent. The widget reflects your real working hours automatically.
- Automatic Offline Switching: When you go offline, WPChat switches the widget to offline mode. No manual toggling required.
- Routing to Messaging Apps: Visitors do not hit a dead end. They get routed to your connected app: WhatsApp, Messenger, Instagram, or Telegram. Their message is saved and waiting when you’re back.
- Custom Offline Message: Write a message telling visitors when to expect a reply. They know they’re not being ignored.
Here’s exactly how to set all of this up.
Why Your Chat Widget Needs Availability Hours
What happens when someone messages your site at midnight?
If your widget shows as online, they expect a reply. When none comes, they don’t wait around. They leave and find someone else.
Here’s the gap most site owners don’t notice until it’s too late:
| What visitors expect | What they usually get | What actually happens |
|---|---|---|
| A quick reply | A clear next step | Silence or a generic offline message |
| To know when you’re back | An estimated response time | No information, no instructions |
| Proof the business is real | Any sign of life | Nothing. They assume you’re not legitimate. |
| A way to leave a message | A simple contact option | A dead end with nowhere to go |
There are three ways this goes wrong.
Your widget shows online when no one is there, and the visitor bounces after getting no reply.
Or it shows an offline message with no instructions. The visitor has no idea what to do next. Or there’s no message at all. They assume the business isn’t real.
I’ve seen all three on real sites. None of them are good for business.
The manual fix exists. You can log into WordPress every morning and toggle the widget on. Then log back in at night to switch it off.
Technically, it works. But you’ll forget. You’ll have an early meeting or a late night. The widget will be wrong for hours.
WPChat handles this automatically. You set your hours once, and the widget does the rest.
How to Install WPChat on WordPress
Log into your WPChat account and go to the Downloads tab. Click Download Plugin to get the ZIP file.
Then go to WordPress Dashboard » Plugins » Add Plugin » Upload Plugin. Select the ZIP, hit Install Now, then Activate.
A standard WordPress upload. That’s all it takes.
Safari users: Safari automatically unzips downloaded files, which breaks the plugin upload. Before downloading, go to Safari » Settings » General and uncheck “Open safe files after downloading.” Then download the ZIP again.
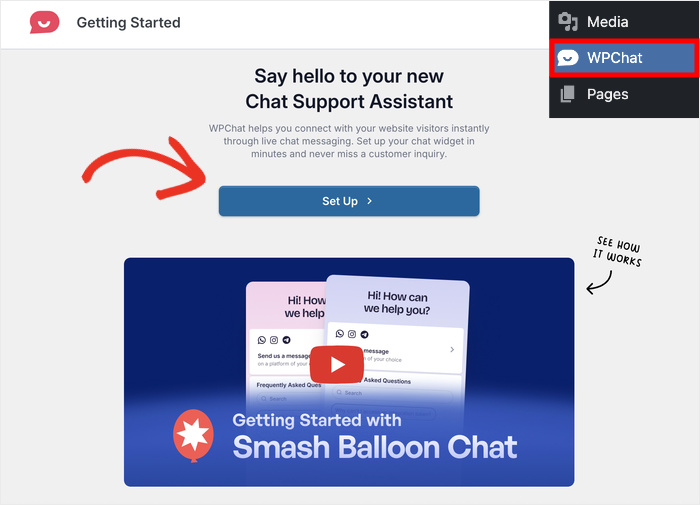
Once you click “Activate”, WPChat opens the setup wizard automatically. That’s where you connect your messaging channels and configure the widget.
Part 1: Connect Your Messaging Channels
This is where you tell WPChat which apps your customers can reach you on.
After you activate the plugin, click on the WPChat menu and select the Set Up option.
You’ll work through four steps: add your channels, pick a theme, set visibility, and activate your license if you’re on Pro.
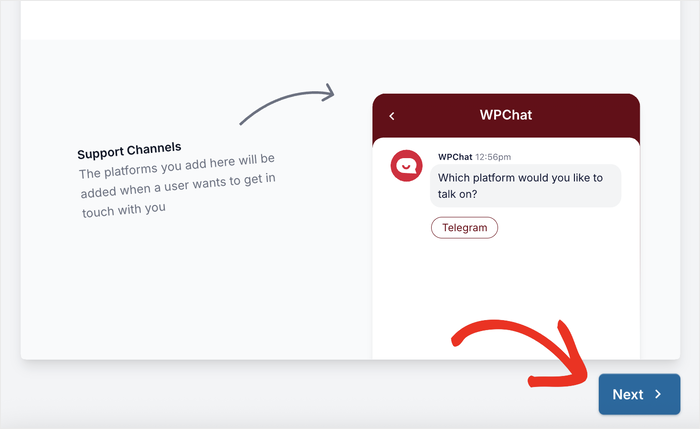
Add Your Support Channels
This first step connects your messaging apps to the widget. When visitors click your chat button, these are the options they’ll see.
- WhatsApp: Click the flag dropdown to select your country code, then enter your phone number.
- Instagram: Enter your username without the
@symbol. - Telegram: Enter your Telegram username.
- Messenger: Enter your Facebook page username or page ID.
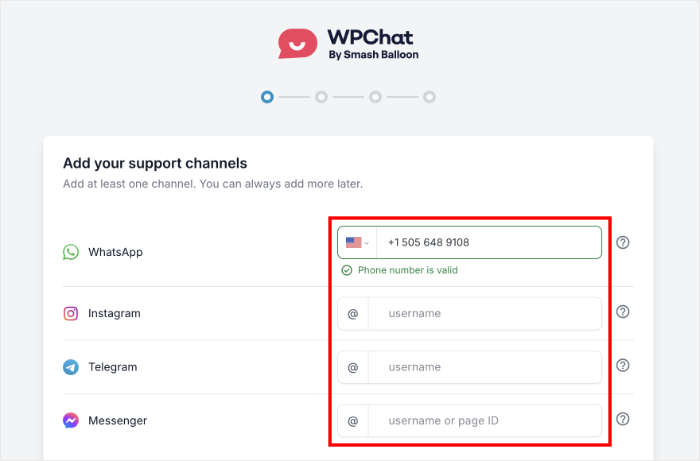
- Watch for the green ✓ under each field. That confirms WPChat recognized your entry as valid.
- Fill in at least one channel, then click Next.
You don’t have to connect all four. Start with the one you actually check. You can add more later.
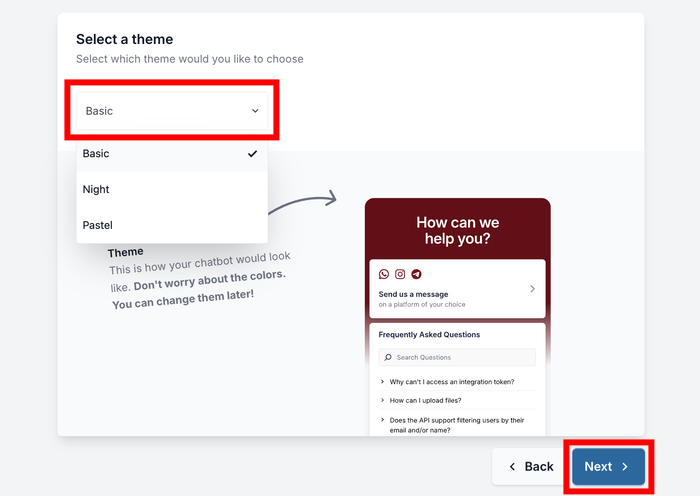
Pick Your Chat Theme
WPChat gives you three visual styles for the widget. This step is quick, but it matters. Your widget should match your site’s look.
- Open the Theme dropdown and choose Basic, Night, or Pastel.
- The live preview updates instantly so you can see exactly how it’ll look.
- Once you’re happy with the style, click Next.
Check the preview against a dark section of your site if you have one. Some themes read better against certain backgrounds.
Choose Where the Widget Appears
This step controls which pages show the chat widget. WPChat gives you two display modes:
| Display Mode | What It Does |
|---|---|
| Display on all pages | Widget appears everywhere by default. Use “Add page”, “Add category”, “Add tag”, or “Add custom post” to exclude specific content. |
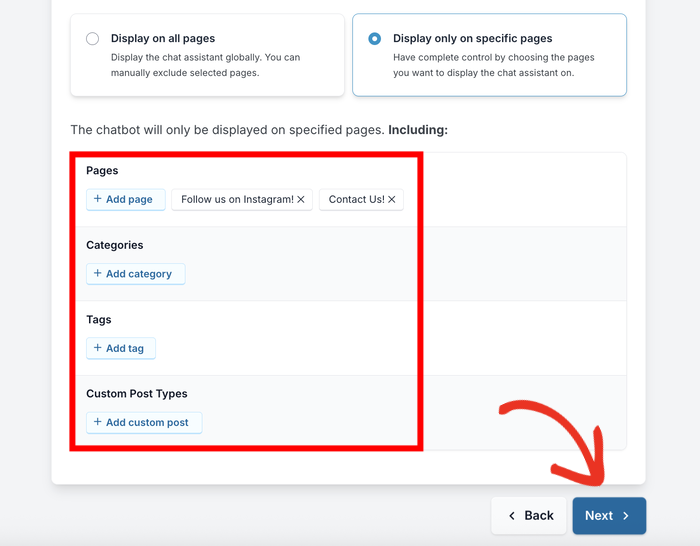
| Display only on specific pages | Widget is hidden by default. Use the same buttons to include only the content you want. |
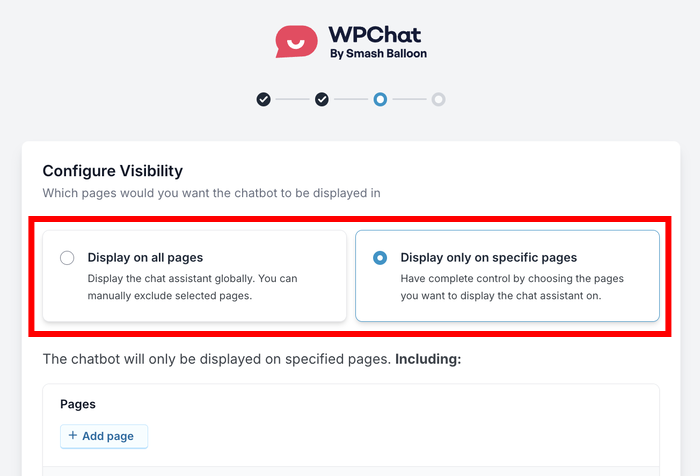
- Select the display mode that fits your setup.
- Use the + Add page, + Add category, + Add tag, or + Add custom post buttons to fine-tune where the widget shows or hides.
- Click Next when done.
If you’re unsure, start with “Display on all pages.” You can always exclude pages like checkout or confirmation pages later.
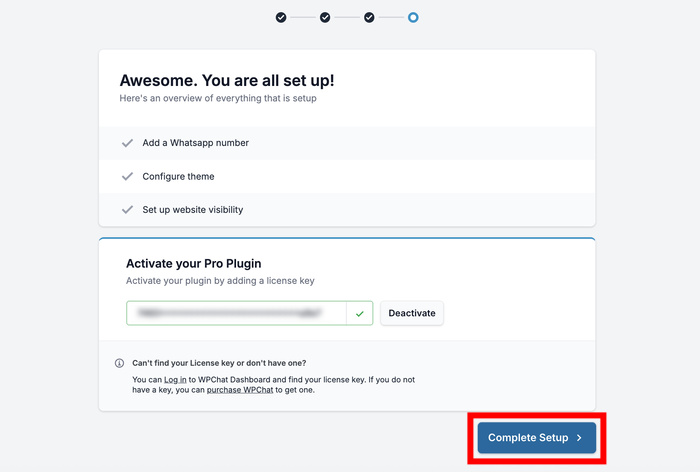
Activate Your License (Pro)
This step applies to WPChat Pro users only. Free plan users can skip ahead.
- Paste your license key into the Paste license key here field.
- Click on Activate.
- The field will display your masked key with a green ✓ confirming activation.
- Click Complete Setup to finish the wizard.
You can now use the timing control feature in the next step to set your availability hours.
Part 2: Enable Agent Timings in WPChat Settings
Now you tell WPChat exactly when each agent is online.
This is the step most people come here for. Two things to set up: the off-hours rules that control what visitors see, and the actual schedule for your agent.
Configure the Off-Hours Rules
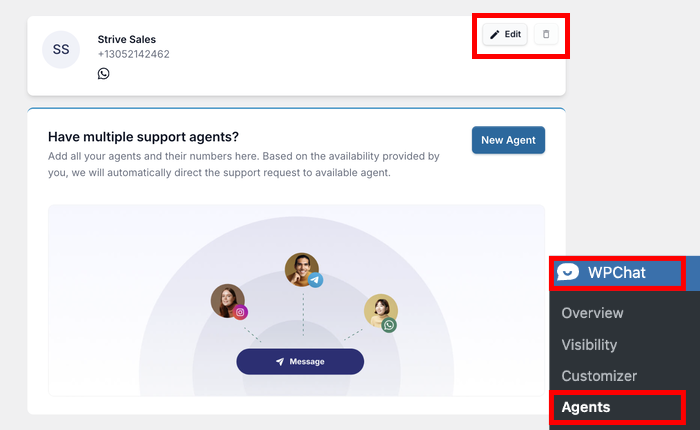
Go to WPChat » Agents and click “Agent Settings.”
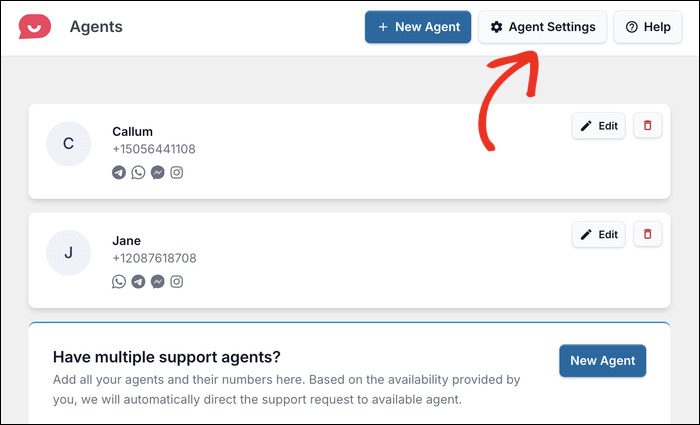
Under Timings, open the “Timings” dropdown and select “Enable.”
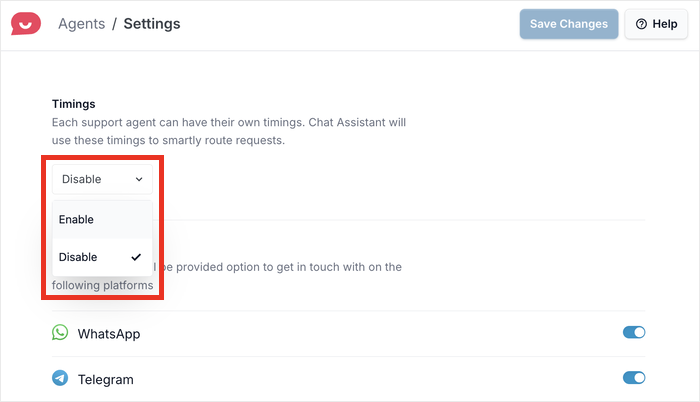
After that, the Off hours rules section appears below it.
You have two options. Pick the one that fits how you work:
| Option | What It Does | Best for |
|---|---|---|
| Disable contact option | Hides all contact methods when offline. Visitors see your business hours instead. | Solo operators who want a clean, simple offline experience. |
| Redirect to an off-hours agent | Routes visitors to a specific backup agent during off hours. | Teams with someone available later, or a dedicated offline contact. |
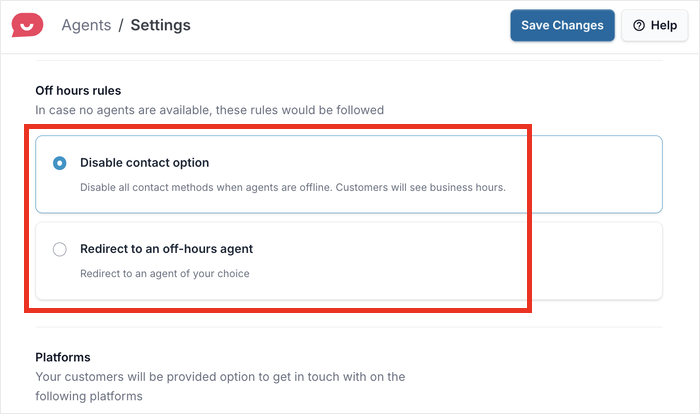
If you choose “Redirect to an off-hours agent,” use the agent dropdown below to select which agent takes those conversations.
Click “Save Changes” and you’re done.
Set Start Time, End Time, and Days
Go back to WPChat » Agents and click “Edit” on your default agent.
Scroll to the Timings section and fill in three fields:
- Start time: Open the dropdown and select your opening time (for example, “9:00 AM”).
- End time: Open the dropdown and select your closing time (for example, “5:00 PM”).
- Days: Click the day buttons (Mo Tu We Th Fr Sa Su) to toggle each day on or off. Selected days show a blue border. Skipped days do not.
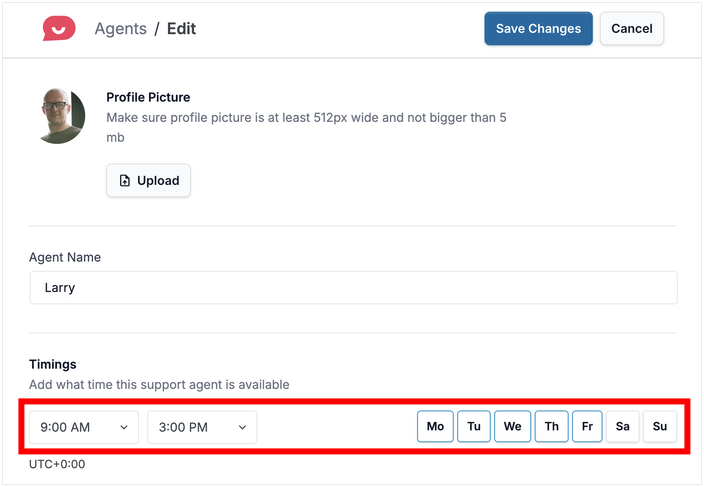
Click on “Save Changes.”
Once saved, the widget switches automatically. You don’t have to touch it every day.
With that, open your website, test your chat widget, and see if everything works properly.
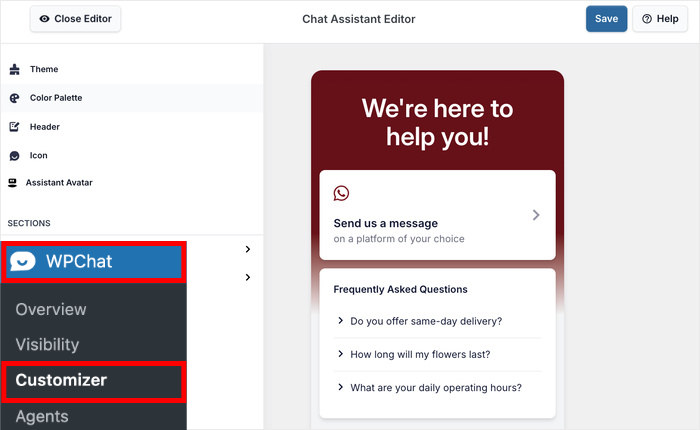
You can also open the WPChat » Customizer option from your WordPress dashboard and customize your widget in detail.
Does WPChat Save Messages When You’re Offline?
Yes. But not inside WordPress. Here’s how it actually works.
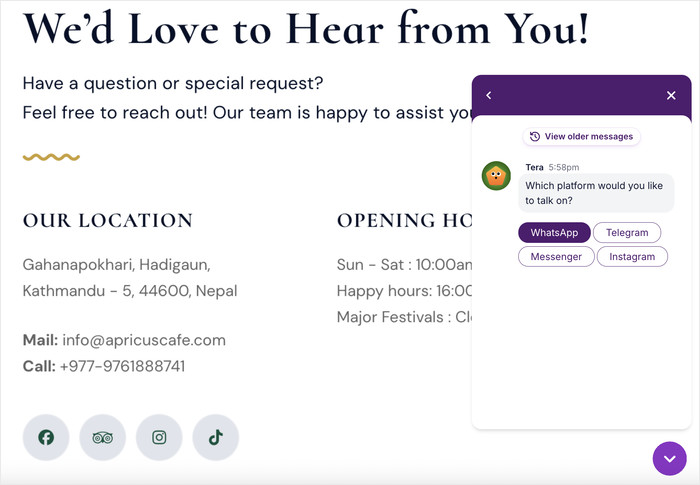
When a visitor clicks your chat widget, they get routed to whichever messaging app you connected during setup: WhatsApp, Messenger, Telegram, or Instagram.
Those platforms save messages automatically. WhatsApp holds them until you open the app. Messenger stores them in your inbox.
Telegram keeps them waiting, no matter when you log in. You don’t lose a single message.
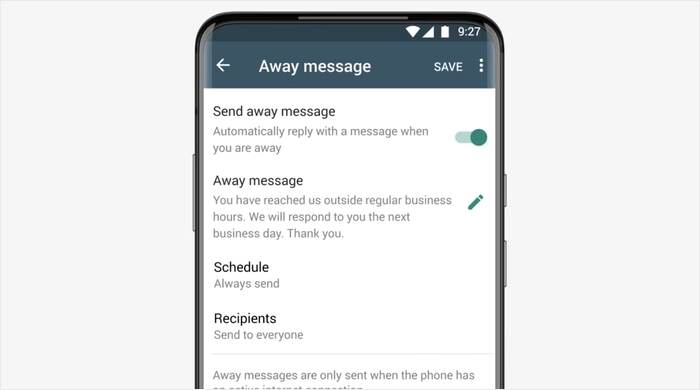
On top of that, these platforms can even let you set up offline or away messages.
People are a lot more willing to wait for responses in this case because they already trust and use these messaging apps every day.
One practical thing to get right before you go live: connect at least one channel you actively check every day.
If you set up a Telegram handle you haven’t touched in months, messages will pile up unread. Pick the app you open first thing in the morning. Start there.
How to Write an Offline Message That Actually Converts
Most offline messages just show “We’re offline right now.”
That single line does nothing. It gives no timeframe, no next step, no reason to stay. The visitor moves on, usually to a competitor who looks more available.
The fix is simple. Write a message that tells visitors exactly what to expect and what to do next.
| Default message (kills conversions) | Better message (keeps visitors engaged) |
|---|---|
| “We’re offline right now.” | “Hey! We’re offline but reply to every message within 4 hours.” |
| “Leave a message and we’ll get back to you.” | “Send us a message on WhatsApp and we’ll get back to you by morning.” |
| “Our team is unavailable at the moment.” | “We’re away right now. Drop us a note and we’ll reply within 2 hours.” |
Three templates you can copy and adjust:
Template 1: “Hey! We’re offline but reply to every message within [X hours]. Send us a message on WhatsApp and we’ll get back to you soon.”
Template 2: “We’re away right now. Leave us a message and we’ll reply by [time/day]. We read every one.”
Template 3: “Offline for now. Drop us a note on [platform] and we’ll get back to you within [X hours].”
The specific timeframe is the detail that matters most.
“Within 4 hours” converts better than “soon” every time. It sets a clear expectation. Visitors know their message won’t disappear.
A specific, human offline message builds trust fast. Visitors who see a real timeframe and a clear next step are far more likely to send that message and wait for your reply.
Frequently Asked Questions
Can I Set Different Hours for Different Days of the Week?
Yes, WPChat lets you set different hours for every day of the week. The day buttons (Mo Tu We Th Fr Sa Su) toggle each day independently, so you can enable Monday through Friday with 9am to 5pm hours and leave Saturday and Sunday switched off entirely.
Will the Widget Switch Automatically, or Do I Have to Do It Manually?
Once you save your schedule, WPChat handles the switching for you. The widget goes offline when your hours end and comes back online when your next shift starts, no manual toggling needed.
Does WPChat Work With Every WordPress Theme?
Yes. WPChat is a plugin-based widget that injects into your site automatically, so it works regardless of which theme you’re running.
Where Do I Find Messages Sent While I Was Offline?
WPChat routes visitors to the social messaging apps you connected during setup, so offline messages land in WhatsApp, Messenger, Telegram, or Instagram, not in your WordPress dashboard.
Open the app you connected, and the messages will be waiting there, stored natively by that platform.
Start Capturing Leads Even When You’re Away
Here’s what happens next.
A visitor lands on your site at midnight. They click the chat widget. WPChat routes them straight to WhatsApp, Messenger, Telegram, or Instagram. The message sits there waiting when you wake up.
Nothing disappears into a WordPress inbox you forgot to check. Nothing gets lost.
WPChat includes everything in this guide: custom schedules, offline messages, and full channel routing.
Grab your copy of WPChat today and start connecting with website visitors today!