Setting Up Your Support Agents
Last updated on October 03, 2025
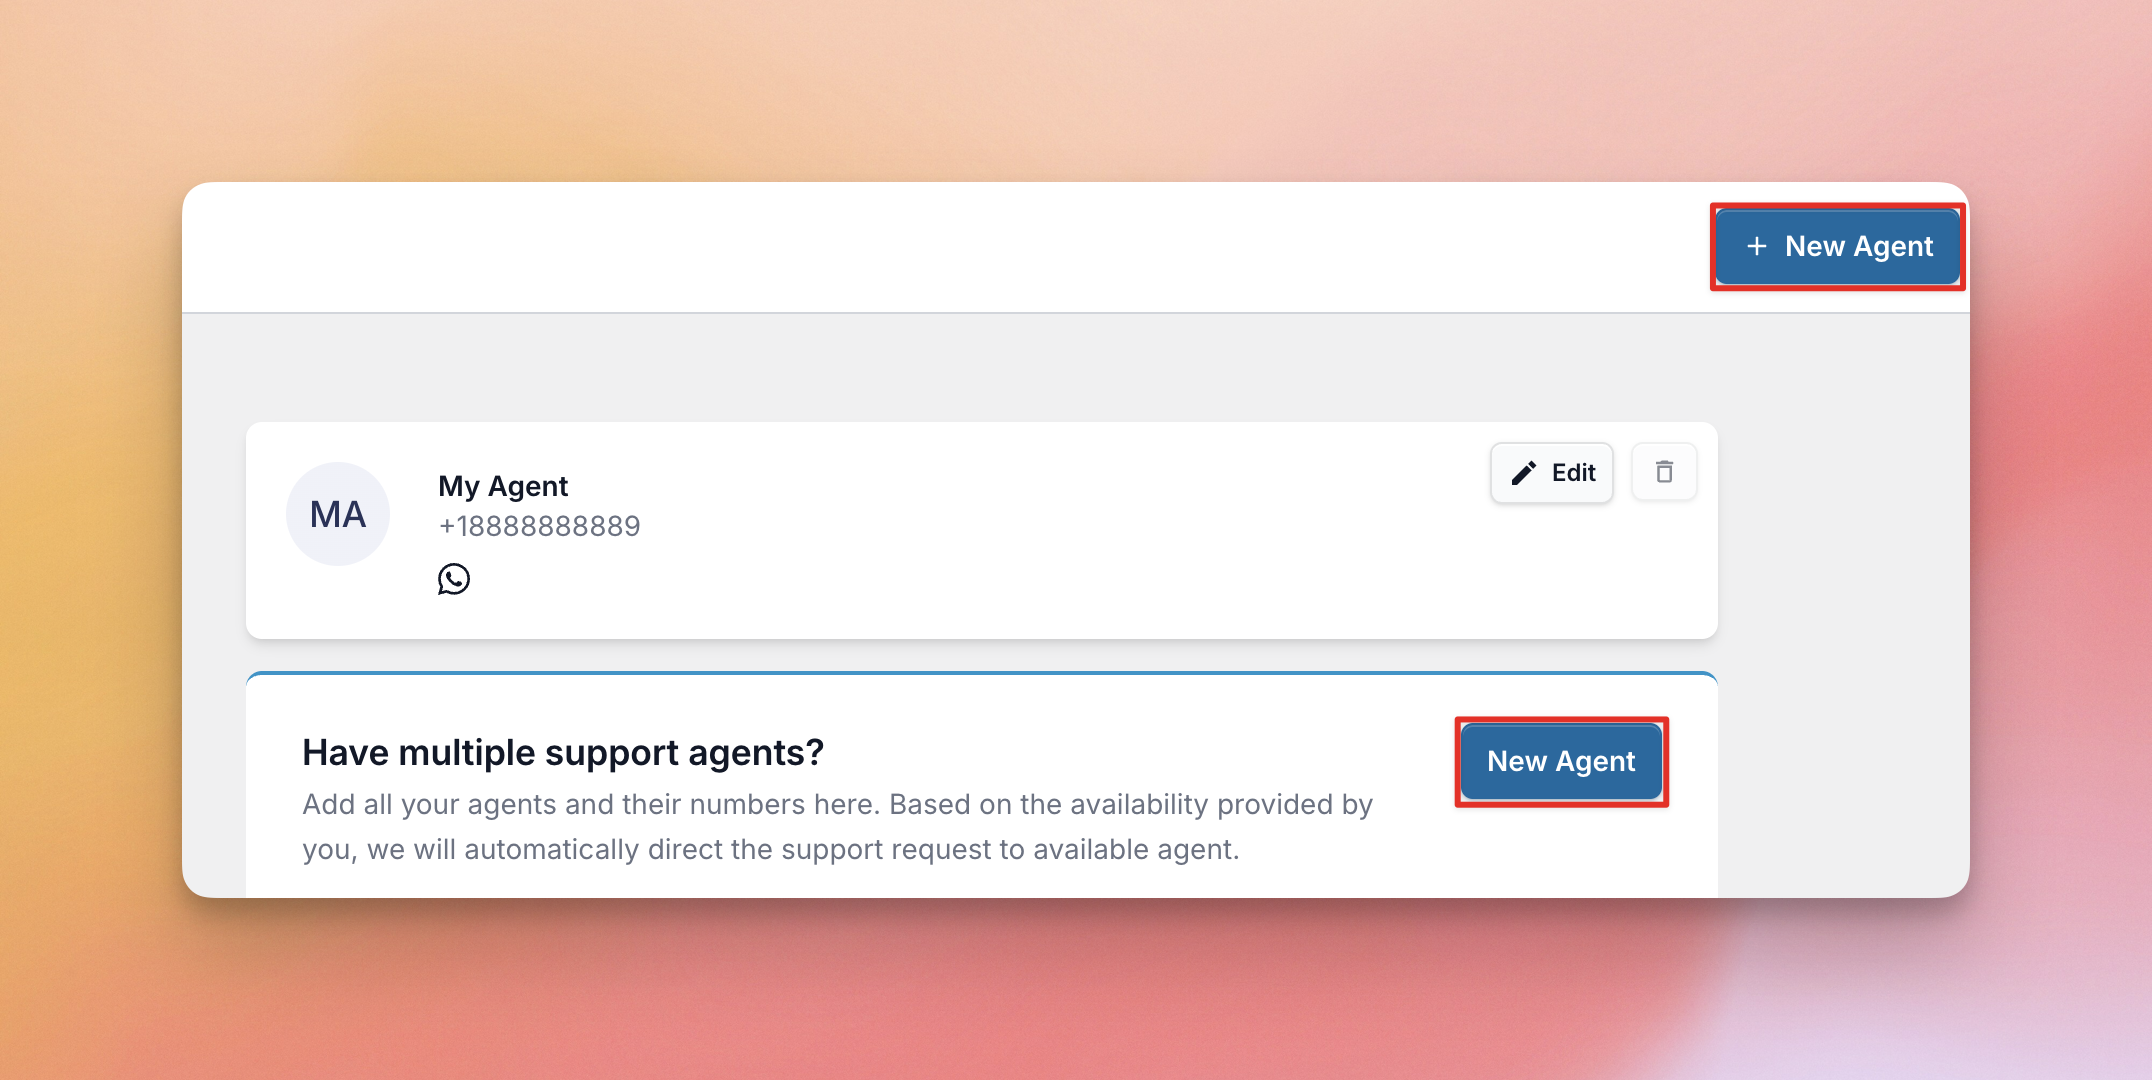
After you complete the initial setup of WPChat, your first support agent has already been created automatically. In the Agents area, you can customize your agent, create new ones, or perform other agent management tasks.
Accessing Agents
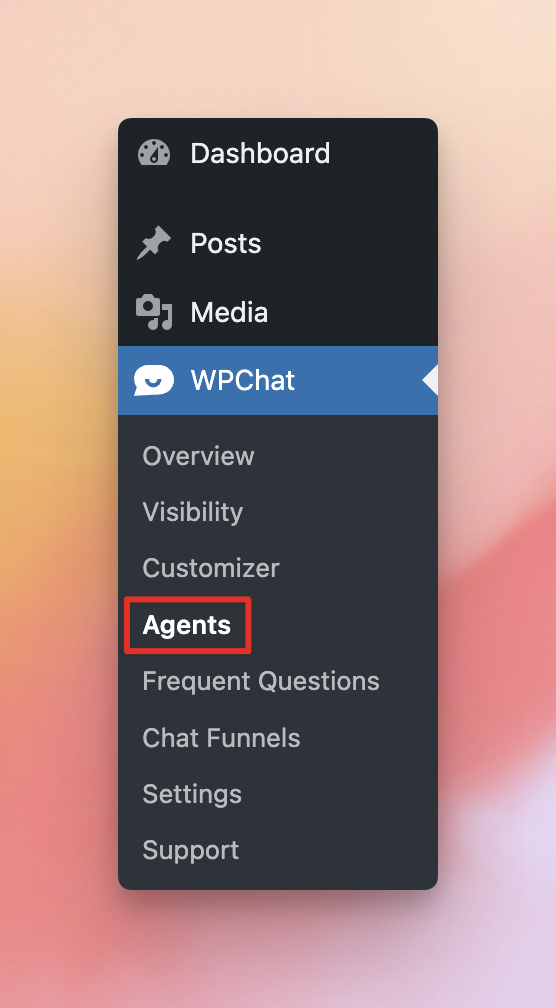
To access the agents, go to WordPress Dashboard > WPChat > Agents
Create a New Agent
Click New Agent to begin creating a new agent.
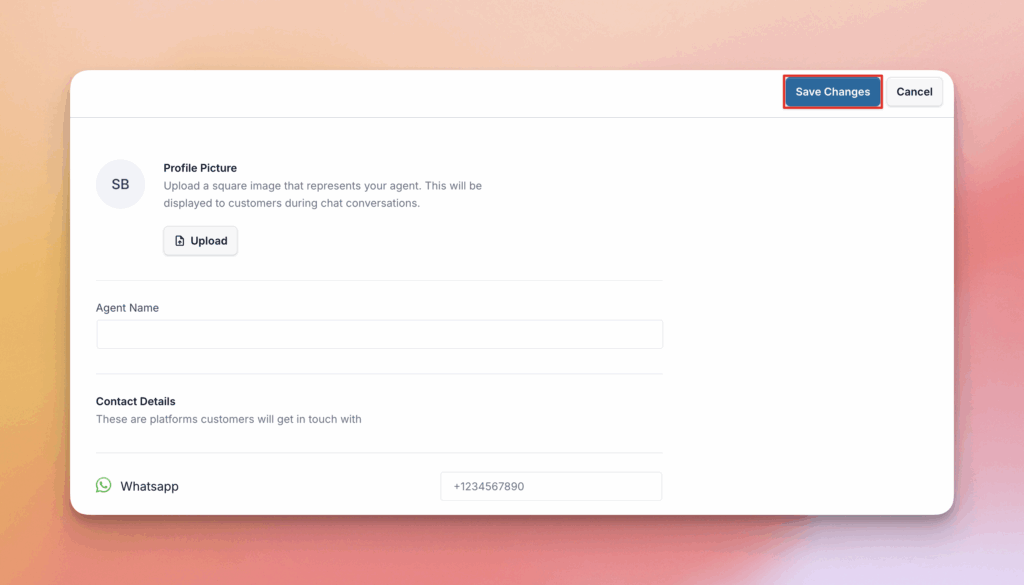
Then fill out the details for the agent. Here you’ll set the Agent Name and Contact Details, and optionally add a Profile Picture for the agent. Click Save Changes once you’ve finished filling in the details.

Edit an Existing Agent
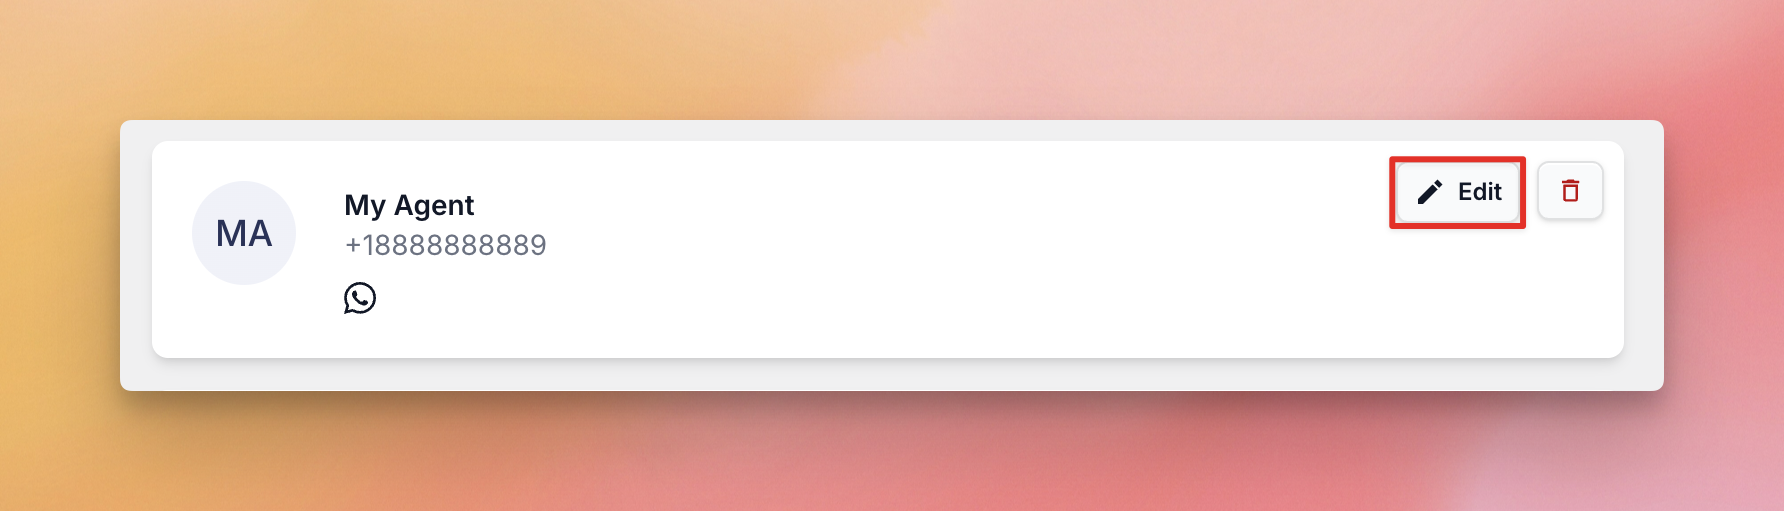
Click the Edit button on an existing agent to update the agent’s information.
You can change the Agent Name, Contact Details, or Profile Picture. Click Save Changes when you’re finished updating the agent details
Delete an Agent
Click the trashcan icon on an existing agent to delete the agent.
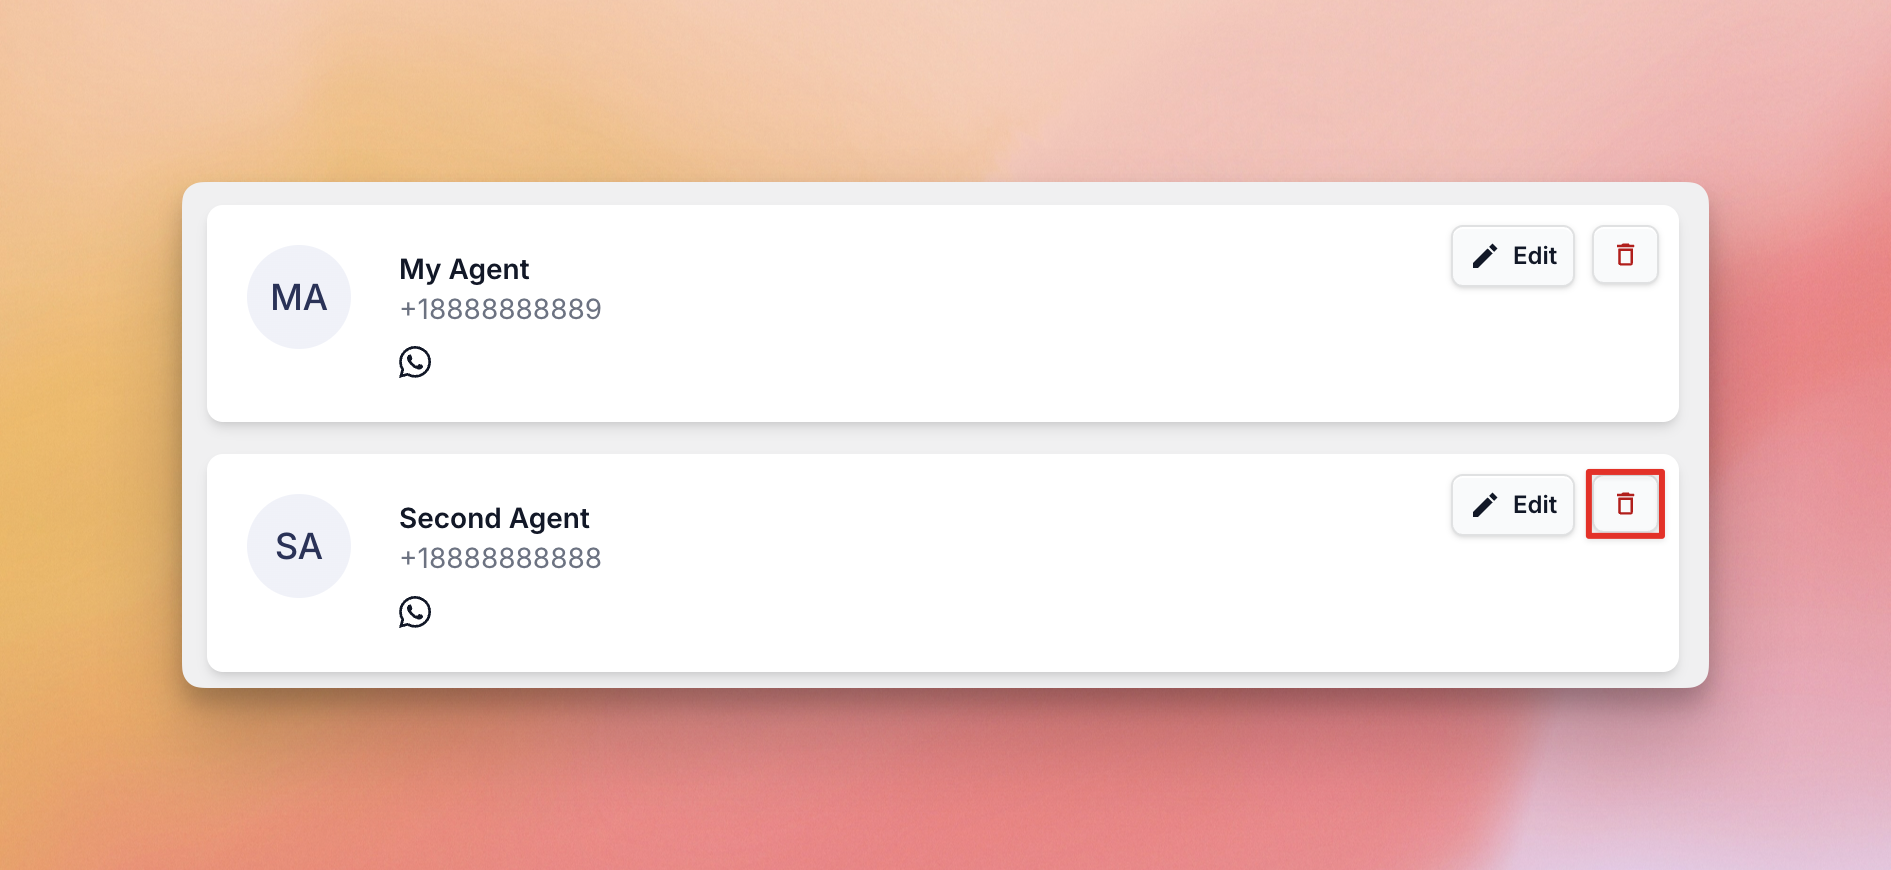
If you only have one agent, you cannot delete it. If you need to change the agent information, you can either edit the existing agent, or create a new one and then the delete the old one.
Advanced Agent Settings
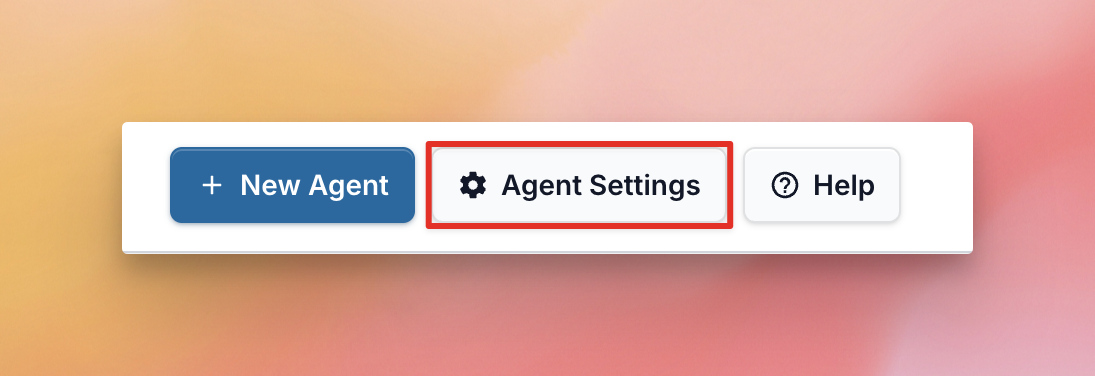
To access the advanced agent settings, click Agent Settings at the top of the page.
From here you can adjust the Timings of when specific agents will handle requests and Off-Hours Rules.
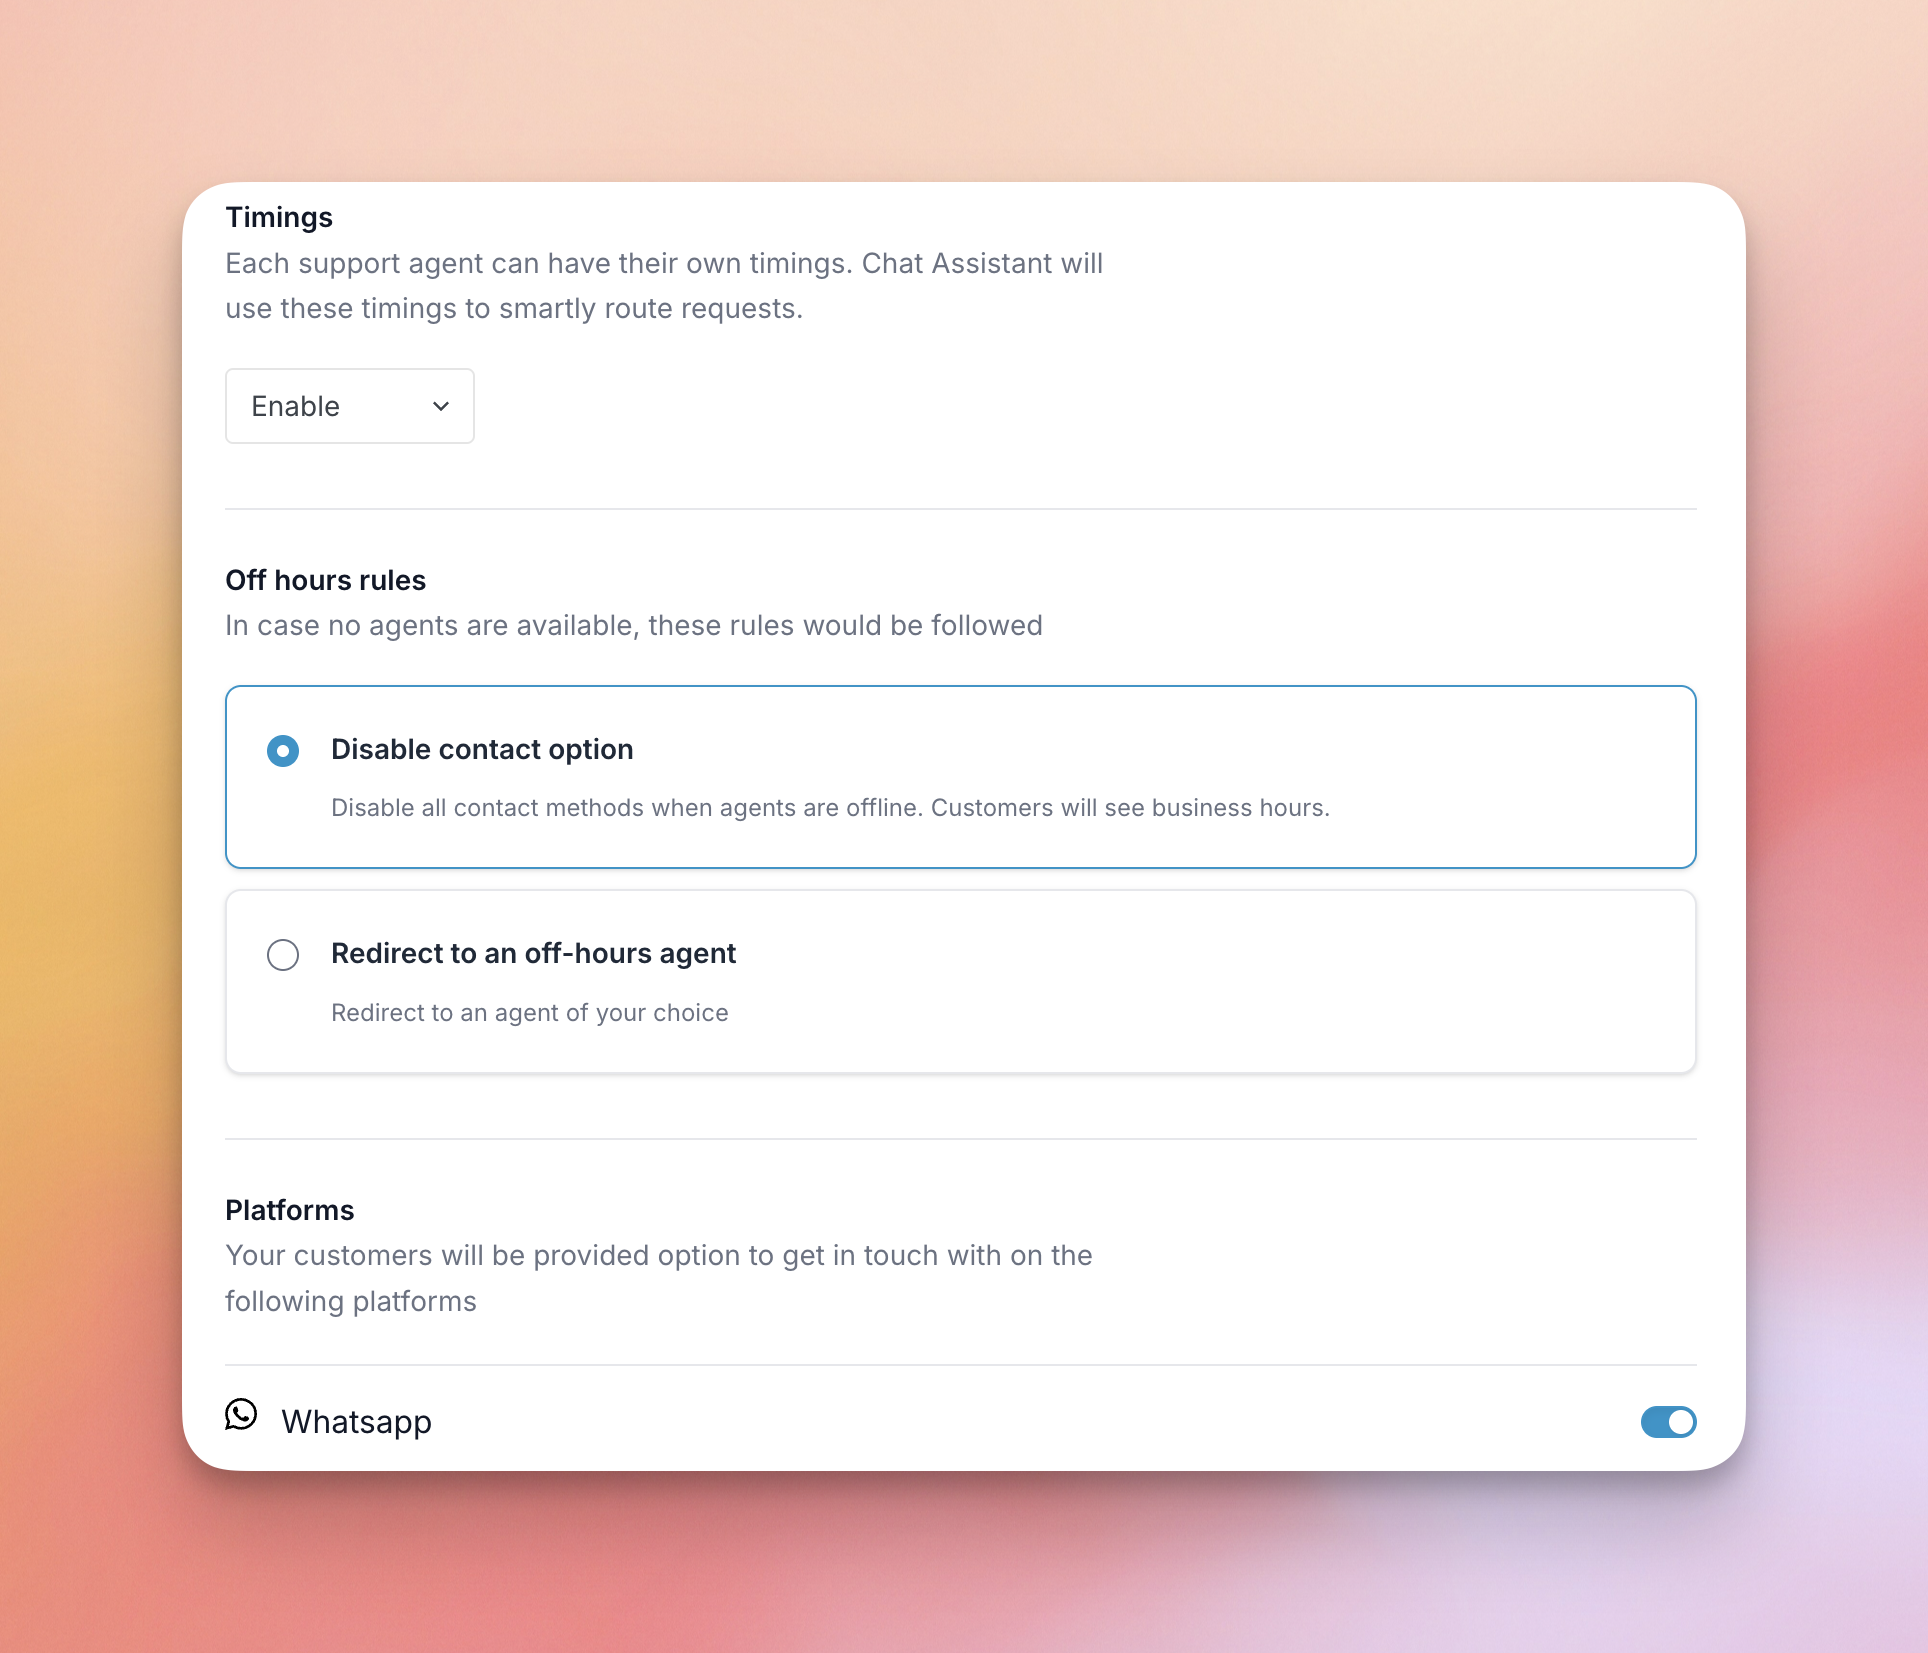
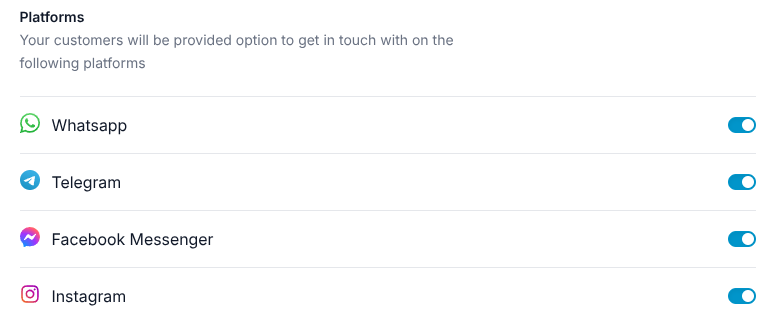
You can also turn messaging platforms (WhatsApp, Telegram, Facebook Messenger, Instagram) on and off.