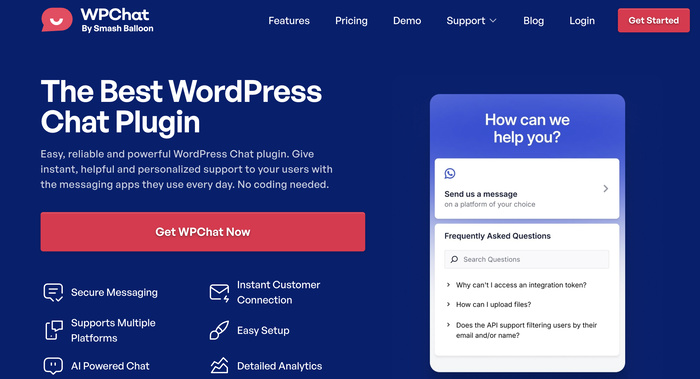
A chat widget (or assistant) is a powerful tool for connecting with your website visitors and providing instant support.
But a generic bot that doesn’t match your site’s design can feel out of place. It can even make your brand seem a little less professional.
You’ve worked hard on your brand’s look and feel, and your chatbot should be no exception.
Now, imagine a chat widget that feels like a natural part of your website. It uses your brand colors, displays your logo, and speaks in your company’s voice.
This small change makes a huge difference in professionalism and helps visitors feel more connected to your brand.
In this guide, I will show you exactly how to customize your chat assistant so it looks perfect on your website.
Why Customizing Your WordPress Chat Widget Matters
With a well-designed chat widget, you’ll have a much easier time grabbing people’s attention and building trust.
Here’s how it can help your WordPress website:
- Fit your branding: When your widget uses your brand colors and styling, it feels like a natural part of your site rather than an obvious third-party tool.
- Match seasonal offers: Update colors, messages, and chat assistant during holiday promotions or special campaigns to drive more engagement.
- Try out new designs: Test different color schemes, positions, and animations to see what encourages more people to start conversations.
- Build client trust: A chat widget with a custom design can make your business appear more established and trustworthy to potential customers.
Just think about it — if you want visitors to turn to the chat widget for help, it’s better for the widget to look like an official part of your website.
Best Tool to Create a Customizable Chat Widget in WordPress
Out of all the options available, WPChat is the best tool for creating a customizable chat widget in WordPress.
WPChat stands out because it’s designed specifically for WordPress users who want professional results without technical complexity.
You can set up a fully functional chat widget in just a few minutes, then spend time customizing it to match your exact needs.
Here are the key features that make WPChat the top choice:
- Quick and easy setup with no coding needed: Install the plugin and follow the simple setup wizard to get your chat widget running in minutes.
- Pre-built themes for beautiful widgets: Choose from professionally designed themes like Basic, Night, and Pastel to quickly create an attractive chat widget.
- Live editor for detailed customization: Use the visual customizer to change colors, fonts, icons, and layout without touching any code.
- Chat funnels and FAQs for instant answers: Set up automated responses and frequently asked questions to help visitors even when you’re not available.
- Custom chat agents with timings: Add multiple team members with profile pictures, names, and specific availability hours to give your support a human touch.
- Supports popular messaging platforms: Your visitors can message you on the biggest chat platforms out there: Facebook Messenger, Instagram, Telegram, and WhatsApp.
WPChat gives you everything you need to create a chat widget that looks professional and works exactly how you want it to.
It strikes the perfect balance between ease of use and powerful customization features.
Ready to get started?
You can get your copy of WPChat here and begin customizing your chat widget today.
How to Create & Customize Your WordPress Chat Widget
Now I’ll walk you through the complete process of setting up and customizing your WordPress chat widget with WPChat.
This step-by-step guide will help you create a professional chat widget that matches your brand perfectly.
If you already have a WPChat chat widget set up from before, you can skip ahead to step 3, where we’ll cover customization options.
Step 1: Set Up WPChat on Your Website
First, you’ll need to get your copy of WPChat and download it on your computer.
Install and activate the plugin (see our beginner’s guide).
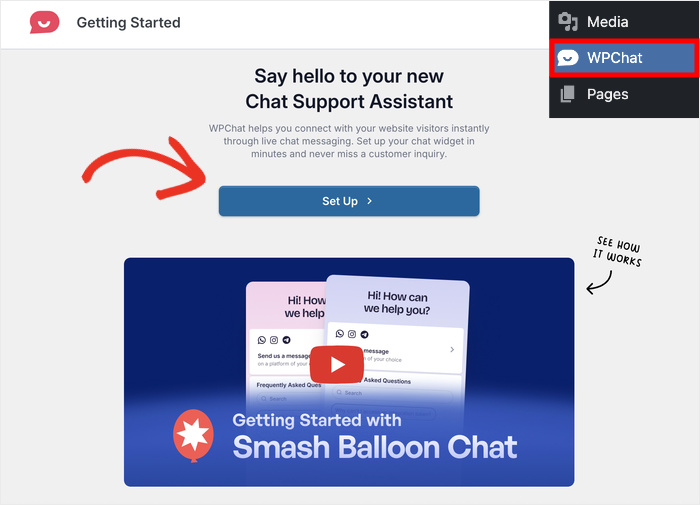
Once the plugin is active, you’ll see a new WPChat menu in your WordPress dashboard.
Click on WPChat and then click the Set Up button to start the configuration process.
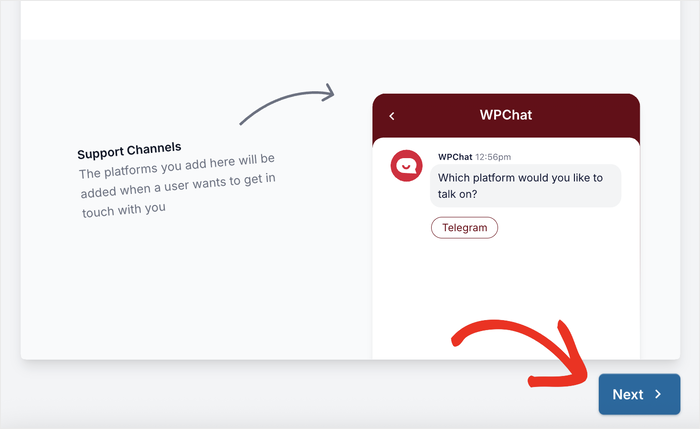
The setup wizard will ask you to enter your contact details that your customers can use to reach you.
You can choose whichever platforms you like from the options:
- Telegram
- Messenger
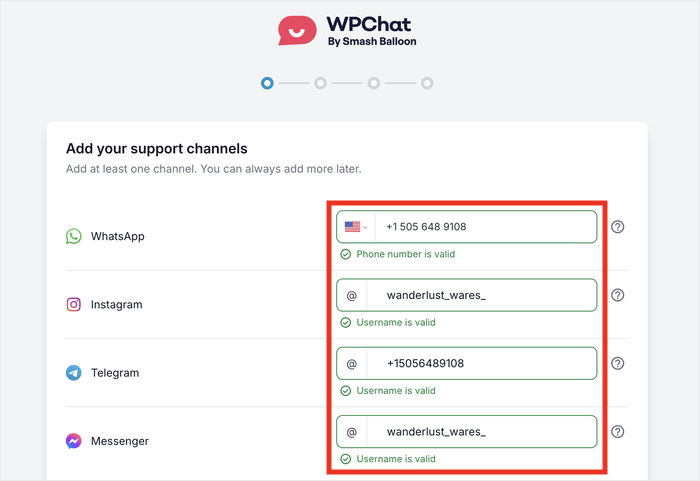
To connect to Telegram or WhatsApp, enter your phone number. For Instagram and Messenger, you can use your username.
After entering your details, scroll down and click the Next button to continue.
The system will save your contact information and move you to the next step.
Step 2: Create Your Chat Widget
Now you’ll create the actual chat widget that visitors will see on your website. WPChat makes this process simple by offering three pre-designed themes to choose from.
You’ll see three theme options available:
- Basic
- Night
- Pastel
Each theme has a different color scheme and style, so pick the one that best matches your website’s current design.
After selecting your theme, click on Next to move forward.
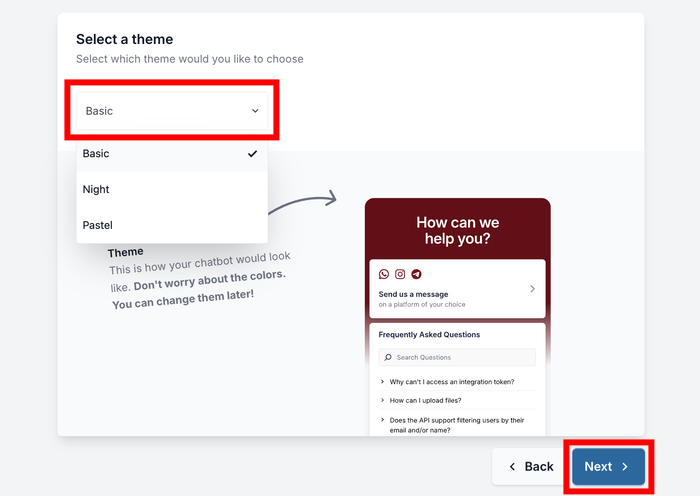
Don’t worry about getting it perfect right now – you can customize everything in the next step.
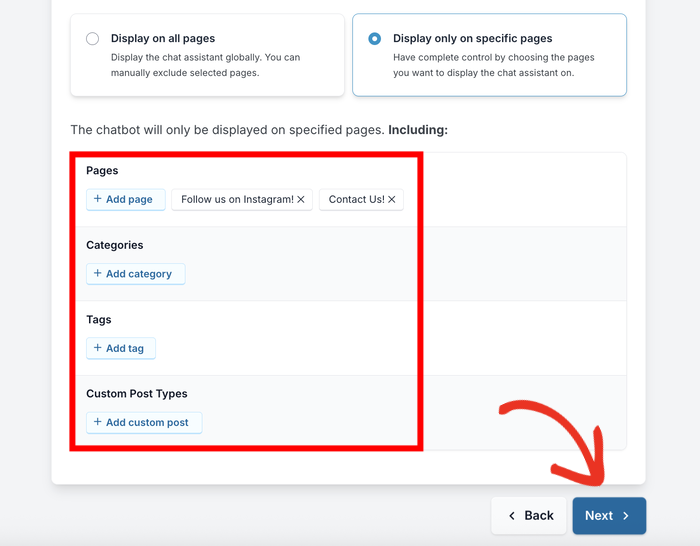
Here, you’ll pick where to display your chat widget on your site. You have two main options:
- Display on all pages
- Display only on specific pages.
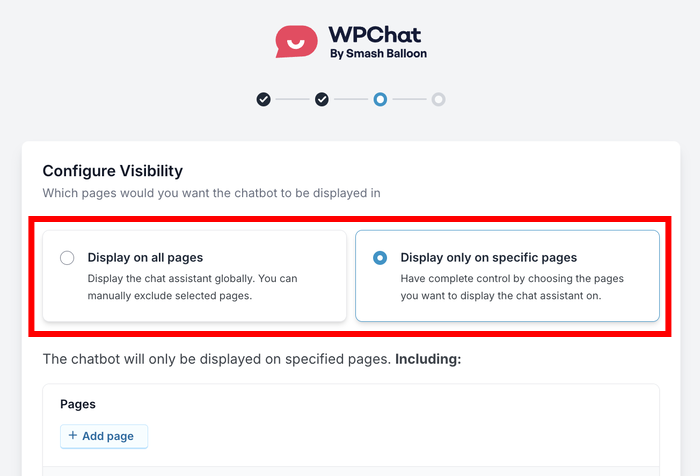
If you decide to display the widget everywhere, you can still exclude certain parts of your site where you don’t want it to appear.
Scroll down and filter out the Pages, Categories, Tags, and Custom Post Types where you want to hide the chat widget.
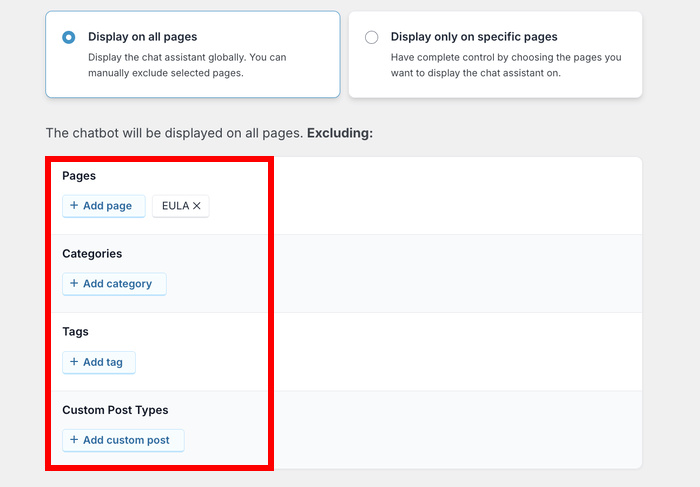
But if you want to display the chat widget only on specific parts of your site, use the available filters to pick exactly where it should appear.
Once you’ve configured your display settings, click on Next.
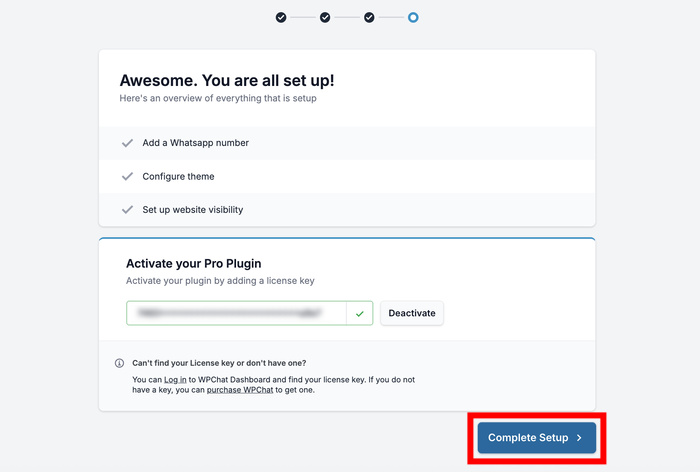
The final step asks you to enter your license key that you received when you purchased WPChat.
Paste the license key into the field and click on Complete Setup to finish the initial configuration.
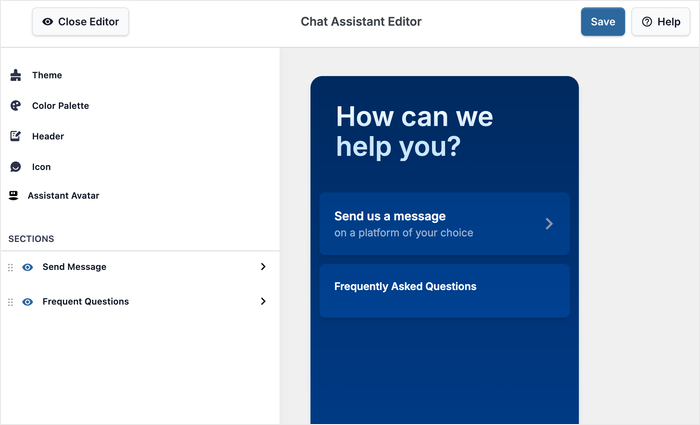
Step 3: Customize Your Chat Widget
Now comes the fun part – making your chat widget look exactly how you want it.
To get started, click on the Customize button here.
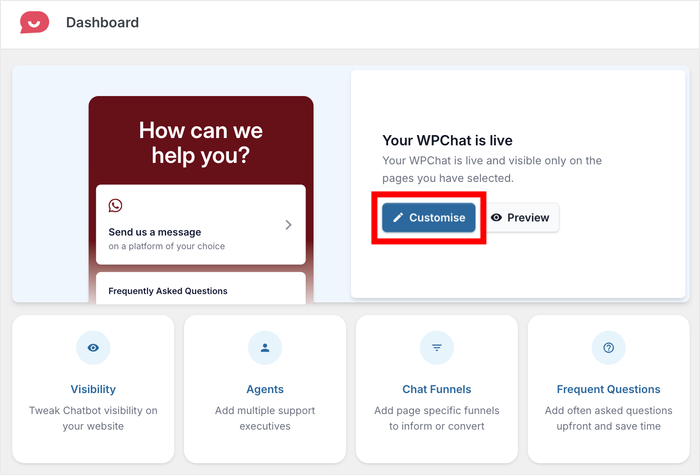
Doing that opens the live customizer for your new WordPress chat widget.
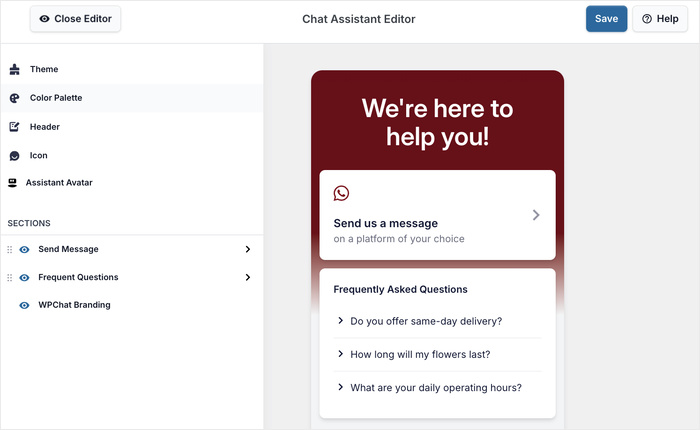
You can see a live preview of your chat widget on the right side while giving you all the customization options on the left.
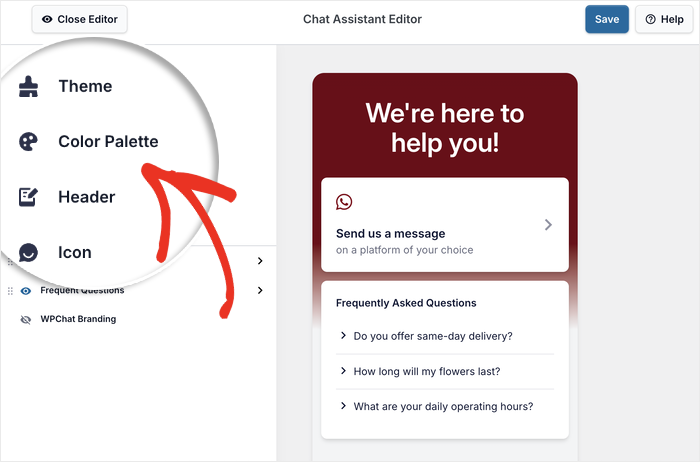
On the left side, you’ll find several customization categories:
- Theme: Change the theme you picked earlier.
- Color Palette: Adjust the color scheme of the chat widget
- Header: Edit the heading text at the top.
- Icon: Pick the floating icon that visitors click to open the widget.
- Assistant Avatar: Customize the avatar that sends opening messages.
- Sections: Choose which sections are visible on the chat widget.
Let me show you how to use a few of these customization options so you can see how the live editor works.
Change the Color Scheme
To start editing the colors of your chat widget, click on Color Palette in the left menu.
You’ll see several pre-made color schemes to choose from:
- Default
- Mystic Bloom
- WhatsApp Dark
- Minimal
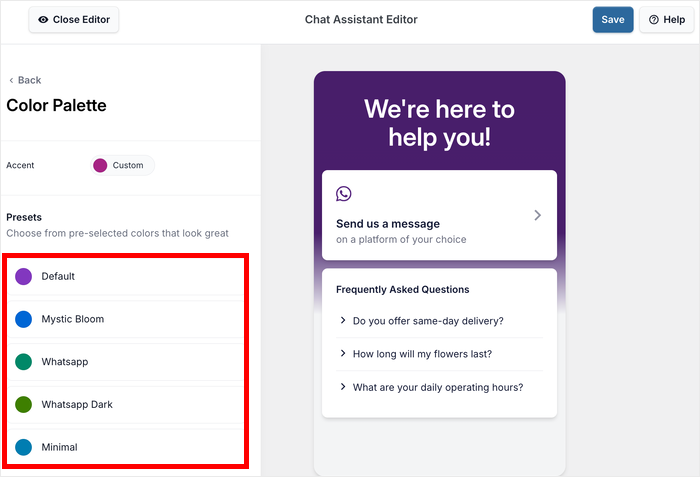
To select your own color instead, you can click on the Custom button.
You can see how each option looks instantly in the preview area. Once you find a color scheme you like, click on Save to confirm your changes.
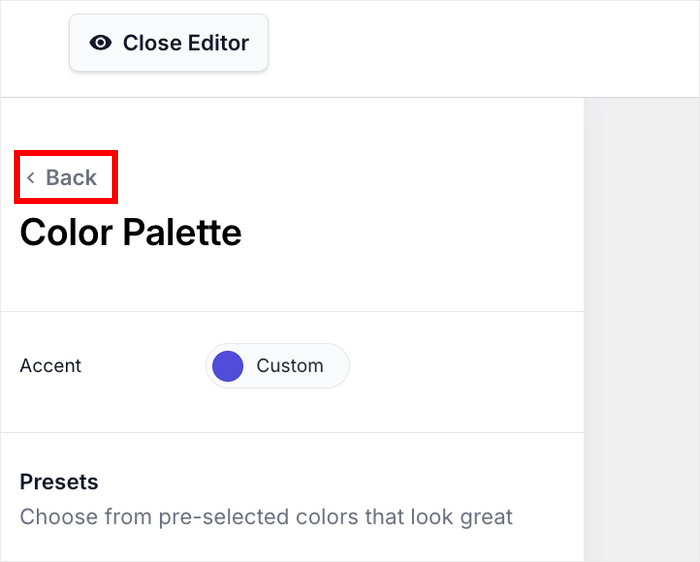
Then click the Back button in the top left to return to the main customization options.
Change the Assistant Avatar
Next, we can customize the avatar that represents your brand in the chat widget.
First, click on the Assistant Avatar option from the left menu.
You’ll see several pre-designed avatars to choose from that can represent your brand.
If none of the default avatars work for you, click the Add Your Own button to upload a custom avatar.
To select a custom image from the computer, click on the Upload button.
It’s best to choose an image that’s clear even with a small size – it could be your logo, a custom mascot, or a fitting icon.
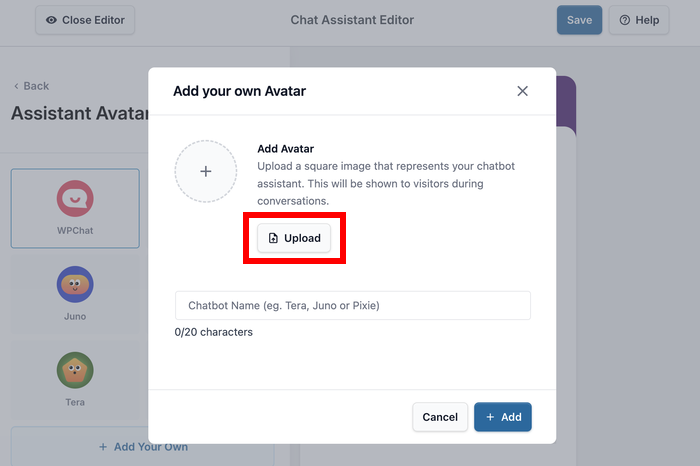
After uploading your image, enter a name for the avatar in the text field before clicking on Add.
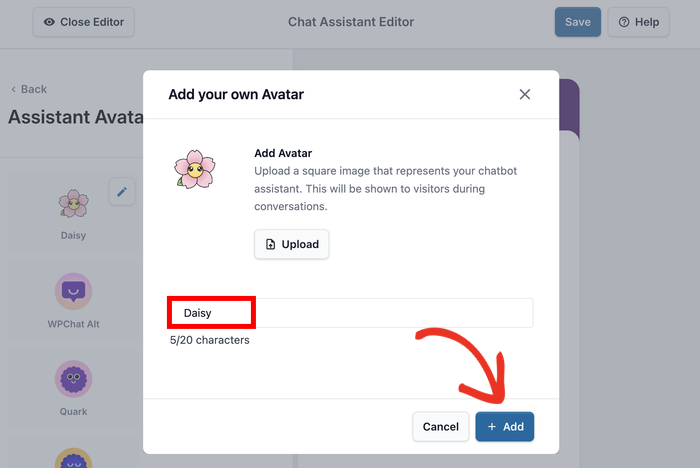
Like before, click on Save to confirm the changes to your chat widget.
Change Visible Sections
The Sections menu lets you control which parts of your chat widget visitors can see and interact with.
So, you can streamline the chat experience and have the widget focus on what’s most important for your business.
You’ll see toggle options for different sections:
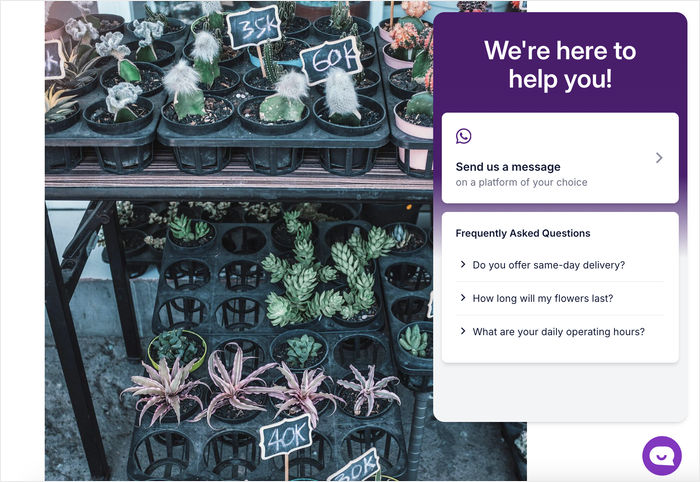
- Send Message: Allows visitors to start messaging your support team or open chat funnels
- Frequent Questions: Shows FAQs so visitors can get instant answers to common questions
- WPChat Branding: Controls whether the WPChat logo appears on your chat widget
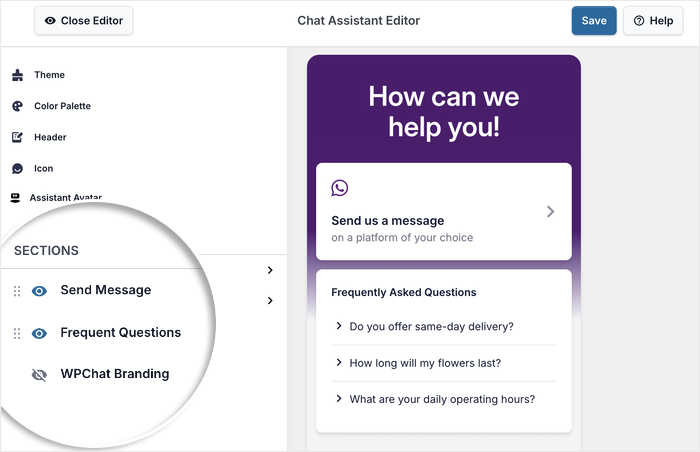
Toggle each section on or off based on what you want to include in your chat widget.
After making your section choices, click on Save to confirm all your changes.
Step 4: Set Up Your Chat Agents
Chat agents represent your support team and show visitors that there are real people ready to help them.
When people see real team members instead of a generic bot, they’re more likely to start conversations and ask for help.
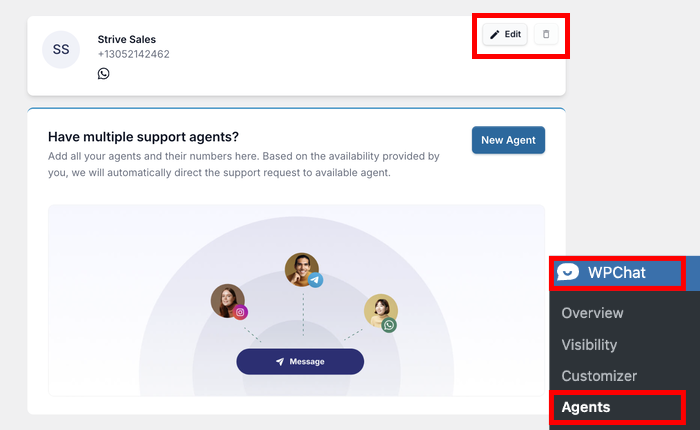
Go to WPChat » Agents in your WordPress dashboard to manage your chat agents.
Click on the Edit button next to the default agent to customize their information.
Customize Your First Agent
Start by adding a profile picture to make your agent feel more human and approachable.
Click on the Upload to select a photo from your computer – this could be a headshot of a team member or even your company logo.
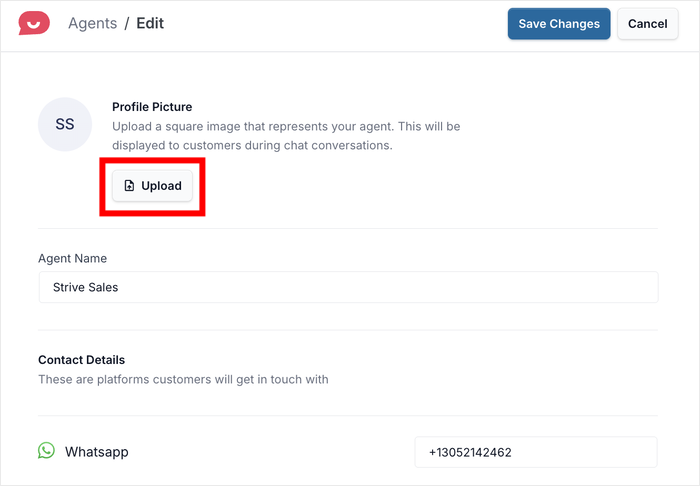
Change the Agent Name to something more personal than the default.
It’s better to use a real name that makes people feel like they’re talking to a human being.
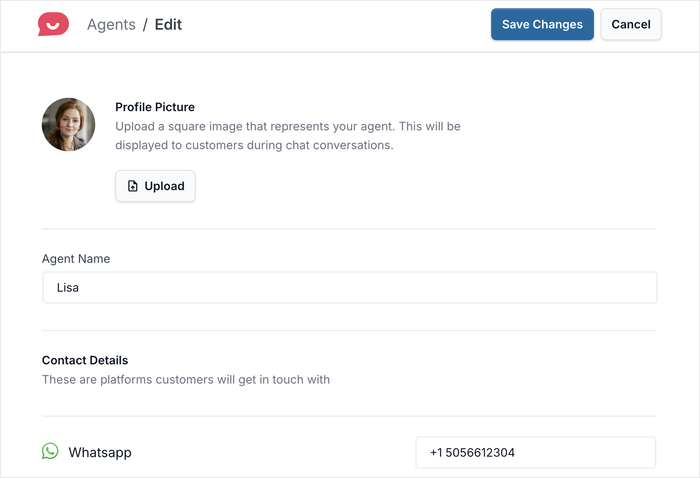
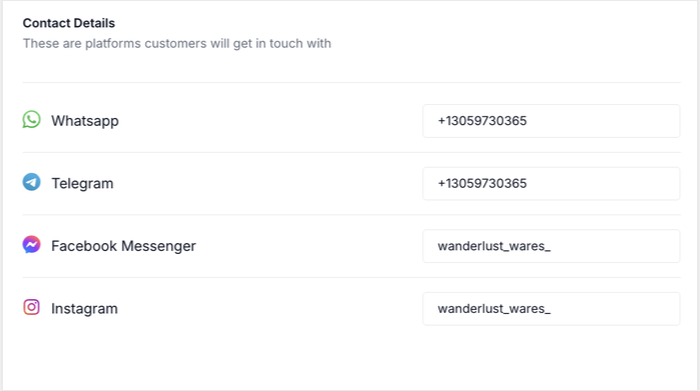
You can also edit contact details for WhatsApp, Instagram, Facebook Messenger, and Telegram for this agent here.
This is useful if different team members handle different types of inquiries.
Once you’ve made your changes, click on Save Changes to update the agent information.
Add More Agents
If you want to add more agents to represent different team members, return to the WPChat » Agents menu from your WordPress dashboard.
Then just click the New Agent button at the top of the page to create additional agents.
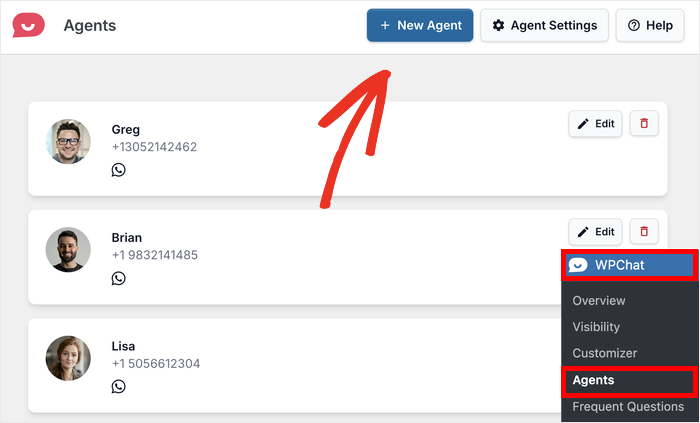
Follow the same process – upload a profile picture, add a personable name, and set their WhatsApp number.
If you have multiple agents, the plugin will automatically balance the workload when assigning chats.
Plus, you can set up different active times for different agents to match the schedule of your support team.
Conclusion & Key Takeaways
Your chat widget is ready to help you connect with potential customers, answer their questions quickly, and build trust through personalized interactions.
The customization options in WPChat give you complete control over how your chat widget looks and functions.
Ready to start connecting with your website visitors?
Get your copy of WPChat today and begin building stronger relationships with your audience.
Going forward, you can try creating chat funnels for your chat widget to generate leads automatically.
Check out our step-by-step guide on how to build your chat funnels using WPChat.