One of the biggest barriers to making an online sale isn’t always the price of your product. It’s the small, unanswered questions that cause a potential customer to hesitate.
Imagine being able to answer those questions instantly, right when your customer is most interested.
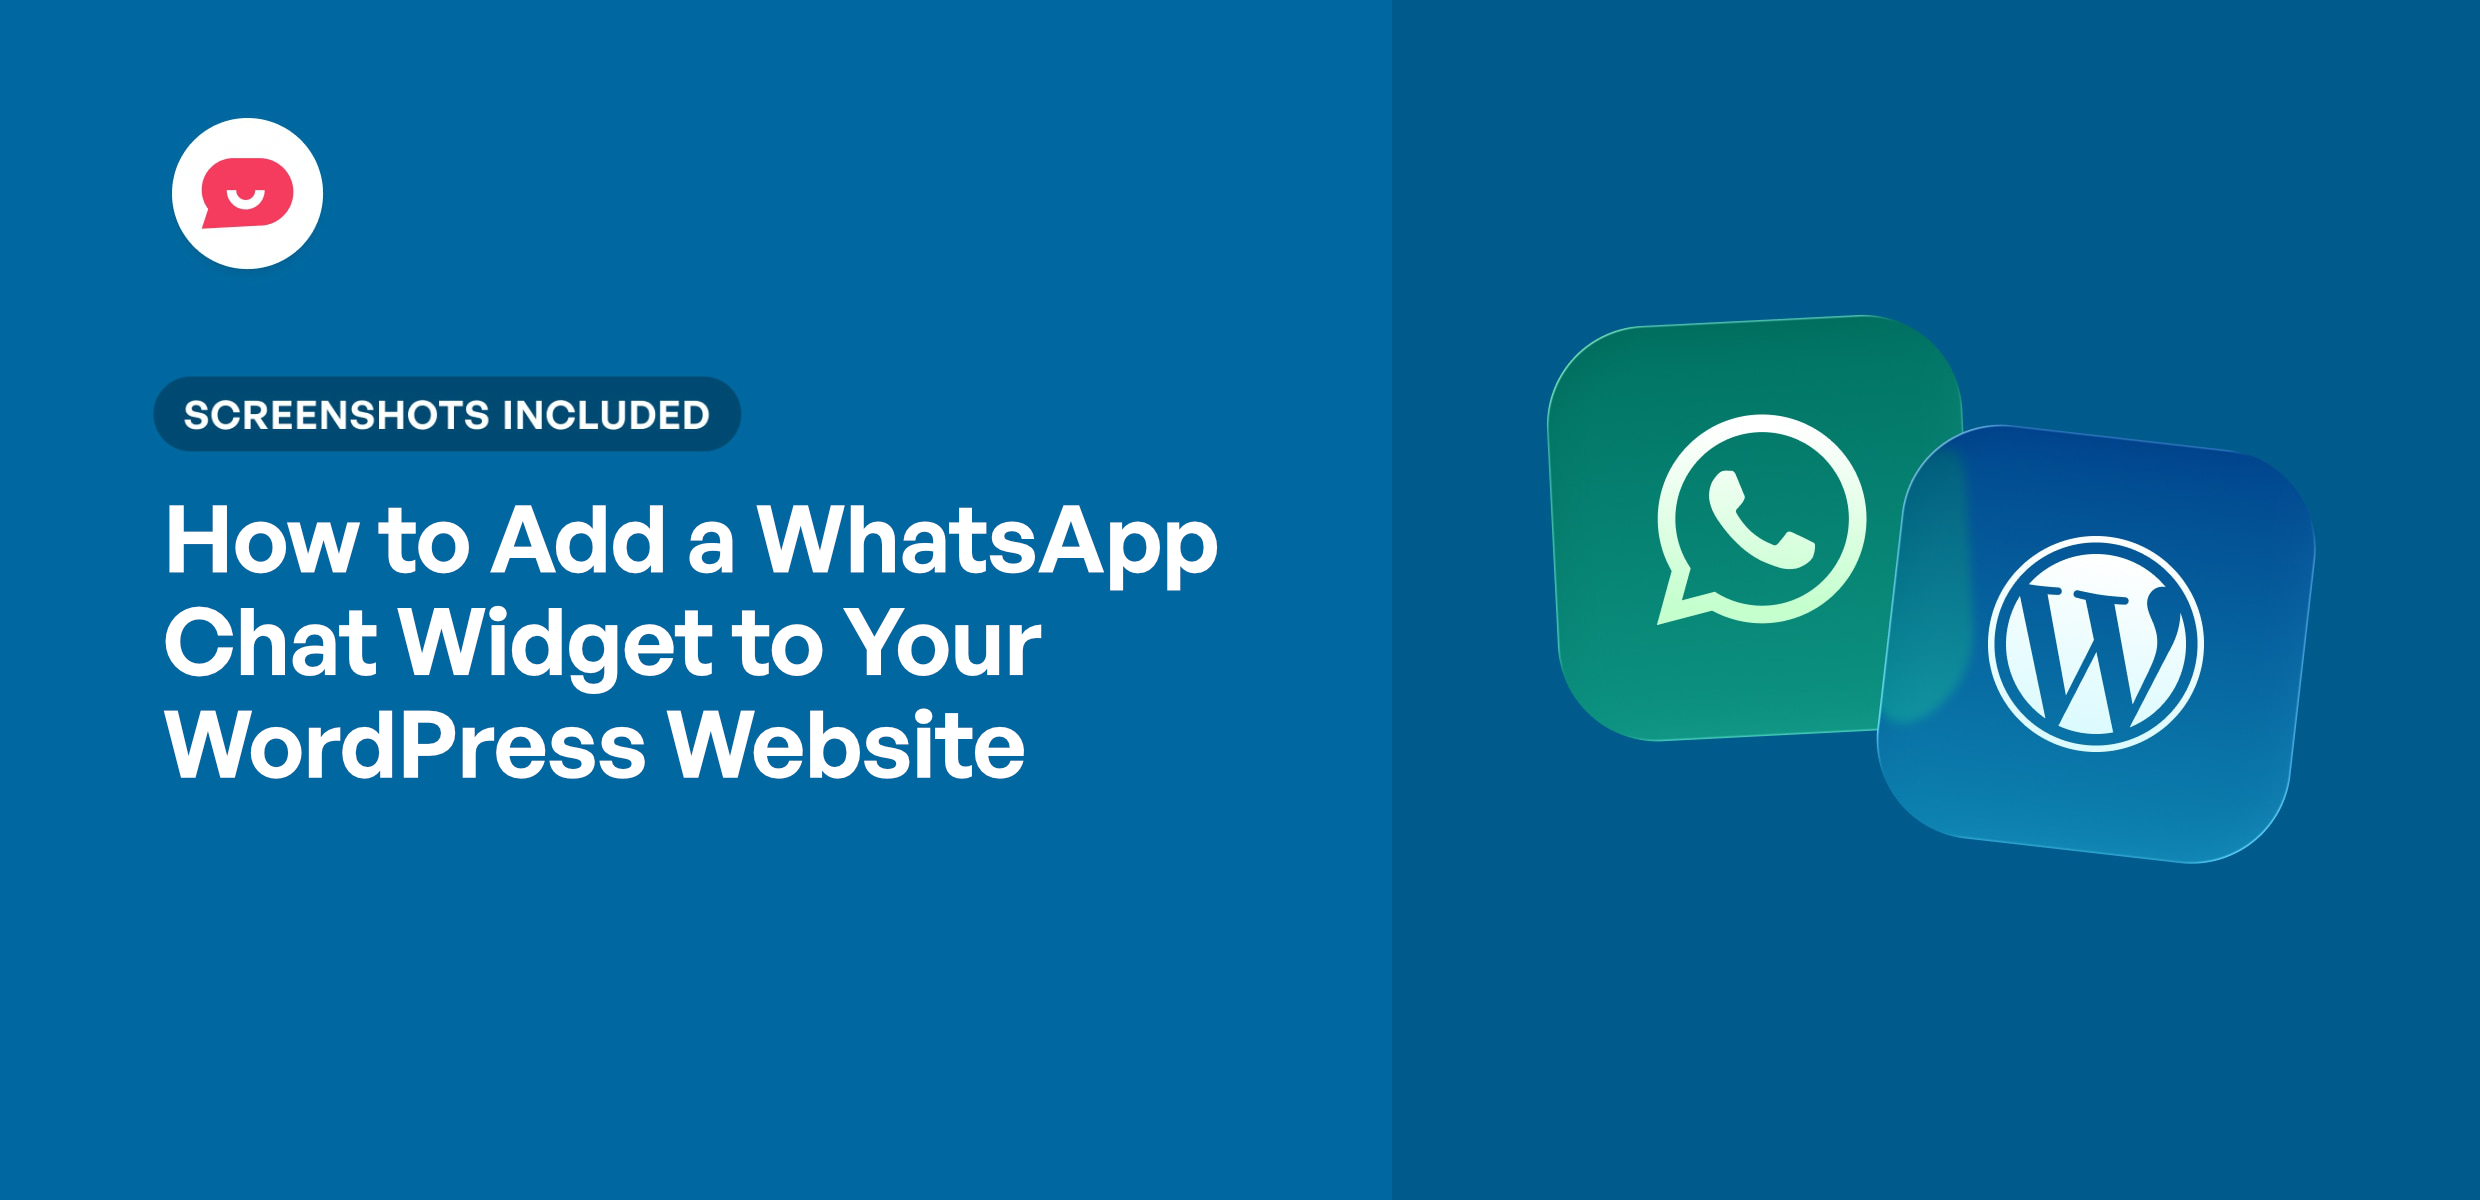
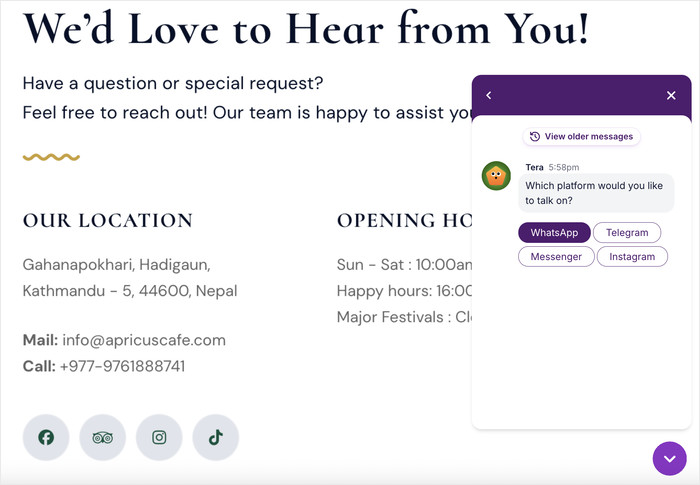
This is where a WhatsApp Chat Widget comes in.
Unfortunately, I’ve seen many business owners who were intimidated by the idea of adding a chat widget to WordPress—especially those without coding experience.
So, I’ve put together this super easy guide on how to add a WhatsApp chat widget to your WordPress website.
In this Article:
What Is a WhatsApp Chat Widget and What Does It Do for Your Site?
You can add a WhatsApp chat widget to your WordPress site for free using a plugin called WPChat, and it takes about 5 minutes to set up.
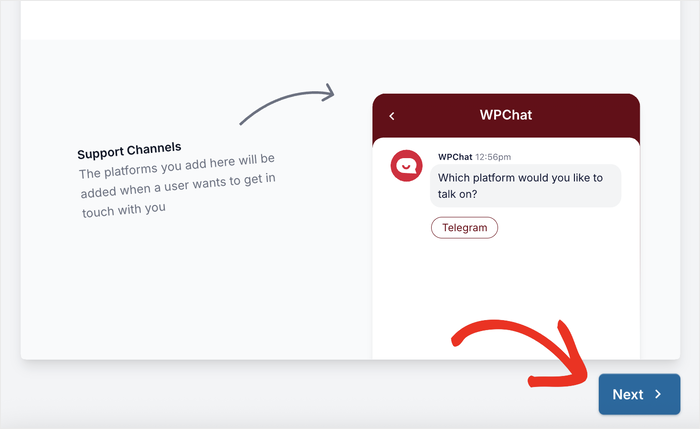
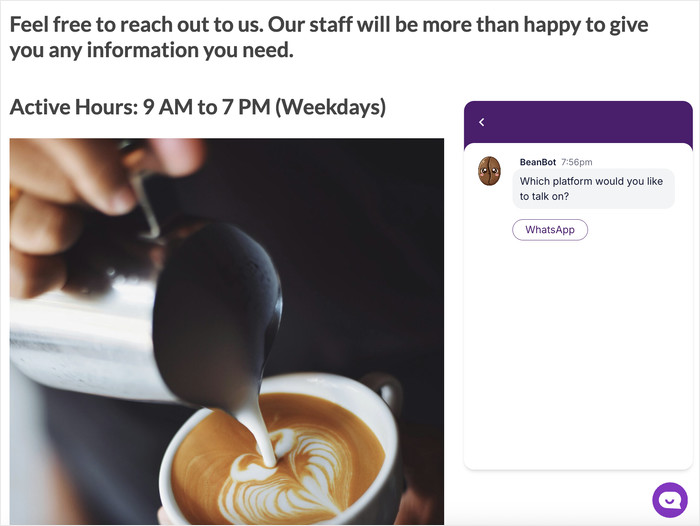
A WhatsApp chat widget is a small floating icon that sits in the corner of your website. When a visitor clicks it, a pop-up appears letting them choose how they’d like to reach you.
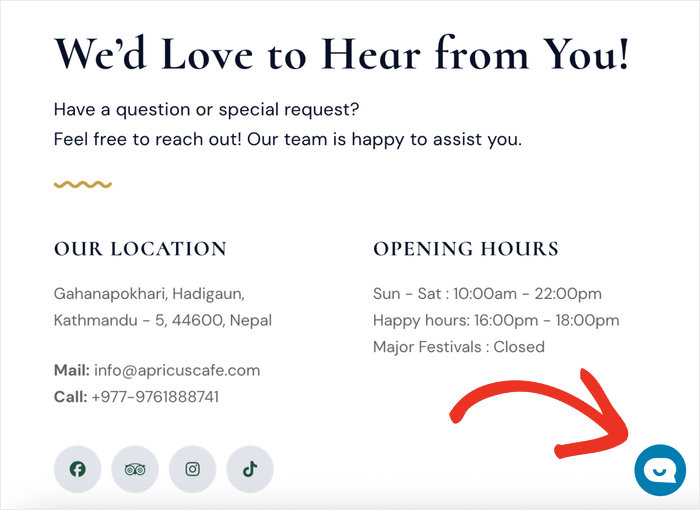
Clicking any of those options opens a direct chat on their phone or in their browser.
Think of WPChat like a front door intercom for your website. Visitors press the button, choose how they want to talk to you, and you’re instantly connected.
Why WhatsApp Chat Widgets Increase Sales (The Business Case)
Adding a WhatsApp chat widget to your site isn’t just a nice touch — it’s a straightforward way to turn more visitors into paying customers.
When someone can reach you instantly, they’re much more likely to follow through on a purchase instead of clicking away with unanswered questions.
Here’s why it works:
- Instant trust: Customers can see a real person is available to help, which makes them feel more confident buying from you.
- Higher open rates: WhatsApp messages have a ~98% open rate compared to ~20% for email, meaning your replies are almost always seen.
- Reduced friction: There are no forms to fill out and no waiting around — visitors just tap to start a conversation.
- Warmer leads: A visitor who messages you has already shown interest. That makes them much easier to convert than a cold contact.
- Personal connection: WhatsApp feels familiar and trusted. Customers are already using it every day, so reaching out through it feels natural, not formal.
It’s worth noting just how many people are already on WhatsApp. According to Meta, WhatsApp has over 2 billion active users worldwide.
Easy Way to Add WhatsApp Chat Widget (What You Need to Know)
Manually integrating WhatsApp into your website comes with its own challenges. You’ll need to deal with API keys as well as coding just to get started.
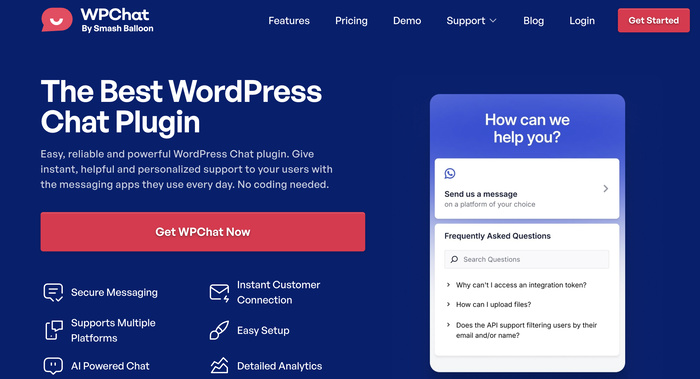
Fortunately, there’s a simple solution that you can use instead: the WPChat plugin by Smash Balloon.
The process is simple: install WPChat, add your WhatsApp Business number, choose where the chat button appears, and customize it to match your brand.
Once it’s live, you’ll be able to handle all conversations through the WhatsApp app you already know.
With that, you can turn website visitors into customers by answering their questions at the exact moment they’re considering a purchase.
Ready to add WhatsApp widgets to your website? Get started with WPChat today!
How to Add a WhatsApp Chat Widget to WordPress (Complete Step-by-Step Guide)
WPChat is a fantastic WordPress plugin that adds a floating chat button for WhatsApp, Telegram, Instagram, and Facebook Messenger.
The entire setup process takes under 5 minutes, and I’ll walk you through each step below:
Step 1: Install and Activate the WPChat Plugin
First, you’ll need to get a copy of the WPChat plugin here.
After doing that, install and activate the plugin (see our beginner’s guide), and you’re ready to get started.
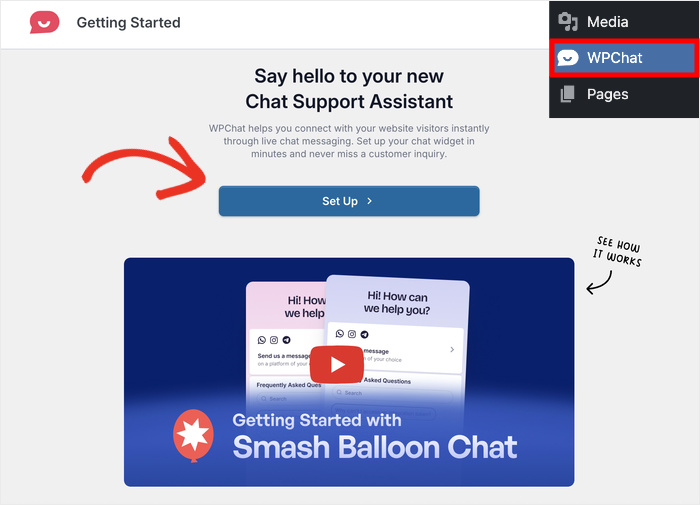
Step 2: Complete the Initial WPChat Setup
Once the plugin is activated, open the new WPChat menu item in your WordPress dashboard.
After doing that, click on the Set Up button to start the simple process.
On the next page, enter your contact info for WhatsApp or any other platform you want to use.
Here’s a quick reference for what you’ll need per platform:
| Platform | What You’ll Need |
|---|---|
| Your phone number with country code | |
| Your Instagram username | |
| Telegram | Your Telegram username or phone number |
| Messenger | Your Facebook Page username |
Just enter the WhatsApp number into the field here to proceed.
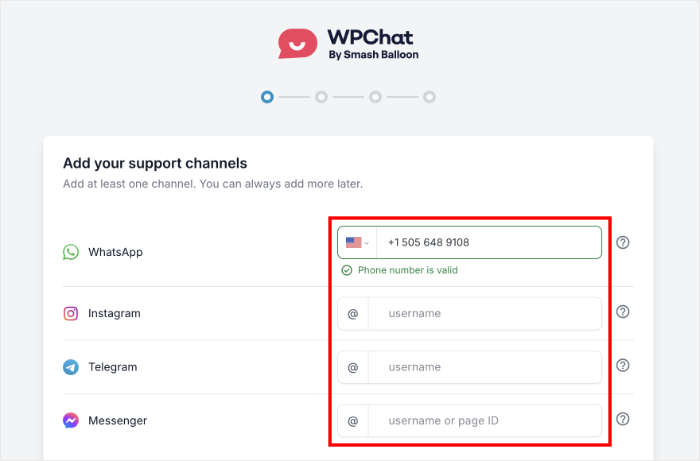
Feel free to use whichever platforms you like. Just make sure to use platforms where you can actually respond to visitors.
After you’ve entered the info, scroll down and click on Next.
To make sure your new WhatsApp chat widget looks just the way you want, you can import a theme.
Each of these 3 themes has a unique look and feel:
- Basic: Default look that displays everything clearly
- Night: Pick a widget with dark colors that stand out
- Pastel: Go for pastel colors that are easy on the eyes
Simply pick a theme and click on the Next button.
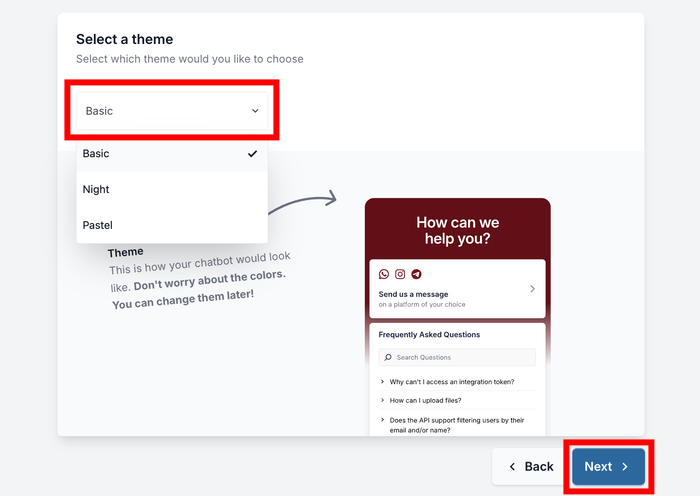
Plus, you can always change this theme later if needed.
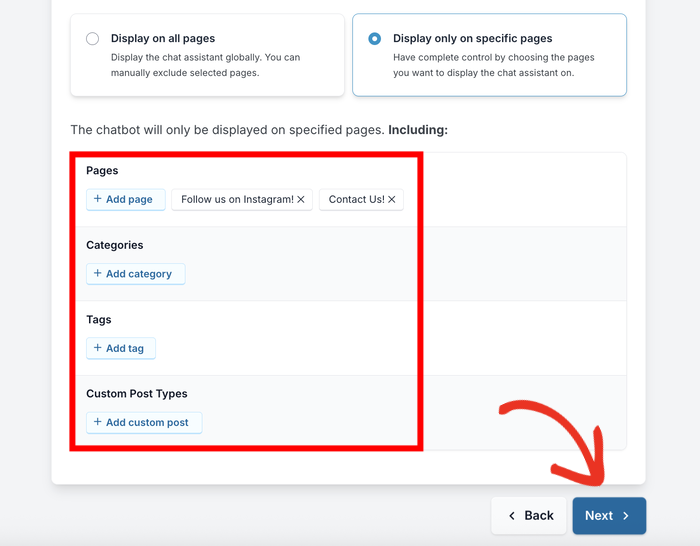
Step 3: Choose Visibility for WhatsApp Chat Widget
Next, you’ll decide where the WhatsApp widget appears on your website. The plugin lets you do this in 2 ways:
- Display on all pages (and add exceptions)
- Display only on specific pages
If you’re not sure which to pick, I recommend showing the widget everywhere and then adjusting based on how your visitors respond.
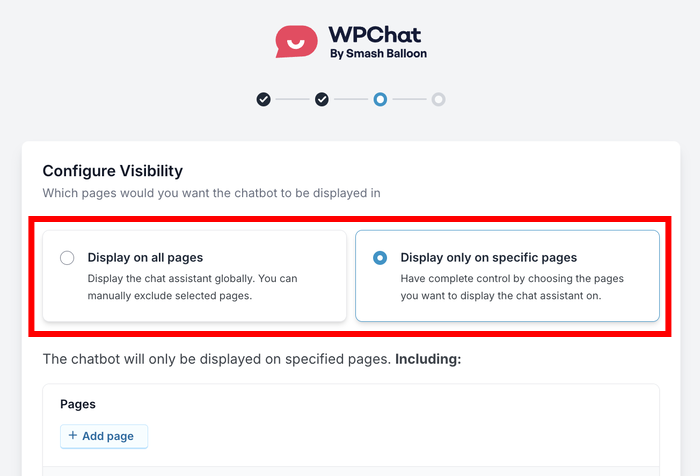
After you pick a visibility option, scroll down and add the filters.
You can choose to show or hide your WhatsApp widget based on Pages, Categories, Tags, or Custom Post Types.
Finally, click on Next once you’ve set up your filters here.
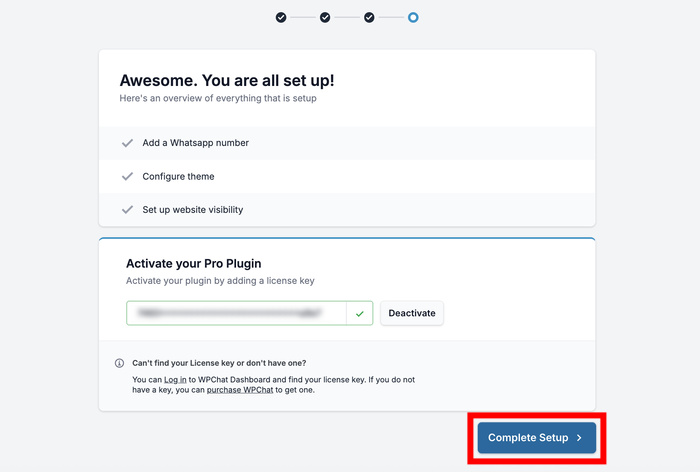
To finish creating your new WhatsApp chat widgets, you can use the License Key that you got with WPChat.
Enter the license key and click on the Complete Setup button below.
Step 4: Customize Your WhatsApp Widget for Maximum Impact
Customization is where you make the chat widget feel like a natural part of your website.
To help you create chat widgets that suit your website specifically, the plugin lets you choose from lots of customization options.
Ready to get started? First, click on the Customize button on the page.
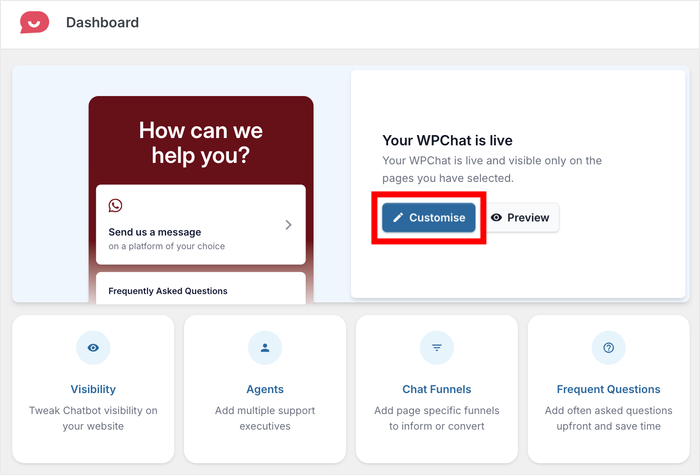
Doing that will open your widget in the live customizer with all the design options on the left.
Whenever you make any changes, the live preview on the right will show you how it looks.
As a demonstration, I’ll show you a few of the major customization options for the widget.
Personalizing the Assistant Avatar
When a visitor opens your chat widget, they’ll see a helpful assistant that’ll redirect them to the WhatsApp chat.
To customize how it looks, click on the Assistant Avatar option on the left.
From here, you can choose from a collection of pre-built avatars.
Or, you can click on the Add Your Own button to create a custom one.
Now, use the Upload button to add a fitting avatar.
After that, you can enter a name below and click on the Add button.
Finally, click on the small Back button in the top left corner.
Doing that will open the main customization options for your widget once more.
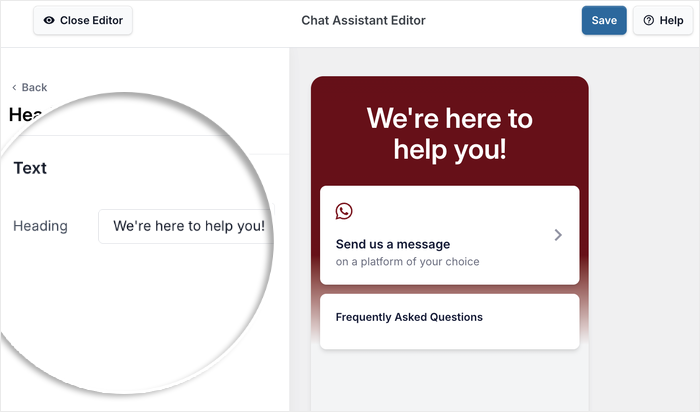
Crafting the Perfect Header Message
Your header message is the first thing visitors see when they hover over your chat widget.
To customize this message, first, open the Header option from the left.
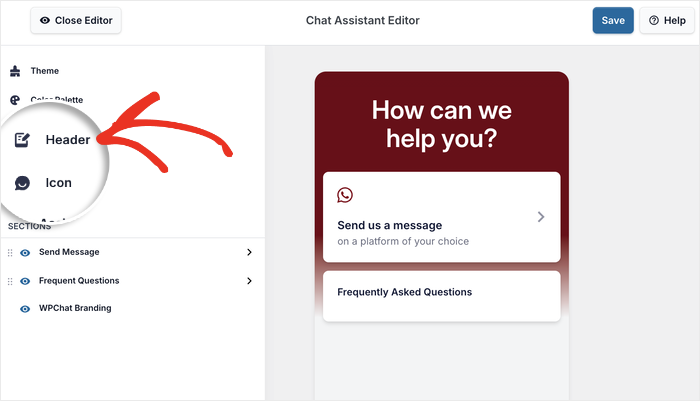
Next, you can just enter whichever header message you want on the left.
I’ll leave it with a basic message for this example.
Not sure what to enter here? Here are a few examples that you can copy:
- E-commerce: “Hi! Need help finding the perfect product? I’m here to help!”
- Service Business: “Ready to get started? Let’s chat about your project!”
- Restaurant: “Questions about our menu or want to make a reservation? Ask away!”
- Real Estate: “Looking for your dream home? Let me help you find it!”
- Consulting: “Have questions about how we can help your business grow?”
- Online Course: “Wondering if this course is right for you? Let’s chat!”
- Healthcare: “Need to schedule an appointment or have questions? I’m here to help!”
Like before, click on Save to keep the changes to your chat widget.
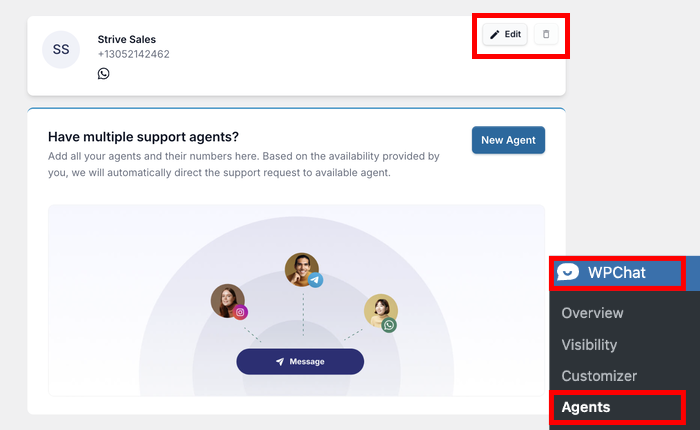
Step 5: Set Up Multiple Chat Agents (Team Management)
You can also create different virtual agents for your WhatsApp chat widget. Each agent can represent a person on your support team.
That way, your visitors can feel like they’re about to talk to a real person, which is great for building trust.
To edit your default agent, open the WPChat » Agents menu and click on Edit.
Next, you can add a more personal touch to your chat agent.
For example, you can click on Upload and then pick a photo for the agent.
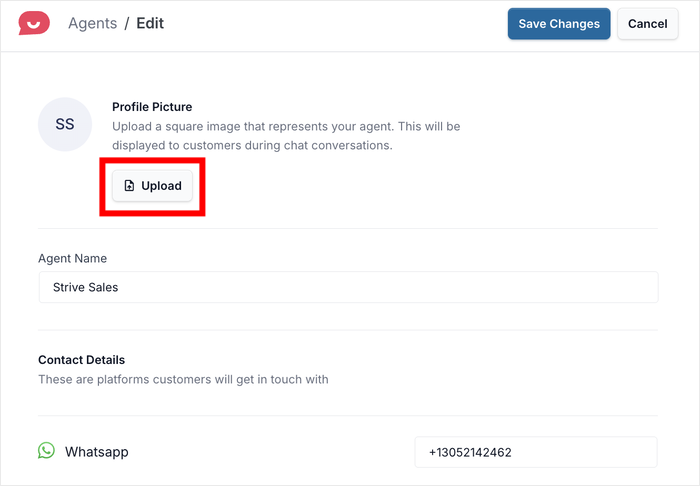
Using a company logo can make the widget fit your website’s design and branding.
Or you can use a professional photo to add a human touch to the WhatsApp widget.
After you pick out a profile picture, enter the name and change the contact info for this agent if you like.
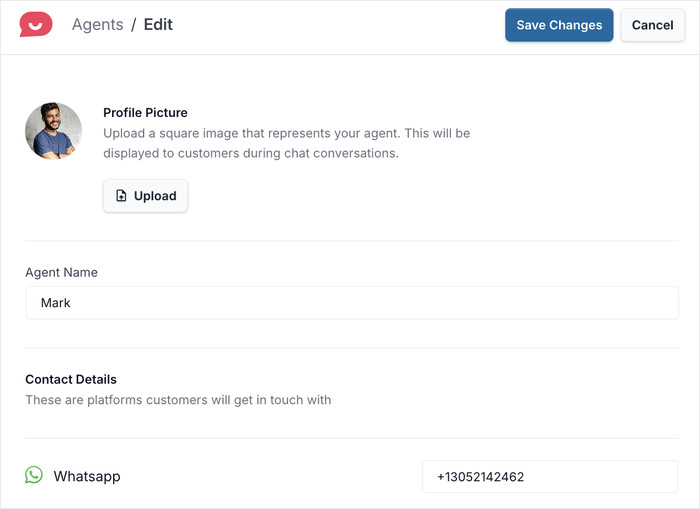
Finally, click on the Save Changes button, and your agent is good to go!
You can use this dashboard to add new agents, delete existing ones, or edit their info.
Plus there’s a ton of other features to explore. You can provide instant answers with FAQs, guide visitors to conversion using Chat Funnels, and track everything with analytics.
How to Get the Most Out of Your WhatsApp Chat Widget (to Boost Sales)
To see the best results from WhatsApp chat, you can try setting it up strategically. Here are some straightforward ways to get more out of your new widget.
1. Use WhatsApp Business for a More Professional Experience
If you’re using a personal WhatsApp account right now, I’d strongly recommend switching to WhatsApp Business.
It can be free for small businesses, and it gives you several new features that make a real difference:
- Separate business and personal chats — your work conversations stay in one place, and your personal messages stay private.
- Automated greeting messages — automatically welcome new customers the moment they reach out, even if you’re not available.
- A product catalog — showcase your products or services directly inside WhatsApp, making it easy for customers to browse before they even ask a question.
- Labels and tags — organize your conversations by category (like “New Lead” or “Order Placed”) so nothing falls.
2. Set Business Hours and Manage Response Expectations
One concern I hear from small business owners is that they don’t want customers to expect an instant reply at all hours. That’s a completely valid worry and it’s easy to address.
You can set up online hours for your chat agents using WPChat. That way, the plugin will only distribute the chat to agents that are online.
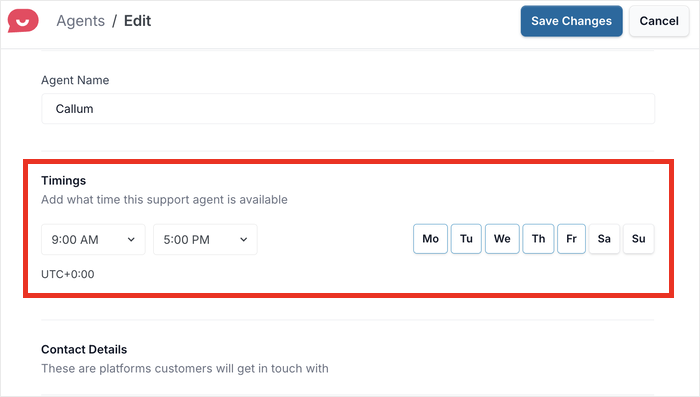
On top of that, you can set up your WhatsApp to automatically reply to messages outside your working hours.
3. Set Up FAQs to Give Instant Answers to Visitors
Many of your site visitors have the same small, common questions, like “Do you ship internationally?” or “How long does delivery take?”
Giving them these answers can make them much more willing to buy from you. Plus, WPChat lets you add FAQs to the chat widget as well.
You can check out this step-by-step guide on adding FAQs to your website using WPChat.
Setting it up can save you hours of repetitive conversations every week. More importantly, it means your customers get answers faster.
4. Show Your Chat Widget on High-Intent Pages
Adding a chat option makes the biggest difference in pages where visitors are closest to making a decision.
This includes your product pages, pricing page, landing pages, and checkout page. A visitor browsing your blog is in a very different mindset than someone sitting on your pricing page weighing their options.
Since WPChat includes built-in display rules, you can use them to limit the widget to those high-intent pages.
Conclusion: Next Steps
Now that you have the WhatsApp chat widget working on your WordPress website, you’re ready to turn more visitors into customers through instant communication.
The best part? You can start connecting with visitors like this in just minutes without dealing with complicated APIs or coding.
Ready to add WhatsApp chat to your website? Get WPChat here and start converting today!
Want to use your WPChat widget to generate leads? Here’s a detailed guide where you can learn about chat funnels.