Do you want to add Facebook Messenger chat to your WordPress website?
In a world of instant communication, that small delay can be the difference between a sale and a lost customer.
Adding a live chat feature helps you connect with visitors instantly. This builds trust and allows you to answer pre-sales questions before potential customers leave your site.
The fastest way to add Facebook Messenger to WordPress is using the WPChat plugin.
It connects directly to your Facebook Page to render a live chat widget. This allows you to manage customer support directly through Messenger without writing code.
In this article, we will show you how to easily add Facebook Messenger chat to your WordPress site.
Why Adding a Messenger Chat Matters for Your Business
Adding a live chat solution is often the best way to answer customer questions quickly.
Unlike email, where replies can take hours, chat allows you to address concerns immediately. Check out this helpful article on email vs live chat for more details.
Here are a few specific reasons why you should add Facebook Messenger to your site:
- Buyers who use live chat are more likely to make a purchase. Answering a simple question can prevent them from abandoning their cart.
- A visible chat bubble shows that your business is active and responsive. It proves there is a real person behind the website.
- Most users already have the Facebook Messenger app on their phones. They can start a chat on your site and continue the conversation later on their mobile device without losing the chat history.
- You can manage all customer inquiries from your Facebook Business Suite. This keeps your support channels organized in one place.
Messenger Chat vs Other Website Chat Options
Before adding Messenger to your WordPress site, it helps to understand how it compares to other communication tools.
- Facebook Messenger vs WhatsApp: Messenger works well if your audience is already active on Facebook. WhatsApp may be more effective in regions where it’s the primary messaging app.
- Messenger vs Live Chat: Traditional live chat tools keep conversations on your site. Messenger allows conversations to continue even after visitors leave.
- Messenger vs Contact Forms: Forms create delays between question and response. Messenger removes friction by allowing instant communication.
If maintaining ongoing conversations and reducing response delays are priorities, Messenger chat can be a strong choice for WordPress websites.
When Facebook Messenger Chat Makes Sense
Facebook Messenger chat works best for businesses that rely on quick, conversational responses. It’s a good fit if:
- Visitors often ask pre-purchase or support questions
- Your audience already uses Facebook or Instagram
- You manage customer conversations inside Messenger today
Messenger chat may not be the best option for businesses that require strict internal ticketing systems or enterprise-level reporting.
Getting Started with Facebook Messenger Chat
There are two common ways to add Facebook Messenger chat to a WordPress website.
You can manually copy code from Facebook and add it to your site, or you can use a plugin that handles the connection for you.
I don’t recommend the manual method for beginners. Pasting code directly into your theme can cause conflicts, and you might lose your changes if you switch themes later.
For most site owners, using a plugin is the more reliable option.
In this guide, we’ll use WPChat, which connects your Facebook Page to WordPress through an API and handles the technical setup automatically without requiring any code.
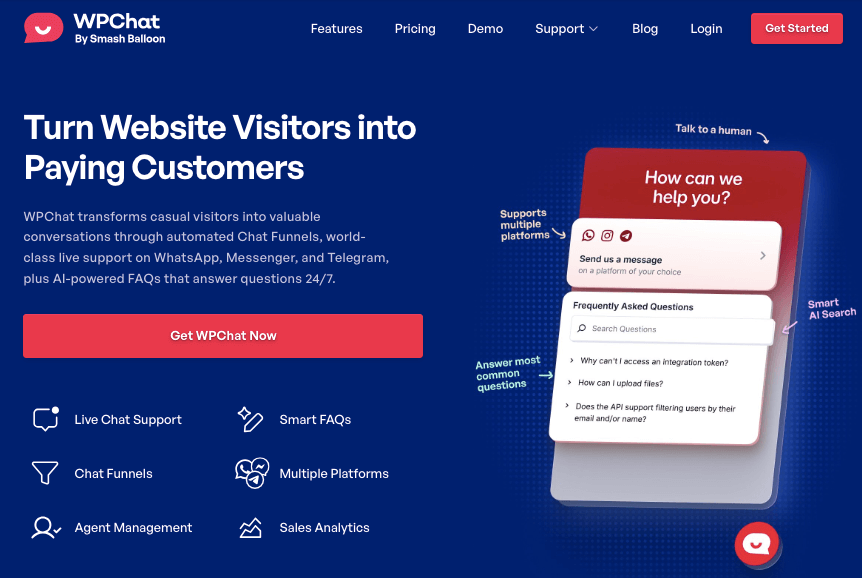
To help boost your reach, you can instantly add chat options for Facebook Messenger, Telegram, Instagram, and WhatsApp.
As a result, it means you’re meeting your customers on whichever platform they want.
What I like the most about WPChat is that WPChat handles the technical connection to Facebook Messenger so you can focus on responding to conversations instead of configuring widgets.
You can create chat assistants, connect them to different messaging platforms, customize their design, and display them on your website. All without touching a single line of code.
How Messenger Chat Works on WordPress
On WordPress websites, Messenger chat typically appears as a floating button or assistant in the corner of the screen. When a visitor clicks the button:
- A short prompt appears on your site
- The visitor is redirected to Facebook Messenger
- The conversation continues inside Messenger on mobile or desktop
This setup allows you to communicate through a platform your customers already use, without requiring them to install anything new or stay on your website during the conversation.
What You Need to Get Started
Before beginning the setup, ensure you have the following items ready:
- Administrator Access – You must be logged in to your WordPress dashboard to install plugins
- A Facebook Business Page – You must have a published Facebook Page. This feature does not work with personal Facebook profiles
- WPChat Plugin – The free version works for basic setups, or use WPChat Pro for more powerful features
- Time Required: Approximately 5 minutes for configuration
Overview on Adding Facebook Messenger Chat with WPChat
At a high level, the setup process looks like this:
- Install and activate WPChat
- Connect your Facebook Messenger account
- Choose where the chat button appears
- Publish the widget on your site
Once connected, messages go directly to your Messenger inbox.
Step-by-Step Guide on Adding Messenger Chat to Your WordPress Site
Now that you have your requirements ready, let’s set up the chat widget. The setup process is straightforward, and you’ll have your Messenger chat widget working in just a few steps.
Step 1: Install and Activate WPChat on Your Website
First, you’ll need to get a copy of the WPChat plugin and install it on your WordPress site. Then, log in to your WordPress dashboard.
Go to Plugins » Add New, upload the WPChat plugin file, and click Install Now. Once installation is complete, click Activate.
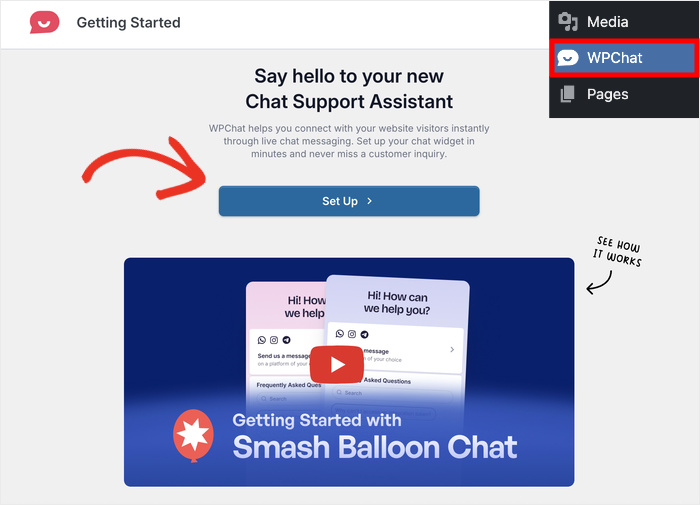
After activation, you’ll see a new WPChat menu item in your dashboard. This is where all Messenger settings will be configured.
Open the WPChat menu in your dashboard and click on Set Up to proceed.
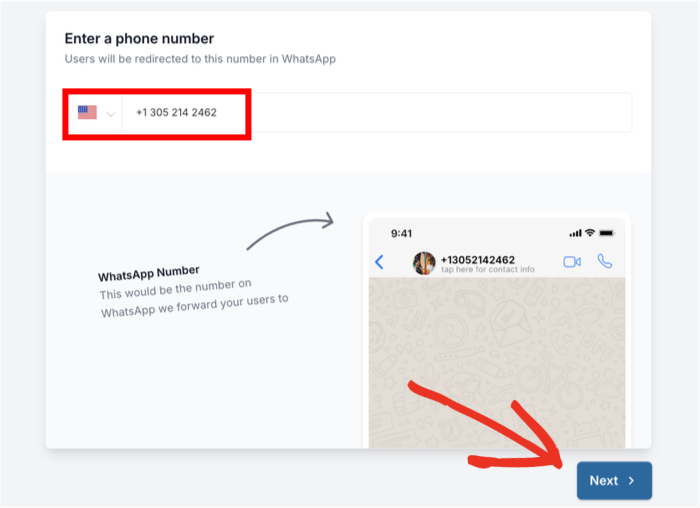
After that, you can enter your WhatsApp number so visitors will have another way to reach your business. Enter your WhatsApp number in the field and click on the Next button to proceed.
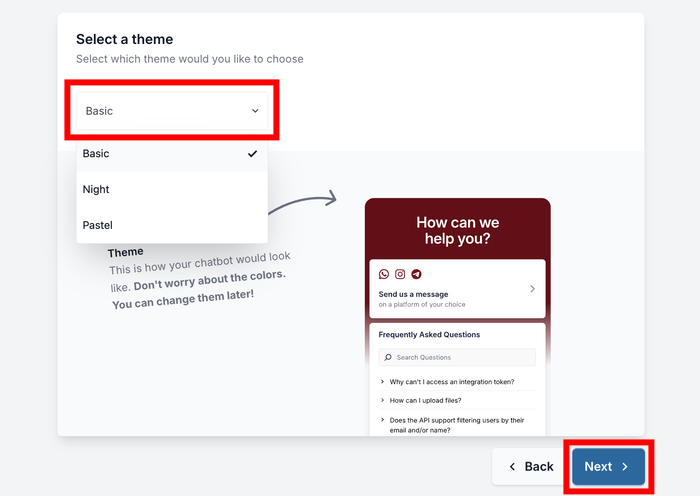
Pick a theme that you prefer from the options and click on Next.
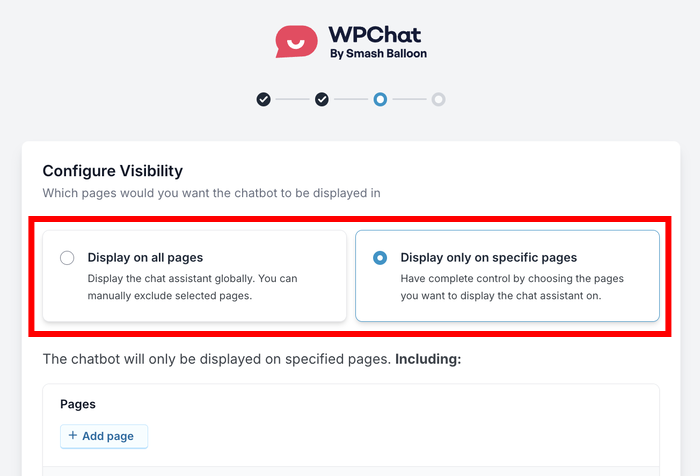
Once you do that, you can choose where your Facebook chat assistant appears on your site. You have 2 visibility options: Display on all pages or Display only on specific pages.
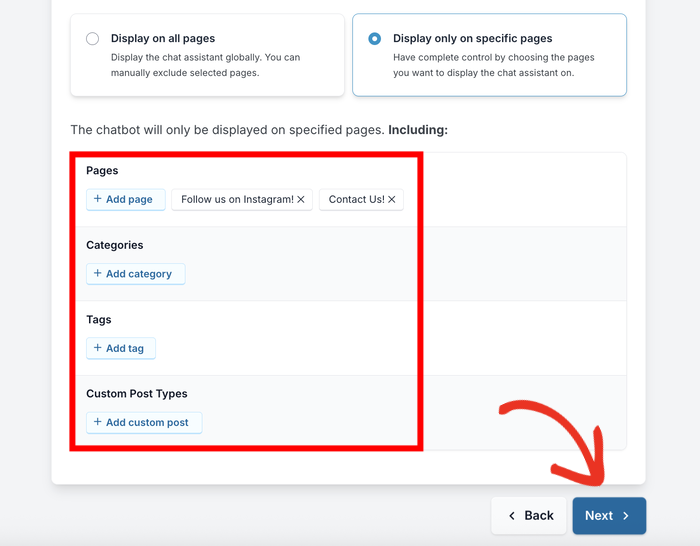
Next, you can scroll down and pick the parts of your website to include or exclude. Pick the Pages, Tags, Categories, and Custom Post Types using the filters below and click on Next.
Finally, enter your WPChat license key in the provided field. This activates all the premium features of the plugin.
After entering your license key, click on Finish Setup to complete this stage.
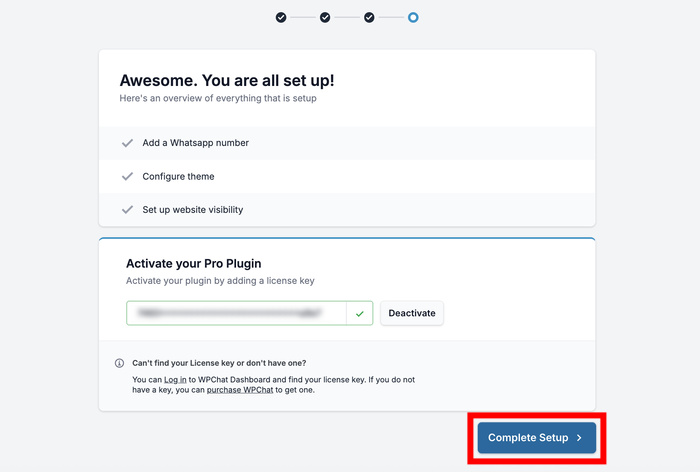
Step 2: Enable Facebook Messenger as a Platform
Next, we’ll activate Messenger inside WPChat. Go to WPChat » Agents. In the top-right corner, click Agent Settings.
Under the Platforms section, turn on the toggle for Facebook Messenger. This tells WPChat that you want to allow conversations through Messenger.
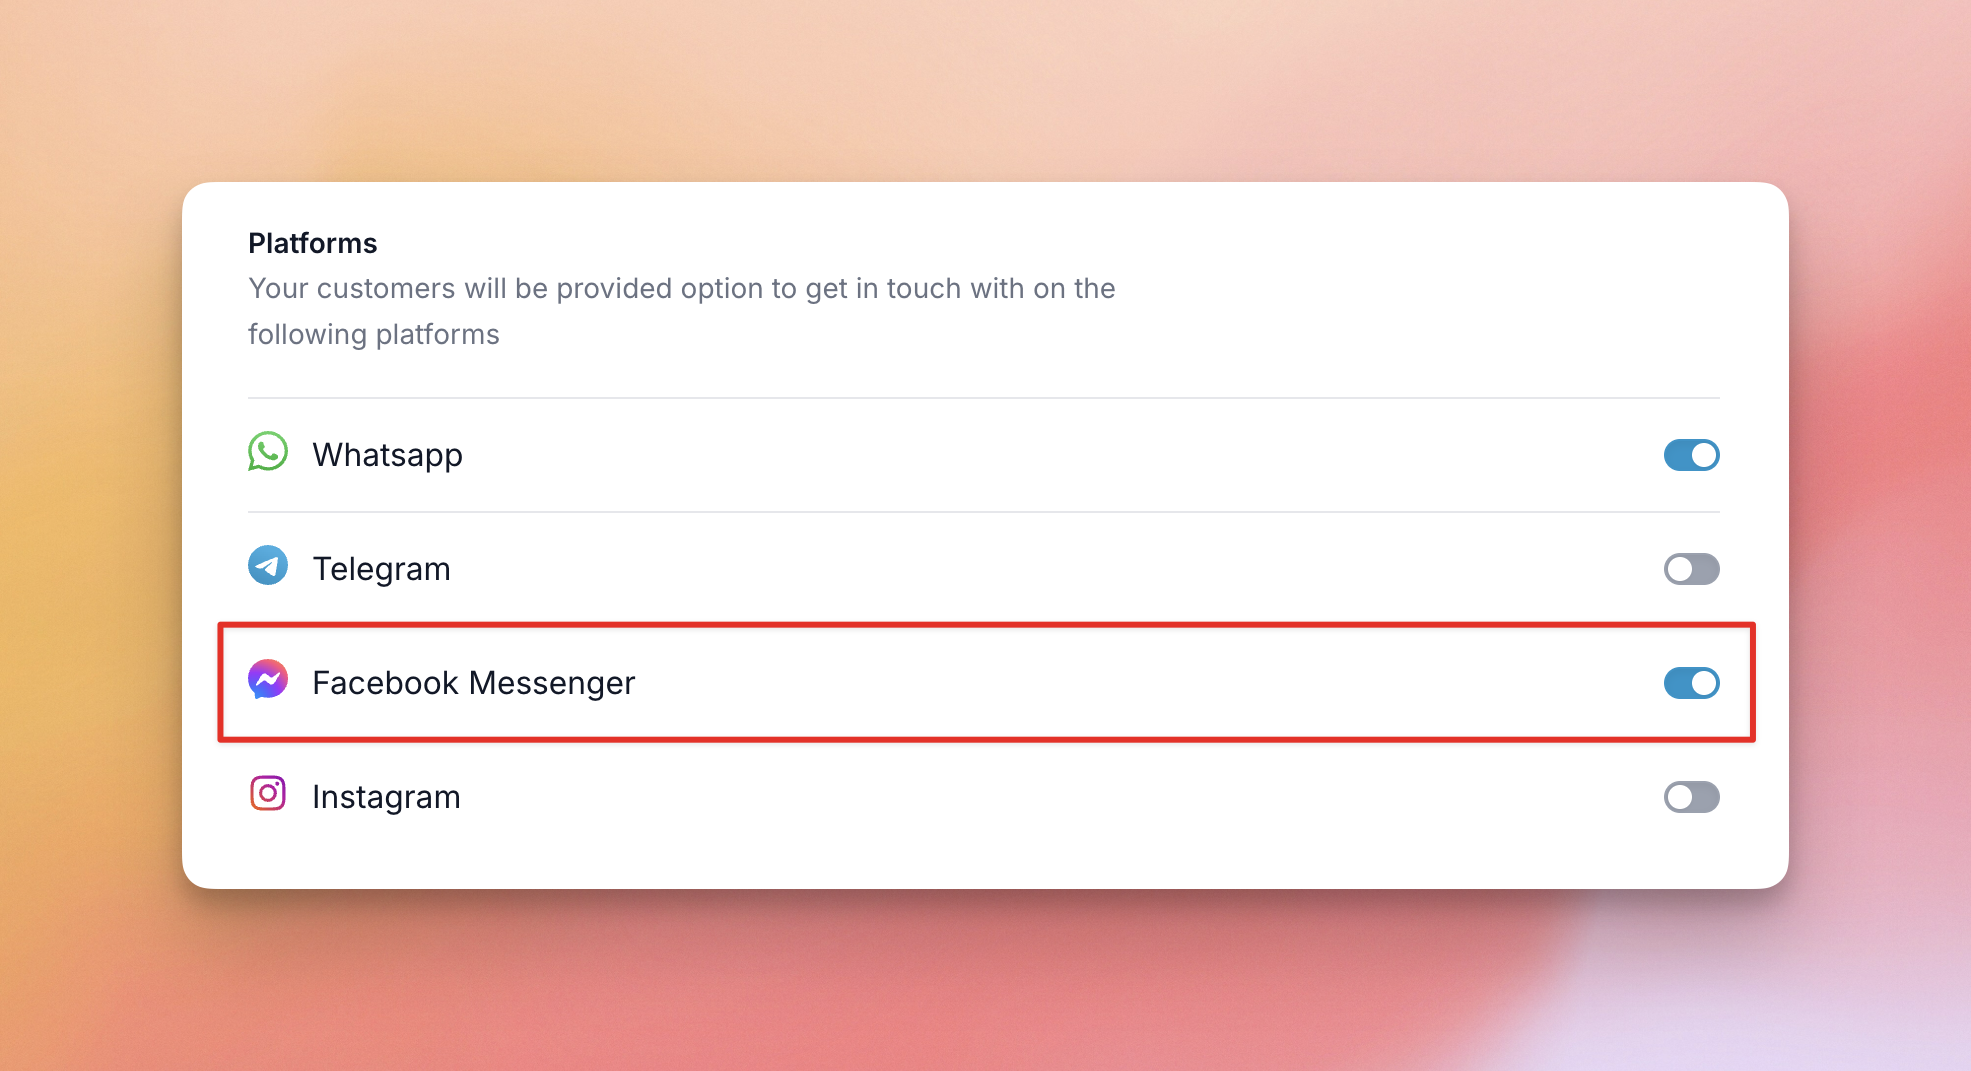
Once enabled, click Save if prompted.
Step 3: Connect Facebook Messenger to an Agent
From your WordPress dashboard, navigate to WPChat » Agents to see a list of chat agents. Then click on Edit to customize the default agent that WPChat created for you.
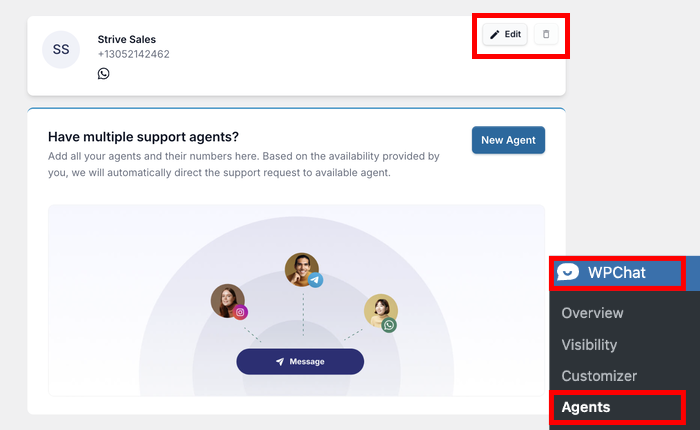
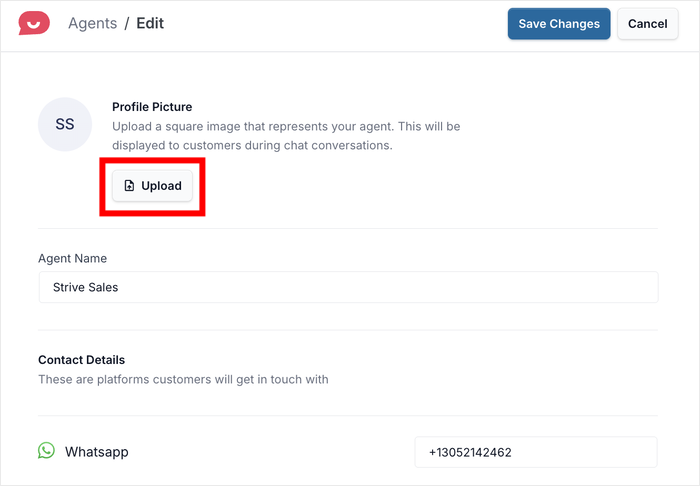
Before we continue, you can edit your agent’s name and click on Upload to select a fitting image for your agent.
This should be a professional photo that represents who visitors will be talking to – it could be your headshot, your team, or your company logo.
Scroll down to find the Facebook Messenger section. Here, you’ll just need to enter your Facebook Messenger ID or username in the provided field.
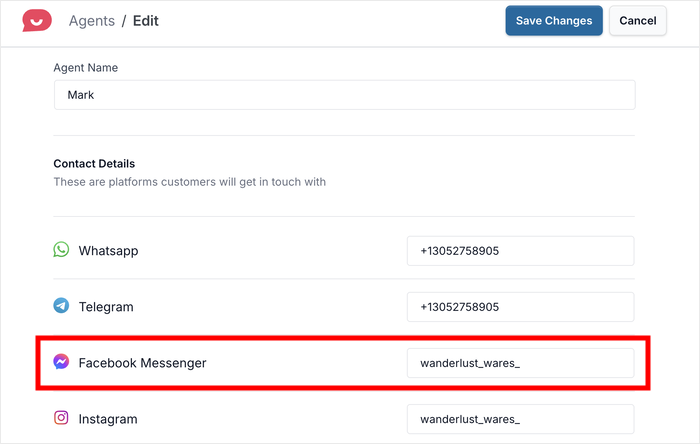
Click on Save Changes, and you’ve now connected your chat agent to Facebook Messenger.
You can open your website in a new browser tab and check how the chat widget looks to your visitors.
Step 4: Customize Your Messenger Chat Assistant’s Appearance (Optional)
WPChat includes a visual customizer that lets you adjust the design of your chat button.
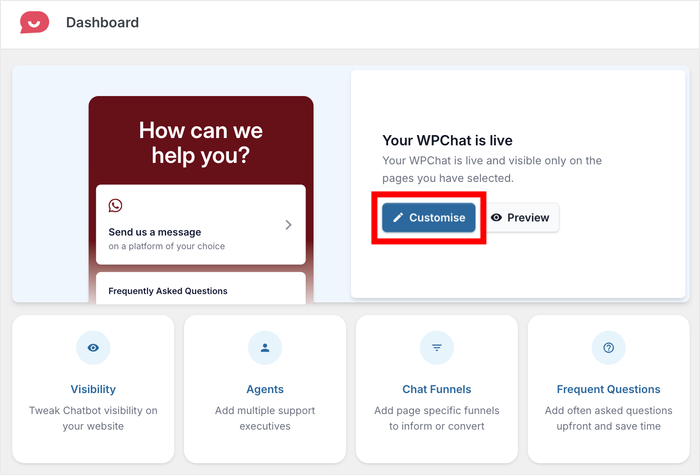
Click Customize from the WPChat dashboard to:
- Change the greeting text
- Select a theme
- Adjust colors
- Customize the assistant avatar
These changes are optional. Your Messenger chat will work even if you leave the default settings.
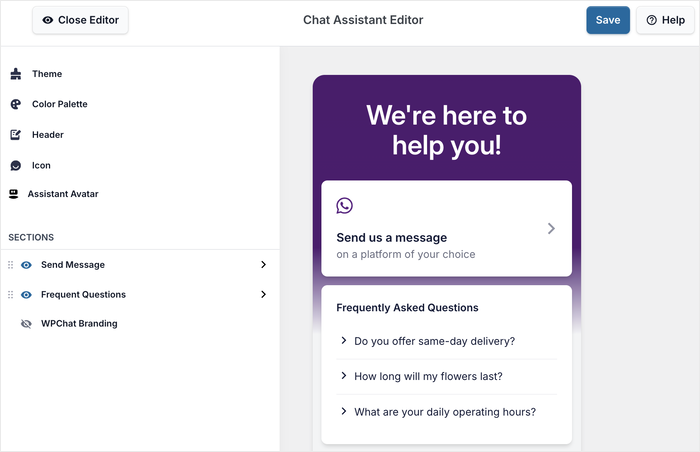
Feel free to try out the available WPChat customization options to change your colors, icon, visible sections, and much more. Just make sure to click on Save at the top of the editor to preserve all your changes.
Each change you make will instantly appear in the preview, so you can see exactly how it will look to your visitors.
What Happens After You Connect Messenger?
Once you’ve completed the setup, the Messenger button becomes active on your website according to the visibility rules you selected.
Visitors will notice a small chat icon on the screen. It stays accessible as they move through your pages, so they can reach out whenever they’re ready.
When someone clicks the button, they’ll see a short prompt and then be directed to Facebook Messenger to continue the conversation.
If they’re browsing on mobile, the Messenger app opens automatically. On desktop, the conversation opens in their browser.
From your perspective, new messages appear inside your existing Messenger inbox. You can reply using the Messenger app, through Facebook, or from your desktop, whichever is most convenient.
You don’t need to log into WordPress each time someone sends a message. After the initial connection, everything runs through Messenger itself.
If you have multiple team members handling inquiries, you can assign Messenger access to different agents so conversations can be managed more efficiently.
From this point on, your website becomes another entry point into your Messenger conversations, without adding another tool to manage.
Start Adding Your Messenger to Your Site Now!
As you can see, it’s easy to add Facebook Messenger chat to your WordPress website with WPChat. The entire process takes just a few minutes, but the impact on your business can be huge.
Your visitors now have an instant way to reach you using a platform they already know and trust, leading to more sales and happier customers.
Ready to boost your website’s engagement with Facebook Messenger chat?
Get WPChat today and start connecting with your visitors instantly.
Going forward, you can use WPChat to add FAQs and automated responses to handle common questions even when you’re not available.
You can even create Chat Funnels to generate leads by guiding visitors through specific conversation paths.
Check out our guide on how to build your first Chat Funnel using WPChat if you want to learn more.
