Real-time chat is one of the most effective ways to build trust with visitors the moment they land on your pages.
If you want to add Facebook Messenger to Divi, you can do it easily by either using a free WordPress chat plugin or by pasting the Meta chat script directly into your theme options.
I know messing with Divi’s code modules can be scary if you aren’t a developer.
I’ve seen a single misplaced line of code trigger a blank screen or get wiped out entirely during a routine theme update.
I’ll show you the absolute safest plugin method, along with the manual method, so you can choose exactly what works best for your business and start connecting with customers instantly.
Why Real-Time Chat Matters for Your Divi Website
Adding Facebook Messenger gives your visitors direct, instant access to a real human, which transforms your static Divi site into an interactive experience.
Research shows that 82% of consumers expect an immediate response when they have sales questions, and live chat overall boasts a massive 73% satisfaction rating.
Because Facebook Messenger has over 1.3 billion active users, your visitors don’t have to download a new app or create a fresh account just to talk to you. They’re likely already logged into the platform.
The Benefit of Cross-Device Syncing
One of the biggest advantages of the Messenger integration is how the platform handles conversations across different screens.
A potential customer can easily start a chat on your desktop website while browsing products, and then finish that exact same conversation on their mobile phone later in the day.
The chat history syncs automatically inside their Messenger app, so you won’t lose the lead just because they walked away from their computer.
Plugin vs. Manual Code: Which Method Is Right for You?
Both methods can get Facebook Messenger chat running on your Divi site. But they are not equal — especially if you’re not a developer.
Here’s a side-by-side look at how they compare:
| Factor | Plugin Method (WPChat) | Manual Code Method |
|---|---|---|
| Setup Time | Under 5 minutes | 20–40 minutes |
| Risk of Site Breakage | Very low | Moderate to high |
| Survives Theme Updates | Yes — plugin is independent of Divi | No — code can be wiped on update |
| Visual Customization Controls | Full dashboard with live preview | Manual CSS edits required |
| Technical Skill Required | None | Intermediate to advanced |
| Ongoing Maintenance | Automatic plugin updates | Manual code checks required |
If you’re not a developer, the plugin method is the clear choice.
Instead, you can use a plugin like WPChat which handles everything through a visual dashboard. No code, no risk of breaking your layout, and no worrying about your work disappearing after a Divi update.
Why WPChat Is the Best for Divi Users
Out of all the options available out there, WPChat turned out to be the best chat plugin for Divi websites.
I tested WPChat against three other chat plugins (Tidio, Tawk.to, and LiveChat) specifically on Divi sites.
Key WPChat Features That Matter for Divi Users
- Guided Setup Wizard: WPChat walks you through the entire setup process step-by-step, getting your Facebook Messenger chat live in under 10 minutes without any technical knowledge required.
- Live Customizer with One-Click Themes: Transform your chat’s appearance instantly by choosing from preset themes, then fine-tune colors, fonts, and layouts without touching code.
- Multi-Agent Support with Smart Routing: Add multiple team members to handle chats and let WPChat automatically route conversations to the right person based on availability.
- Powerful Visibility Controls: Decide exactly where your chat appears by choosing specific pages, categories, or post types so you’re not showing chat where it doesn’t make sense.
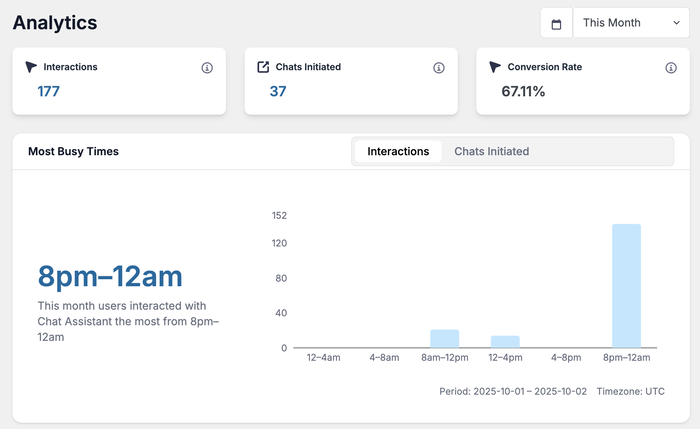
- Built-in Analytics Dashboard: Track response times, customer behavior, and satisfaction metrics to see what’s working and continuously improve your support.
The setup process takes less than 10 minutes, and WPChat integrates seamlessly with Divi without requiring any code modifications.
Plus, WPChat stays active even when you update your theme, so you never lose your chat functionality.
Ready to transform how you connect with visitors on your Divi site?
Get WPChat today and start providing instant support.
How to Add Facebook Messenger Chat to Divi (Using a Plugin)
Now that you understand why Facebook Messenger chat works so well with Divi, let me walk you through the exact setup process.
It’s a quick and easy process, and you’ll have a powerful chat system ready in just minutes.
Step 1: Install and Activate the WPChat Plugin
First, you’ll need to get a copy of the WPChat plugin. Visit the WPChat website and get the plan that fits your needs.
Once you’ve downloaded the plugin file, install and activate it on your website.
In case you need help, you can look at this step-by-step guide on how to install WordPress plugins.
Step 2: Complete the Initial WPChat Setup
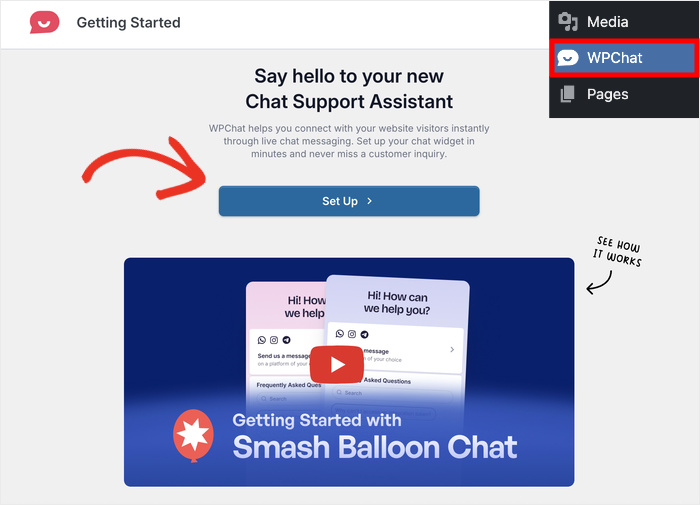
Now it’s time to configure your new plugin. Open the WPChat menu item from your WordPress dashboard.
You’ll see a welcome screen with a Set Up button. Just click on it to start the setup.
After that, the plugin will let you connect this chat assistant to Facebook.
To do that, enter the username of your brand’s Facebook page.
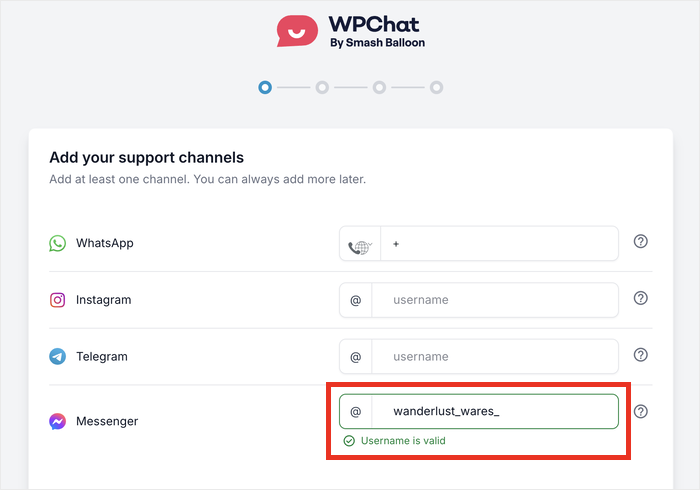
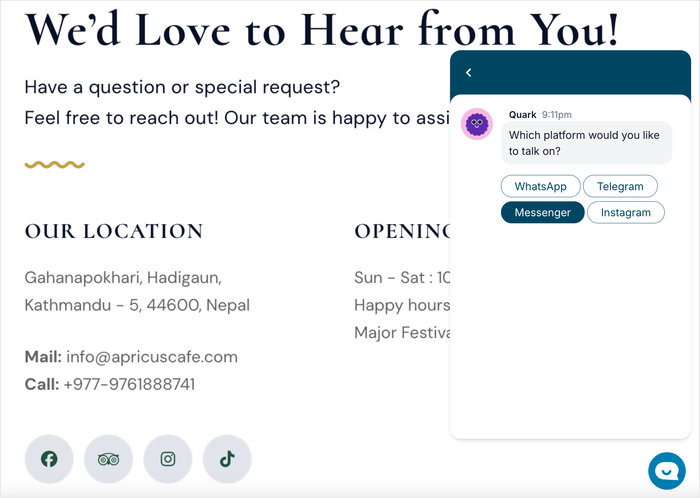
You can also connect other messaging apps from here, including WhatsApp (also owned by Meta), Instagram, and Telegram.
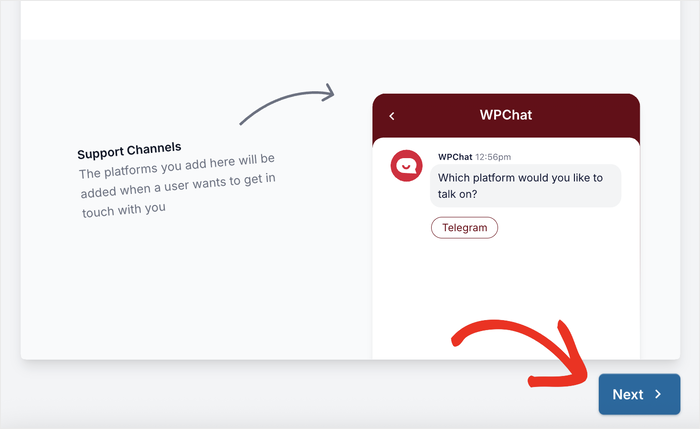
Finally, scroll down and click on the Next button.
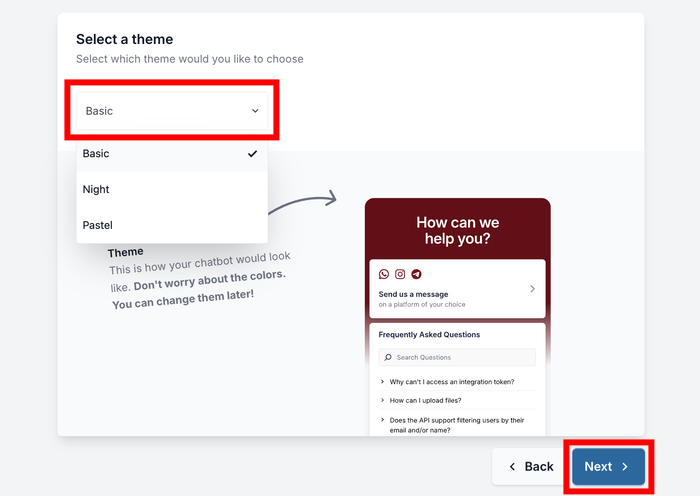
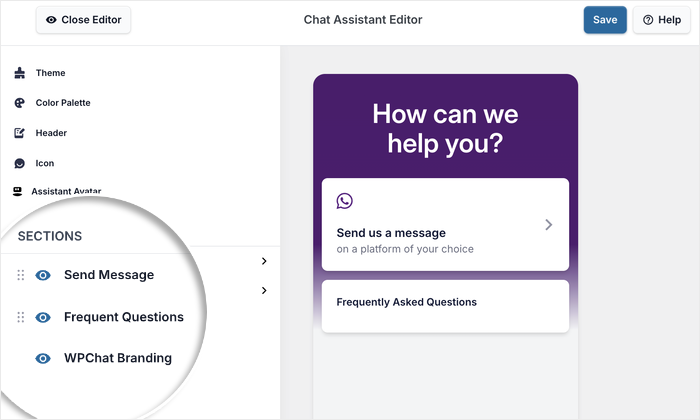
On the following screen, you’ll be able to pick a theme for your chat widget’s appearance.
WPChat offers several pre-designed themes that match different website styles:
- Basic
- Night
- Pastel
Choose the one that best complements your Divi design, then click on Next to continue.
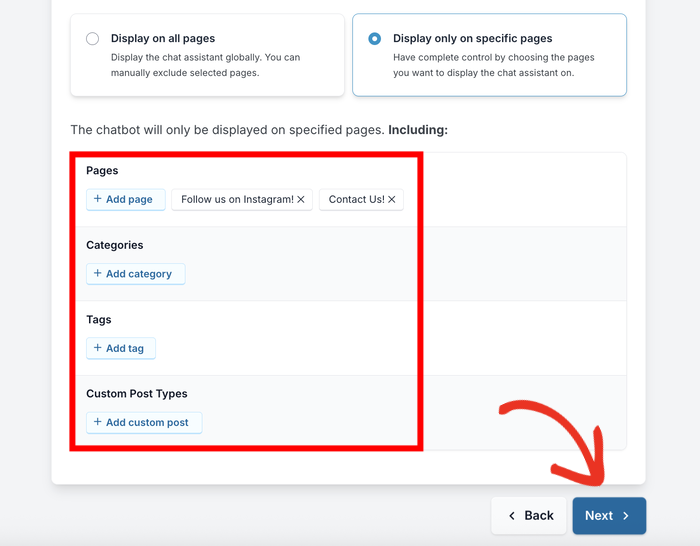
Step 3: Choose Visibility for Facebook Messenger Chat Widget
This step lets you control exactly where your chat widget appears on your Divi site. You have two main options to consider:
- Display on all pages shows your chat widget across your entire website, giving visitors consistent access to support.
- Display only on specific pages lets you choose exactly which pages show the chat bubble.
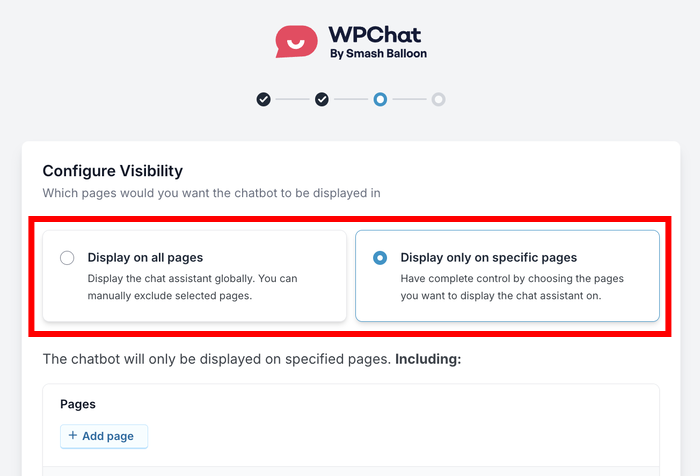
Once you do that, you can use the filters below to get even more control over the Messenger chat option to appear.
You can add filters based on Pages, Categories, Tags, or Custom Post Types.
For example, you might want chat to appear only on product pages or your contact page. Or, you can exclude the chat option from your blog section.
After setting your visibility preferences, click on Next.
On the final setup screen, enter your WPChat license key. You can see this key on your account page on WPChat.
Enter your key here and click on the Complete Setup button to finish up here.
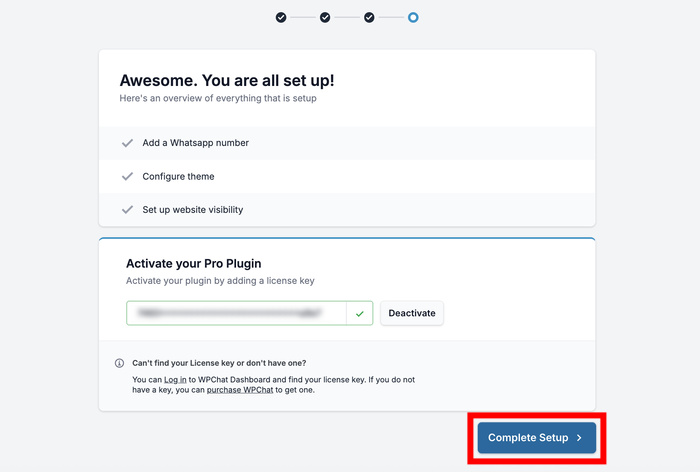
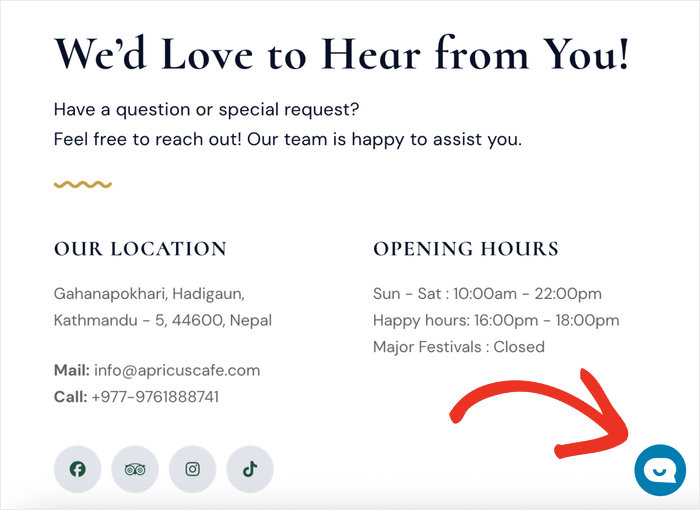
Just like that, your Facebook Messenger chat widget is now active on your Divi site.
Anyone on your site can just click on the floating button to open the Facebook chat widget.
Step 4: Customize Your Messenger Widget for Best Impression
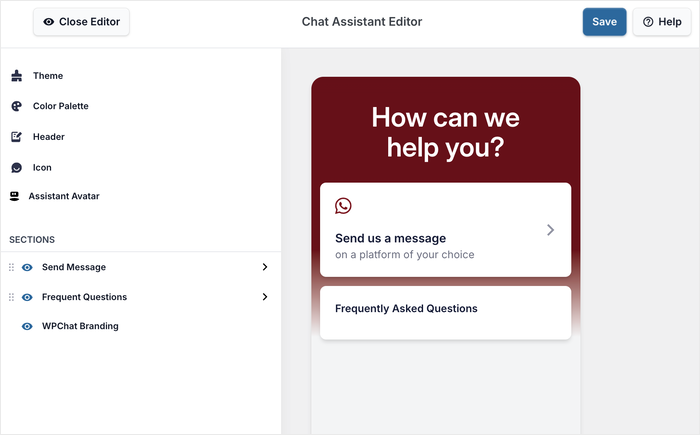
With the basic setup complete, let’s make your chat widget look perfect for your Divi website.
First, click on the Customize button on your WPChat dashboard.
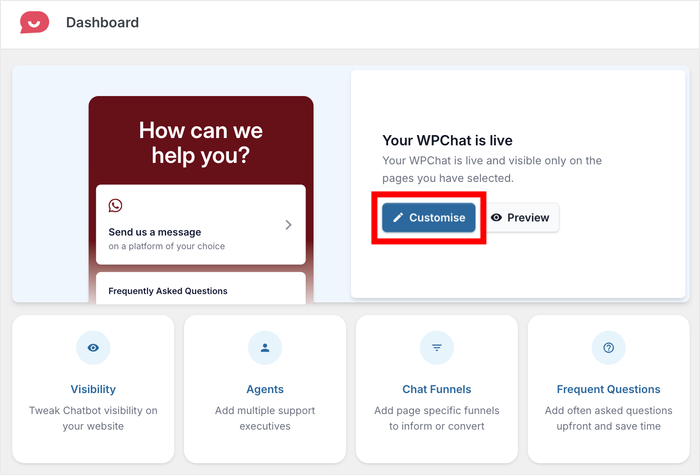
This opens the live editor, where you can see a panel with the different customization options.
Like with the Divi editor, you get a live preview to make it easy to design your chat widget.
Let’s go through some of the customization options here:
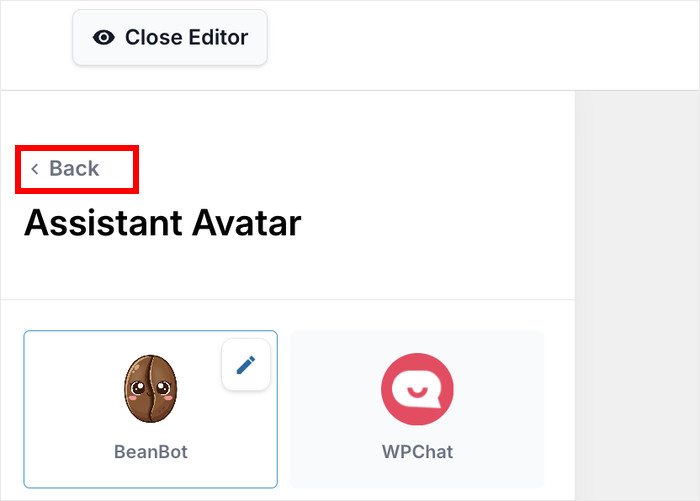
Personalizing the Assistant Avatar
First, you’ll want to add a friendly face to your chat widget.
So, click on the Assistant Avatar option in the customization menu.
You can find several pre-built avatars you can choose from here.
If you want to use your own image, click the Add Your Own button instead.
Use the Upload button to add an image from your media library or your computer.
Just enter a name for your avatar, then click on Add to save it.
With that, you can click on Save to confirm your new assistant avatar.
After doing that, click the Back button to return to the main customization screen.
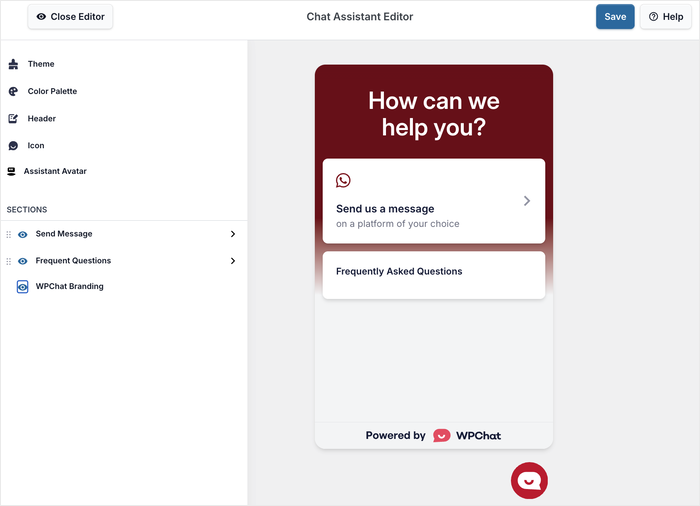
Editing the Visible Sections
Next, you can control the different sections of your Messenger widget.
Just look for the Sections option on the left side of the customizer.
From here, you can choose to show or hide the section with a single click.
You can also move the sections up and down so the focus can be on the messaging feature of the FAQ options.
Feel free to click on each of the two main sections to customize them even further.

Once you’re happy with your widget, click on Save to store your changes.
As you can see, this customizer is pretty easy to use even without design or coding experience.
Step 5: Set Up Multiple Chat Agents (Team Management)
If you have a team handling customer inquiries, WPChat lets you create different agents to represent your support team.
Each agent can have a name and profile pic to make the conversation feel more human for your visitors.
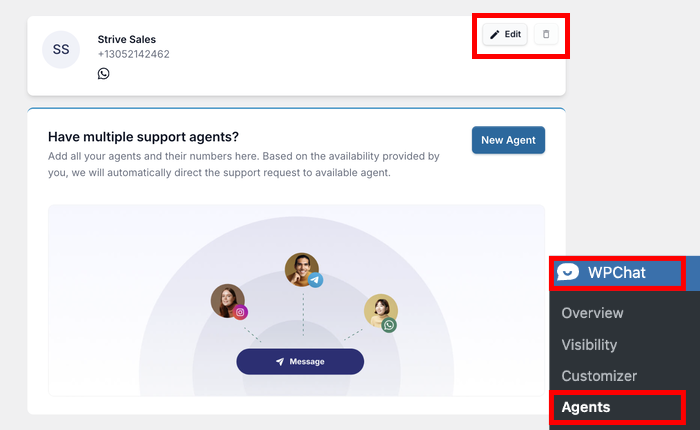
To set up your agents, open the WPChat » Agents menu from your WordPress dashboard.
You’ll see a default agent that was created when you set up the plugin.
Just click on Edit next to this agent to modify the information.
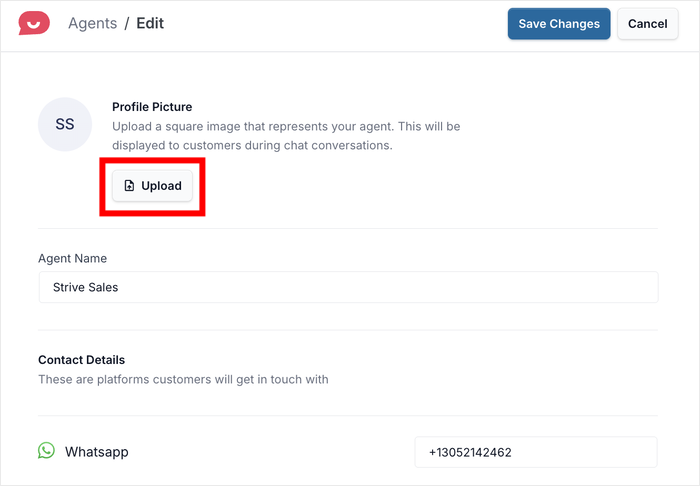
To add a profile photo, click Upload and select an image from your computer.
Professional headshots can be great for building trust with visitors. Or, you can use the company icon or mascot to make the conversation feel official.
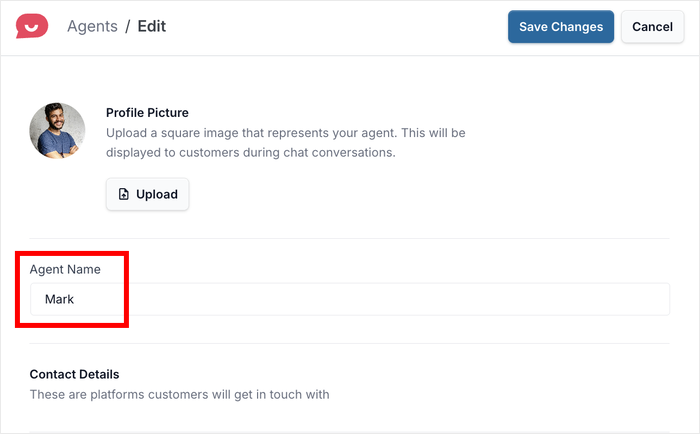
Next, enter the agent’s Name in the field below.
You can use the person’s real name to add a human touch or use a general name for all the support staff.
If you scroll down, you can also change the contact info for this specific chat agent.
After you’re done setting up the agent, click on Save Changes.
You can then add new agents and repeat this process for each team member who will be handling chat conversations.
Finally, open your website and test out your new Messenger chat widget.
Conclusion
As you can see, it can be surprisingly easy to add Facebook Messenger to your Divi WordPress site using WPChat.
Key Takeaways
You now know the safest, most straightforward way to add Facebook Messenger chat to a Divi site. With WPChat, you can handle everything through a visual dashboard.
You’ve also seen how to control exactly where your chat bubble appears, how to brand it to match your site, and how to set up chat agents.
Ready to start connecting with your visitors in real-time? Get started with WPChat today!
Frequently Asked Questions
Do I need a Facebook Business Page to add Messenger to Divi?
Yes, you do need a Facebook Business Page to add Messenger chat to your Divi site. The Messenger chat widget connects directly to a Page’s inbox — it cannot connect to a personal Facebook profile.
If you don’t have one yet, you can create a Facebook Page in just a few minutes using Facebook’s own setup guide.
Will adding a chat widget slow down my Divi website?
Adding WPChat to your Divi site will not slow it down in any noticeable way. WPChat loads asynchronously — meaning the chat widget loads in the background after the rest of your page is already visible to your visitor.
Your page content always loads first, and the widget quietly appears once everything else is ready.
Can I add Messenger chat to only one page in Divi?
Yes, you can show the chat widget on just one page. WPChat’s visibility controls — covered in Step 3 of this walkthrough — let you target specific pages, tags, categories, or custom post types.
Does Facebook Messenger chat work with Divi’s mobile layout?
Yes, the WPChat widget works perfectly with Divi’s mobile layout. The floating chat bubble is responsive by default, meaning it automatically adjusts to fit any screen size: from desktop monitors to smartphones.
On top of that, the cross-device syncing advantage we covered earlier means your visitors can start a conversation on mobile and pick it back up on desktop without losing a single message.