Speed is the single most important factor when closing sales online. If a potential customer waits too long for a simple answer, they’ll visit your competitor instead.
I know how frustrating it is to lose revenue simply because you couldn’t answer a basic question instantly.
You can’t be available 24/7, and hiring a full support team costs more than most growing businesses can afford. I’ve talked to business owners who improved their support quality while reducing the load on their support team with FAQ bots.
Many saw better conversions because visitors got instant answers instead of waiting hours for email replies.
The solution is simpler than you think. An FAQ bot answers common questions instantly, even while you sleep.
In this guide, I’ll show you exactly how to add an FAQ bot to your WordPress website so you can resolve customer issues automatically and boost your sales.
Why Your Website Needs an FAQ Bot (The Business Case)
I’ve seen countless small business owners lose sales simply because a visitor couldn’t find the answer to a simple question about shipping or pricing.
Someone lands on their site at 11 PM, has a quick question about returns, and leaves because there’s no one available to help.
The statistics tell the same story. According to research, 53% of online customers are likely to abandon their purchase if they can’t find a quick answer to their question.
Here’s how FAQ bots directly boost your revenue:
- Your bot works 24/7, answering questions and collecting contact information even when you’re offline, so you never miss a potential customer.
- The bot can ask key questions upfront to determine if visitors are serious buyers, saving you time on unqualified leads.
- Instant answers to common concerns about shipping, returns, or products can encourage more visitors to buy from you.
- When your bot handles repetitive questions, you can focus on closing bigger deals and building relationships with your best customers.
- Customers feel valued when they get immediate help, which increases their confidence in your business and makes them more likely to buy.
What Makes WPChat the Best FAQ Bot Solution
WPChat is a WordPress chatbot plugin that displays a floating FAQ bot on your website.
When visitors click it, they can browse through your frequently asked questions and get instant answers.
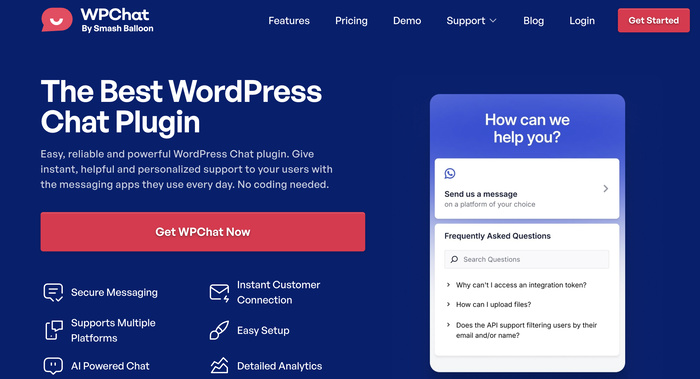
The plugin is specifically designed for non-technical users who want powerful chatbot features without touching code.
Key Features That Set WPChat Apart
- Messaging App Support: Allow visitors to continue conversations on the biggest messaging apps out there: WhatsApp, Instagram, Facebook, and Telegram.
- Customizable Themes: Choose from multiple design themes (Basic, Night, or Pastel) that automatically match your website’s style without any coding required.
- Visual Bot Builder: Create conversation flows with drag-and-drop simplicity, so you can build your FAQ bot in minutes.
- Smart FAQ Display: Show frequently asked questions in an organized, searchable bot that appears exactly where your visitors need it most.
- Page-Level Control: Display your FAQ bot on specific pages only, or show it site-wide with exceptions, giving you complete control over where visitors see it.
- Visual Answer Support: Upload images, screenshots, and diagrams directly into your FAQ answers to provide clearer explanations for visual learners.
What I love most about WPChat is that you can have your FAQ bot up and running in under 15 minutes.
There’s no learning curve, no complex configuration, and no need to hire a developer. The plugin handles all the technical details automatically, so you can focus on writing helpful answers to your customers’ questions.
Ready to add an FAQ bot to your website? Get WPChat here and start answering customer questions automatically.
Best Practices for FAQ Bot Success (Pro Tips)
Once your FAQ bot is running, these strategies will help you get better results and keep visitors engaged.
- Write Conversational Responses: Write like you’re talking to a friend who asked you a question, using simple words and a friendly tone that makes visitors feel comfortable.
- Keep Your FAQ Database Updated: Review your FAQ answers every few months to make sure information about pricing, shipping times, and product details is still accurate..
- Use Your Bot to Pre-Qualify Leads: Take advantage of WPChat’s chat funnels feature to ask qualifying questions that help you identify serious buyers.
- Don’t Overload Visitors: Begin with 3-6 of your most common questions rather than trying to answer everything at once.
How to Add an FAQ Bot to WordPress (Step-by-Step)
Now I’ll walk you through the complete process of setting up your FAQ bot using WPChat. This should take about 15 minutes from start to finish.
Step 1: Install and Activate the WPChat Plugin
First, you’ll need to download the plugin file from the WPChat website here.
Once you have the file, install and activate the plugin on your WordPress site (see our beginner’s guide).
Step 2: Create a New FAQ Bot
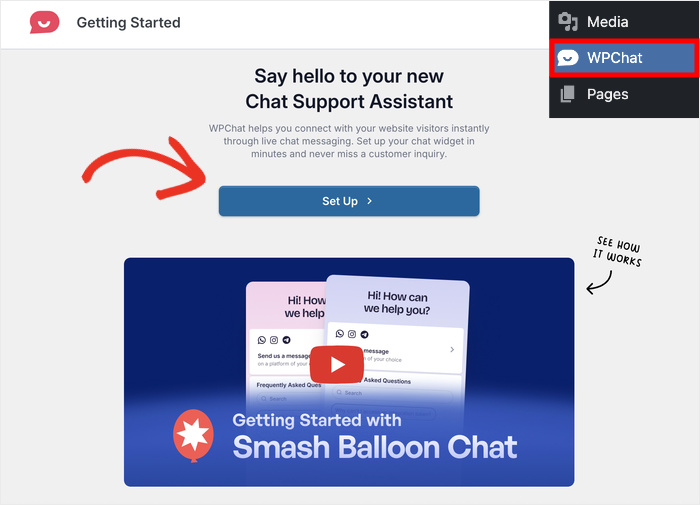
Navigate to the WPChat menu in your WordPress dashboard.
You’ll see a Set Up button on the welcome screen—click it to begin configuring your FAQ bot.
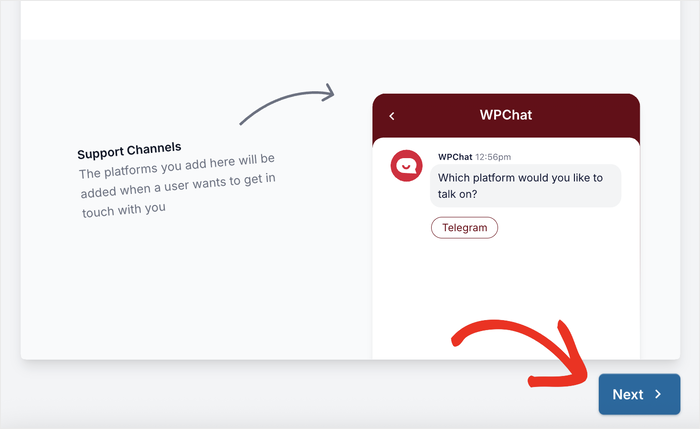
The setup wizard will first ask you to enter your contact info. This lets your visitors choose a messaging app they prefer and directly start chatting to you.
So, enter the contact info for the messaging apps you want to use:
- Telegram
- Messenger
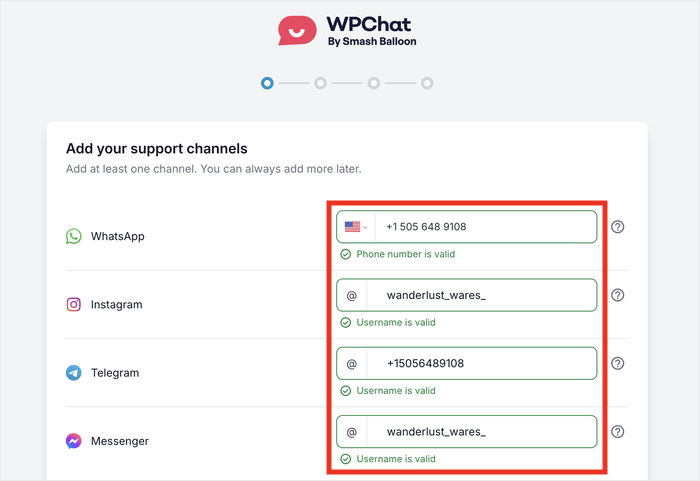
You can add your phone number for Telegram and WhatsApp, and the username for Facebook and Messenger.
After you’ve done that, scroll down and click on Next.
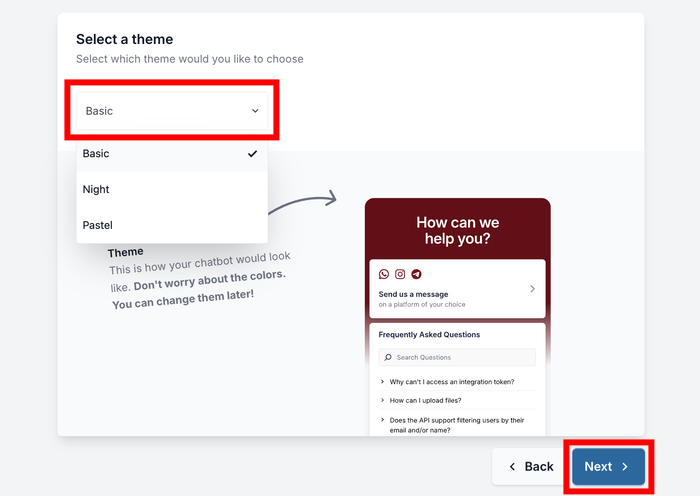
On the next screen, you’ll choose a theme for your FAQ bot.
WPChat offers three design themes: Basic (clean and minimal), Night (dark mode), and Pastel (soft colors).
Select the theme that best matches your website’s style and click on Next.
Step 3: Set Visibility for Your FAQ Bot
Now you need to decide where your FAQ bot will appear on your website.
WPChat gives you two options: Display on all pages (with the option to hide it from specific pages) or Display only on specific pages.
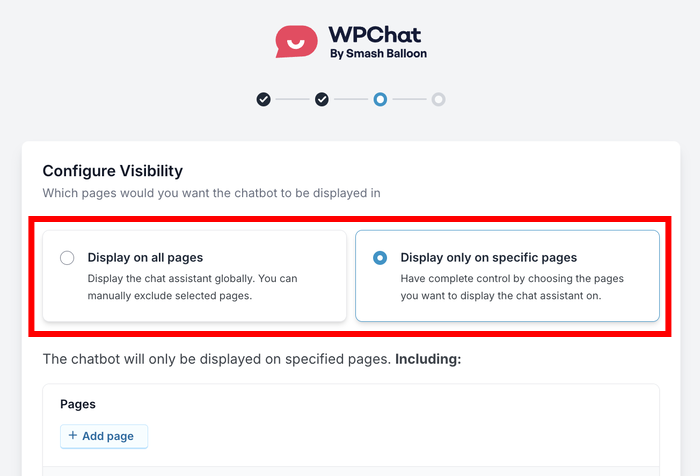
For most websites, I recommend choosing Display on all pages so visitors can access help anywhere on your site. You can always exclude specific pages later if needed.
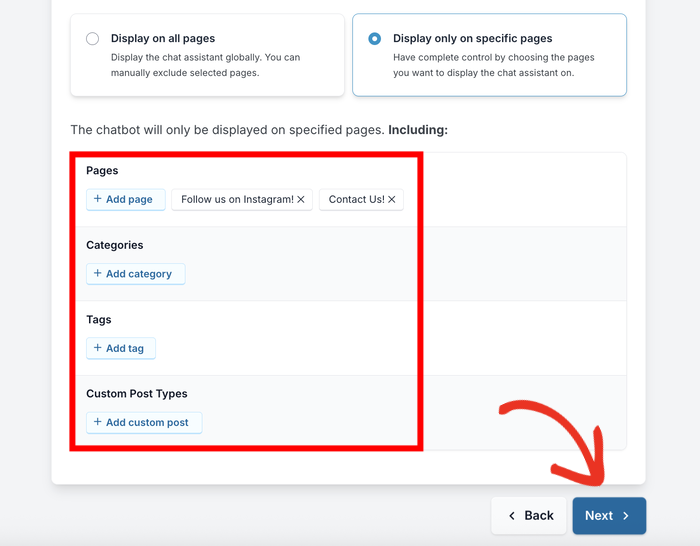
If you choose to display on all pages, you can then select which Pages, Categories, Tags, and Custom Post Types to exclude.
For example, you might want to hide the bot from your checkout page to avoid distractions during purchase.
Alternatively, if you select Display only on specific pages, you can choose exactly which Pages, Categories, Tags, and Custom Post Types should show the bot.
This works well if you only want the FAQ bot on product pages or your contact page.
After you set up your filters, click on the Next button to continue.
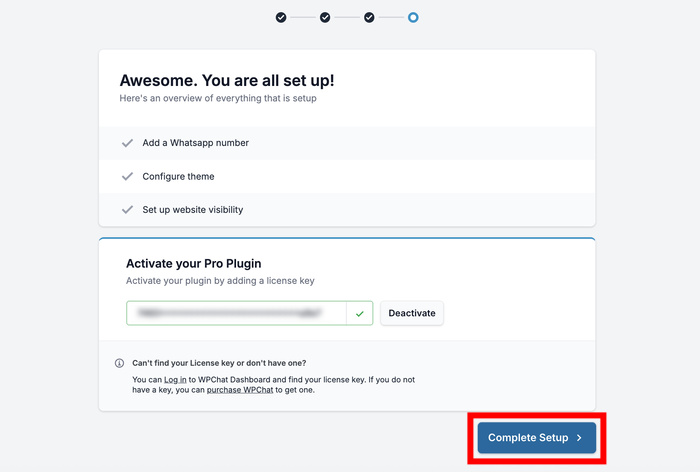
On the final screen, paste your License Key, and click on Complete Setup to finish the initial configuration.
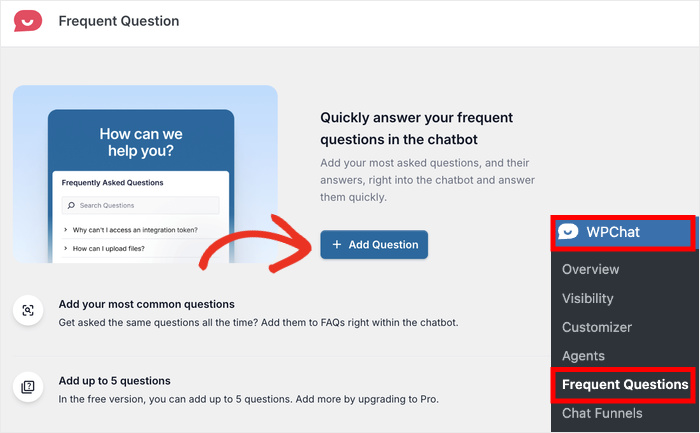
Step 4: Add Questions and Answers
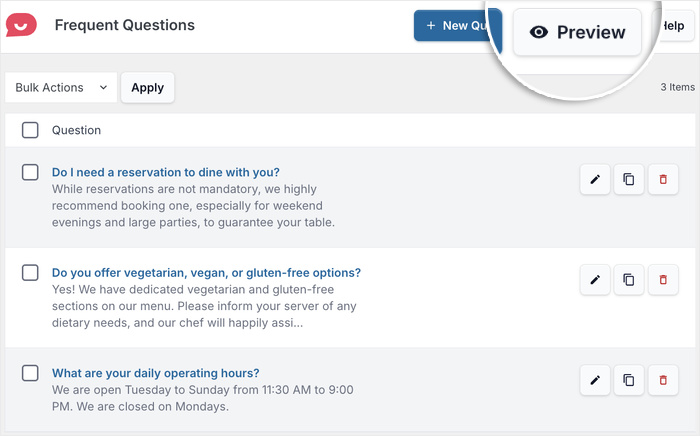
Navigate to WPChat » Frequent Questions in your WordPress dashboard.
This is where you’ll add all the questions and answers that visitors will see in your FAQ bot.
Click the Add Question button to create your first FAQ entry.
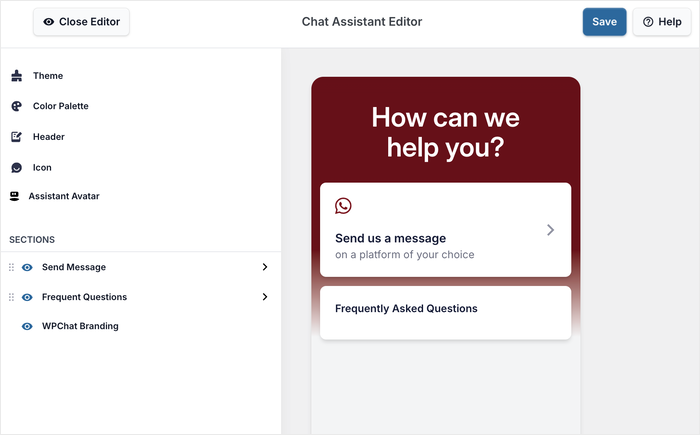
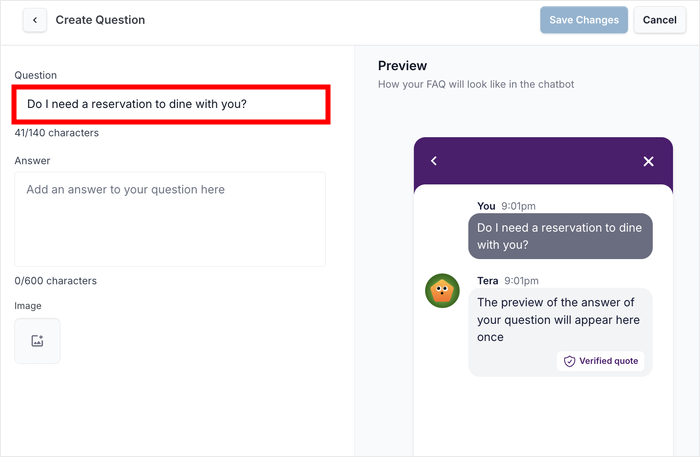
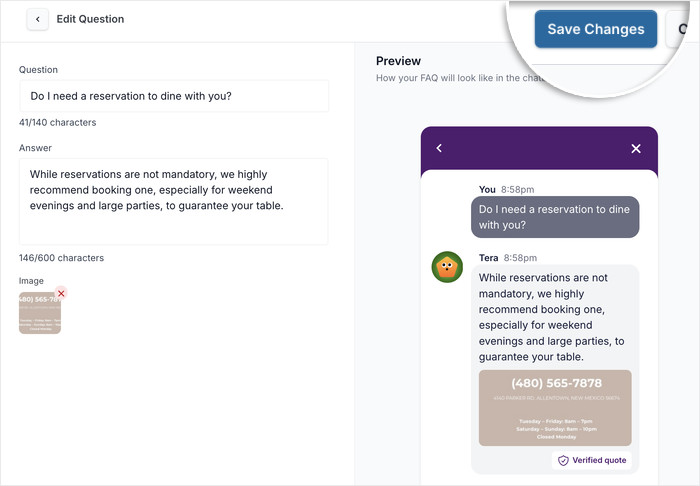
You’ll see a simple form with two main fields: Question and Answer.
On the right, you can see a live preview of your FAQ bot. This lets you check how the bot will look to your website visitors.

In the Question field, enter the exact question as your customers would ask it.
Use natural language like “How long does shipping take?” or “What is your return policy?” instead of formal phrasing.
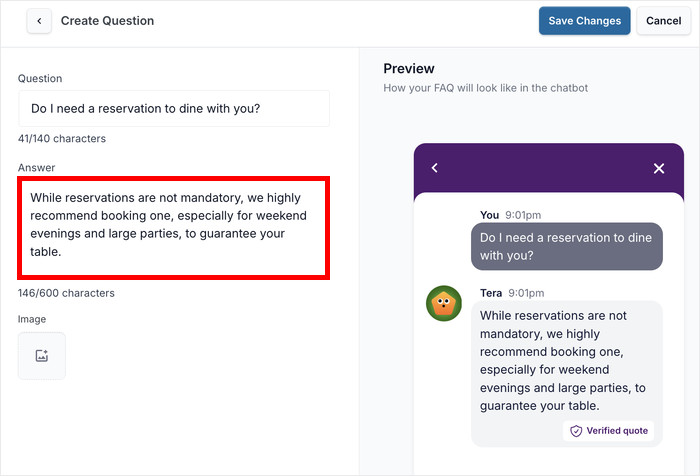
Next, move to the Answer field and type your response.
Keep your answer clear and focused, breaking longer responses into short paragraphs of 1-2 sentences each for easier reading.
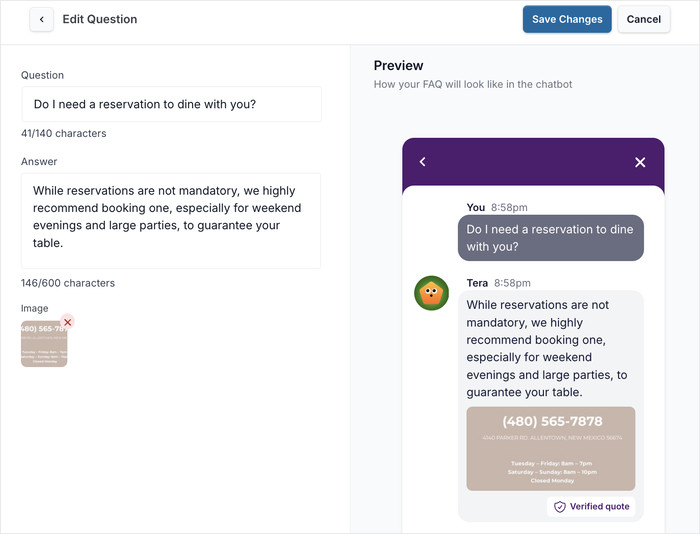
If your answer would benefit from a visual explanation, click on the Image icon to upload screenshots, diagrams, or photos.
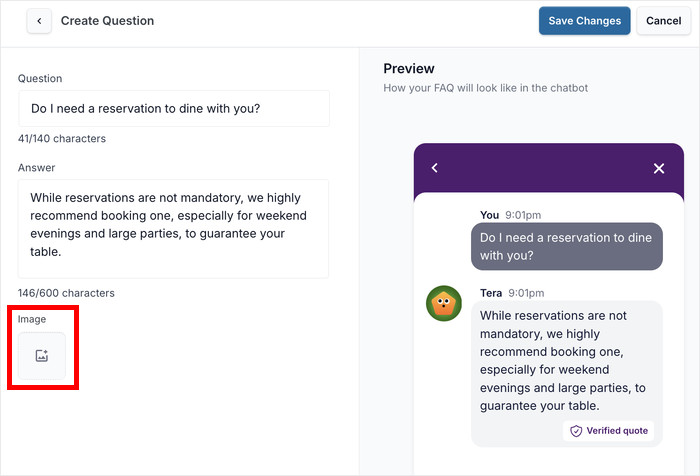
For example, a shipping timeline diagram or a step-by-step screenshot can make complex information much easier to understand.
You can even provide important information like phone numbers in an image that visitors can easily save.
As you type, use the real-time preview on the right side of the screen to see exactly how your FAQ entry will appear to visitors.
This helps you catch formatting issues and ensure your answer looks professional.
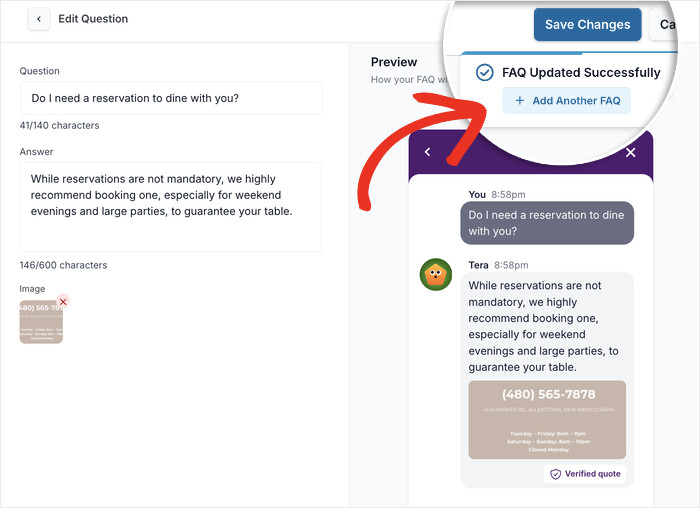
Once you’re satisfied with your question and answer, click Save Changes to publish the FAQ entry to your new bot.
You can then click on the Add Another FAQ popup to add even more FAQs to this bot.
I recommend starting with your 3-6 most common customer questions before going live. You can always expand your FAQ library later.
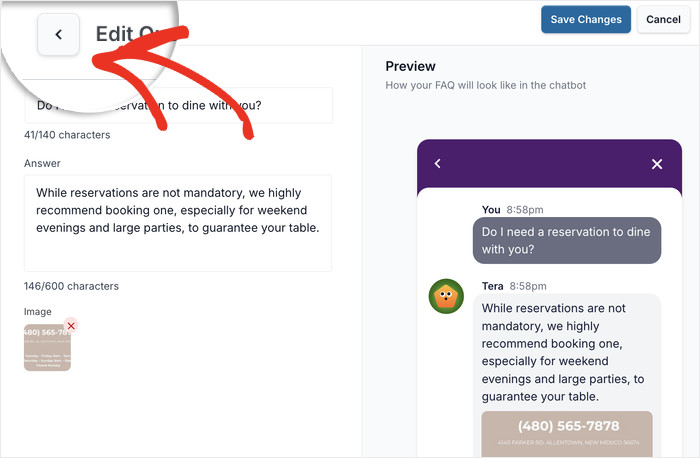
Step 5: Manage Your Questions & Answers
To start managing your FAQ entries, you can click on the Back button on the top left.
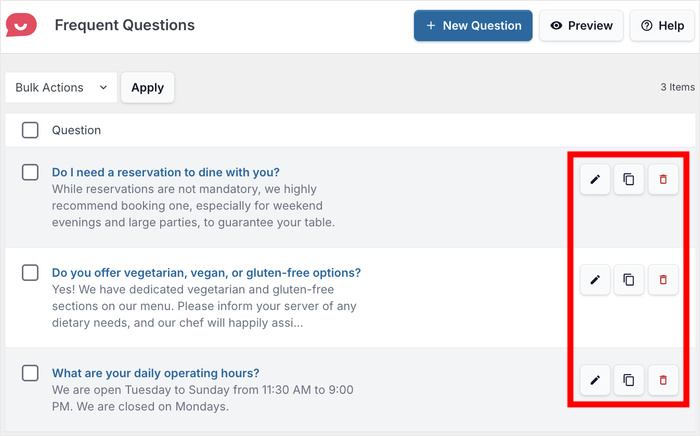
WPChat makes it easy to maintain your FAQ entries over time. For each FAQ entry, you have 3 ways to manage it:
- Use the Edit option to update answers when information changes
- Select the Clone option to duplicate similar questions and modify them
- Click on the Delete option to remove outdated entries.
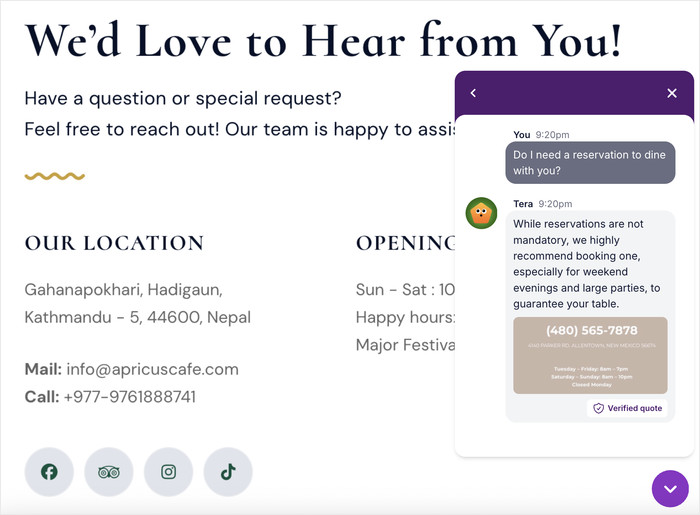
Before making your FAQ bot public, click the Preview button to see the final bot exactly as visitors will see it on your website.
This lets you test the experience and catch any typos and errors before going live.
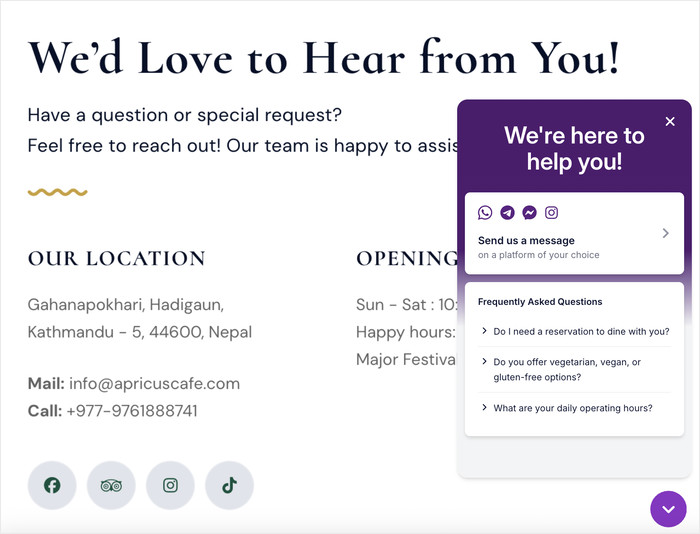
With that, all that’s left is to open your website and see how your FAQ bot looks to your visitors.
As you can see, you can serve instant answers to important questions with the help of your new bot.
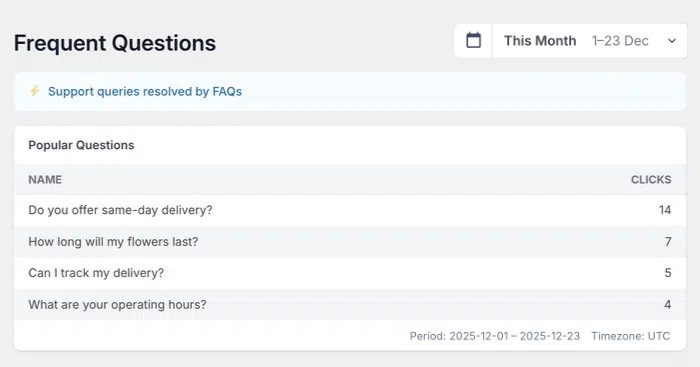
Going forward, you can use the in-built analytics feature of WPChat to check how your new FAQ bot is performing.
That way, you can see which questions get more responses and adjust your products and FAQ bots as you need.
Conclusion & Final Thoughts
In this tutorial, you learned how to install WPChat, create your FAQ bot, add questions and answers with visual support, and customize where the bot appears on your site.
As you can see, WPChat makes it easy to provide instant answers to your visitors 24/7, capture leads even when you’re offline, and guide customers through their buying journey without manual intervention.
Ready to start answering customer questions automatically?
Get WPChat here and set up your FAQ bot in just 15 minutes.
To start generating leads and converting visitors with your FAQ bot, check out this guide on creating chat funnels.