Imagine someone on your site who wants to buy something, but they’re not sure if it comes with a feature they really need.
After skimming through the text, they open Google to find out more, only to end up on some other brand’s website.
For small business owners, this might be surprisingly common.
Visitors often have questions but can’t find quick answers. Traditional contact forms feel too formal, and phone calls seem outdated to many users.
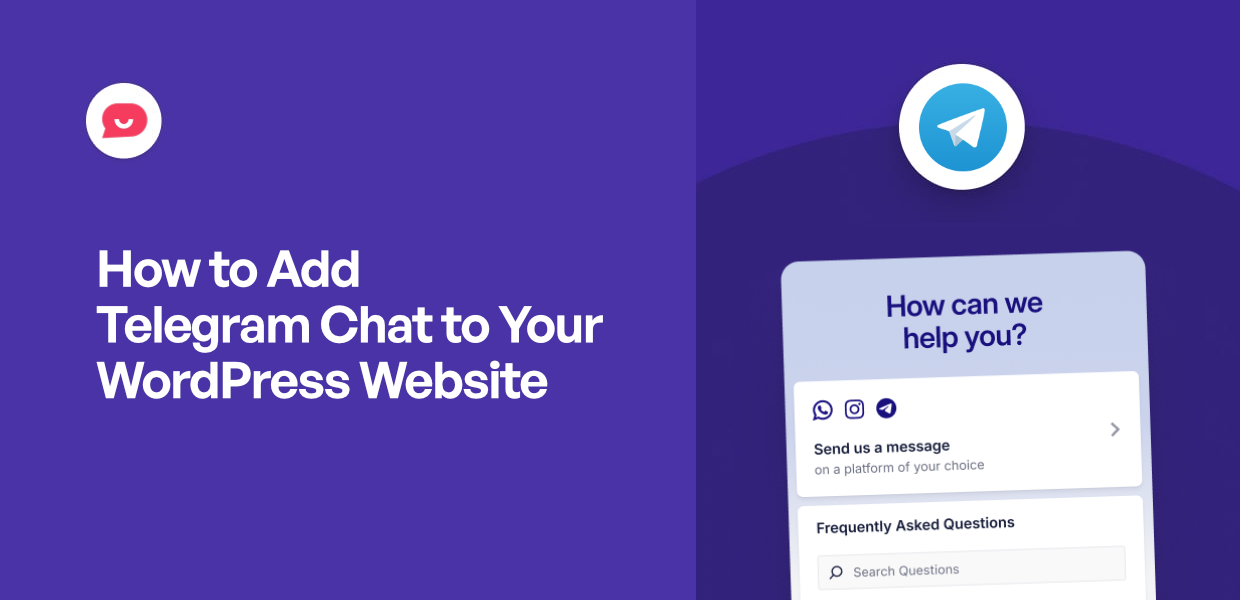
The good news is that you’ve got an easy way to connect with visitors on an app they’re already using — Telegram.
In this guide, I’ll show you how to add a Telegram chat to your website and create a secure communication channel with your audience.
Why Add a Telegram Chat to Your WordPress Website
Adding Telegram chat to your WordPress website creates a direct line of communication with visitors using an app they already trust. Instead of making people fill out contact forms or learn new platforms, you’re meeting them where they feel comfortable.
Here’s how adding a Telegram chat to WordPress can help your business:
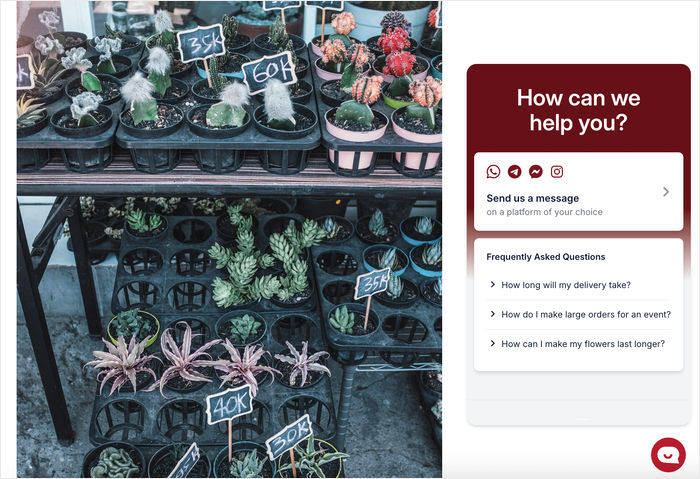
- Secure Communication: Telegram’s encryption keeps your conversations with visitors private and protected from security threats.
- Easy Access for Telegram Users: People with Telegram accounts can message you instantly without creating new accounts or downloading additional software.
- Follow-Up Opportunities: You can send visitors useful information, news updates, and special deals directly through Telegram after your initial conversation.
- Improved Customer Support: Visitors can send photos, documents, and files through Telegram, making it easier for you to provide detailed help and troubleshooting.
- Easy Availability: Unlike phone calls or traditional contact forms, Telegram chat lets visitors reach out anytime, even outside business hours.
By providing an easy way for visitors to connect, you’ll be able to build trust, connect with people, and even convert them into customers.
Easiest Way to Add Telegram Chat to Your WordPress Site
Adding Telegram chat manually means dealing with complex coding and API integrations. This approach requires significant time and technical expertise that many business owners don’t have.
The good news? You can sidestep all this hassle with the help of a WordPress plugin like WPChat.
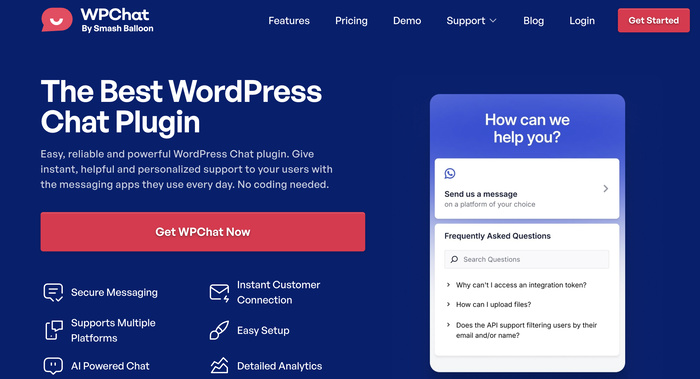
As the #1 WordPress chat plugin, WPChat makes it easier than ever to add messaging support for your website.
To help you reach the most users, WPChat supports Telegram along with other major messaging platforms like Facebook Messenger, Instagram, and WhatsApp.
WPChat offers several advantages that make it perfect for beginners:
- Simple setup process: The entire configuration takes just minutes and requires zero coding knowledge.
- Complete control over placement: You get full control over where the Telegram chat appears on your website and which pages display it.
- Professional chat agents: You can create chat agents to represent your support team and make interactions feel more personal and human.

- Built-in FAQ system: Add frequently asked questions to provide instant answers and reduce the workload on your support team.
- Lead generation features: Generate leads automatically with chat funnels that guide site visitors through your sales process.
- Detailed analytics: Track your chat conversations, conversion rates, team workload, and much more to optimize your customer service.
The plugin handles all the technical complexity behind the scenes while giving you a professional chat solution that works right out of the box.
Ready to add Telegram chat to your website? Get your copy of WPChat here to get started!
How to Add Telegram Chat to Your WordPress Website in 5 Steps
Now I’ll walk you through the complete process of setting up Telegram chat on your WordPress site using WPChat. Each step builds on the previous one, so you’ll have a fully functional chat system by the end.
Step 1: Install and Activate WPChat on Your Website
First, you’ll need to get the WPChat plugin and install it on your WordPress site.
You can get the plugin from the official WPChat website here.
Once you install and activate the plugin, you’re good to go.
In case you need help with that, here’s a beginner’s guide on how to install WordPress plugins.
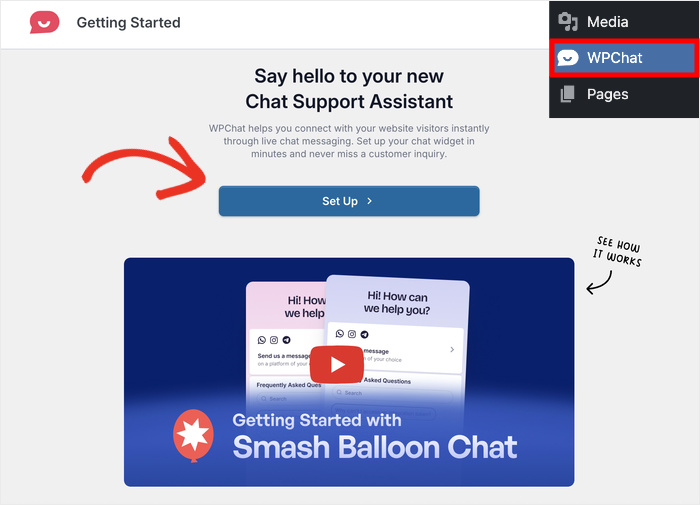
Step 2: Create a Telegram Chat Assistant
Now it’s time to set up your chat assistant. Don’t worry — it’s quick and easy.
Navigate to the WPChat menu in your WordPress dashboard and click on the Setup button to begin the configuration process.
You’ll first be asked to enter your Telegram number in the field here.
On top of that, you can enter your WhatsApp number or username for Instagram and Facebook.
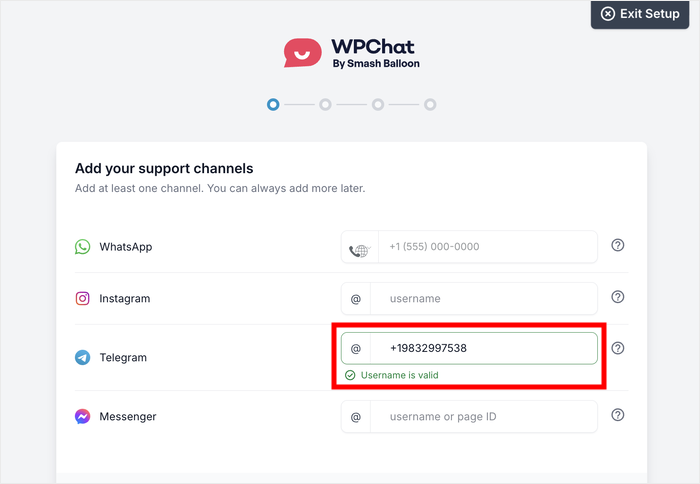
Just enter the details for the platforms you want to use.
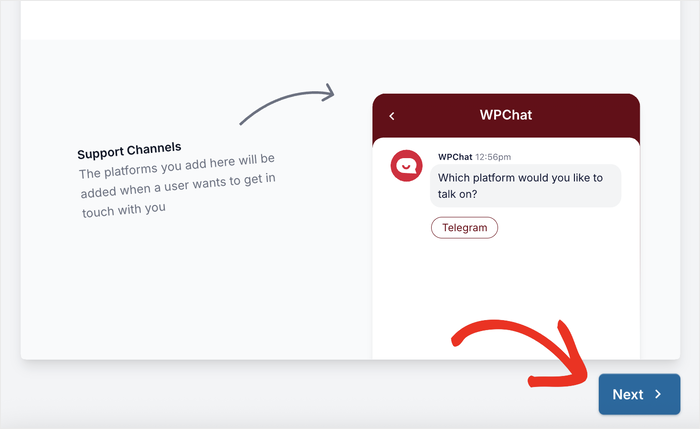
After that, scroll down and click on Next to move to the theme selection step.
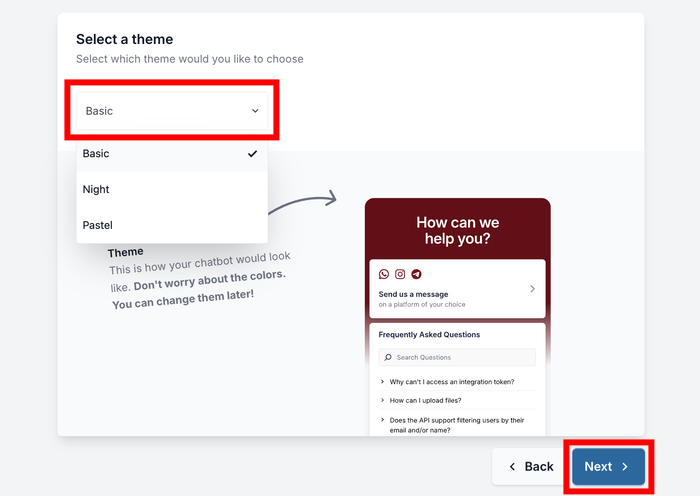
Here, you can pick a visual theme for your Telegram chat assistant using the dropdown menu.
WPChat offers 3 different theme options to match your website’s design. You can also change the theme later if you like.
Pick an option that you like and click on the Next button.
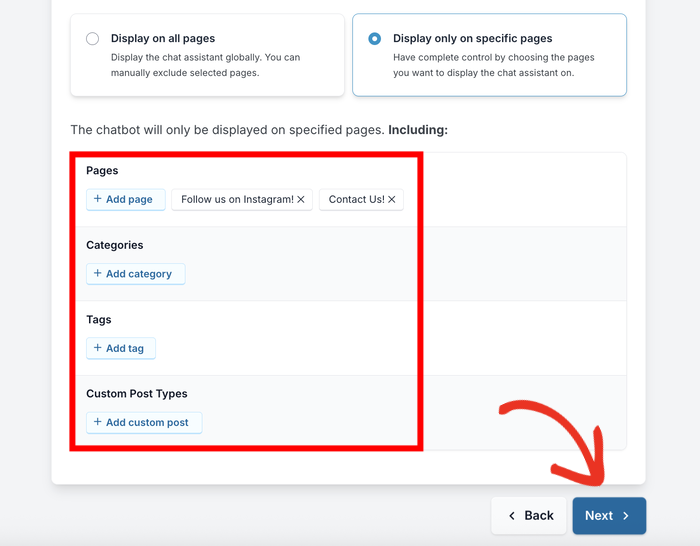
Step 3: Pick Where Chat Assistant is Visible
This step determines where your Telegram chat will appear on your website. WPChat gives you 2 main visibility options for the Telegram chat assistant:
- Display on all pages
- Display only on specific pages
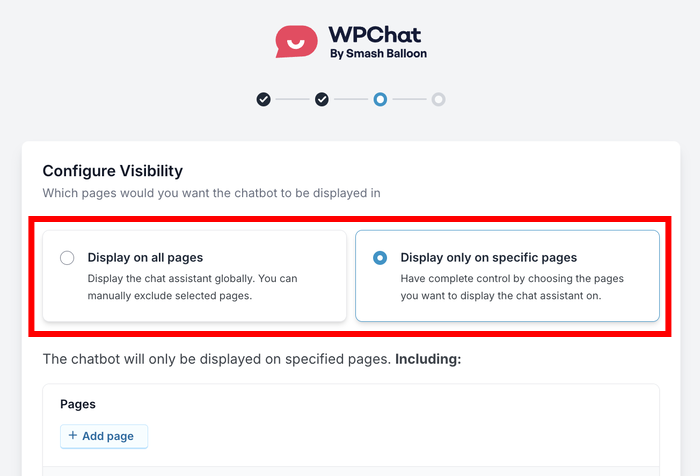
If you scroll down, you can use the built-in filters to include or exclude different parts of your website.
You can select specific Pages, Tags, Categories, or Custom Post Types here.
For example, you can only have your Telegram chat appear on your sales pages or support sections.
Once you’ve set up your visibility preferences, click on Next to continue.
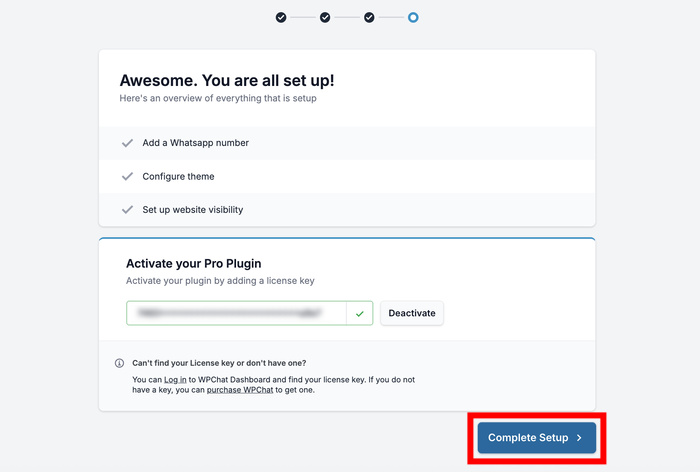
Finally, you can enter your WPChat license key in the provided field. You’ll get this key along with the plugin in step 1.
After entering the key, click on Finish Setup to complete the basic setup.
Step 4: Customize Your Telegram Chat
Now you’ll want to make sure your Telegram chat assistant perfectly matches your website’s design and branding. Just like that, you can make sure the chat feels like a natural part of your site.
Click the Customize button to open WPChat’s live customizer.
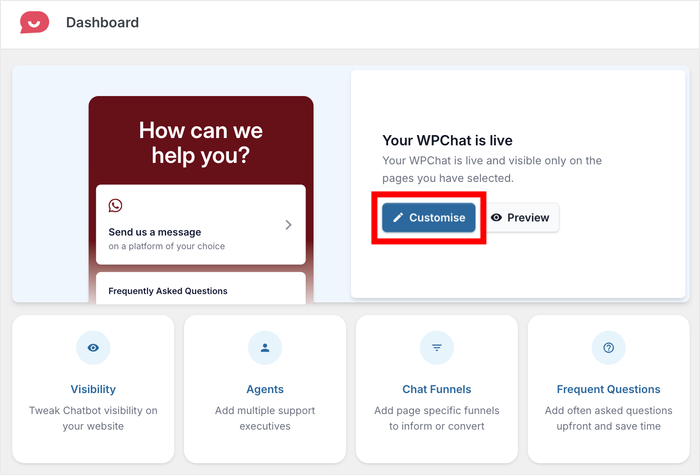
From the live customizer, you can modify your theme, color palette, header text, icon, and many other design elements.
The live preview on the right side of the screen shows your changes in real-time, so you can see exactly how visitors will experience your chat.
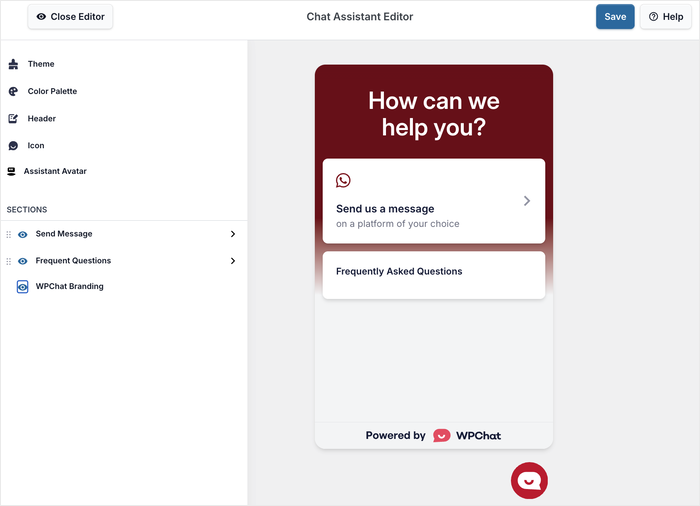
Let me show you a couple of key customization options.
First, click on Color Palette in the left sidebar to access the color settings.
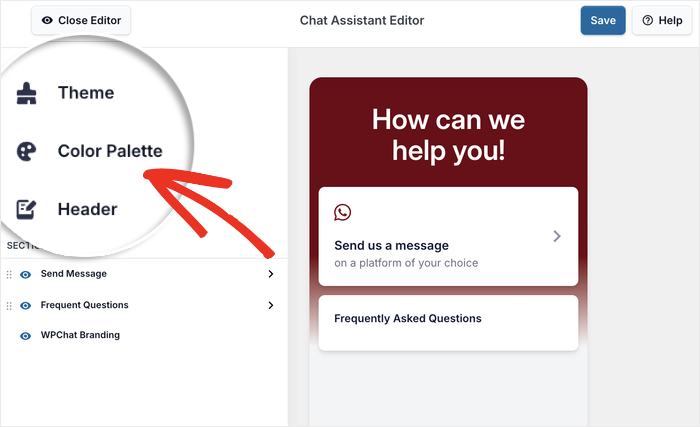
You can pick a pre-made color scheme from the available options.
Or you can click on Custom to select your own brand colors using the color picker.
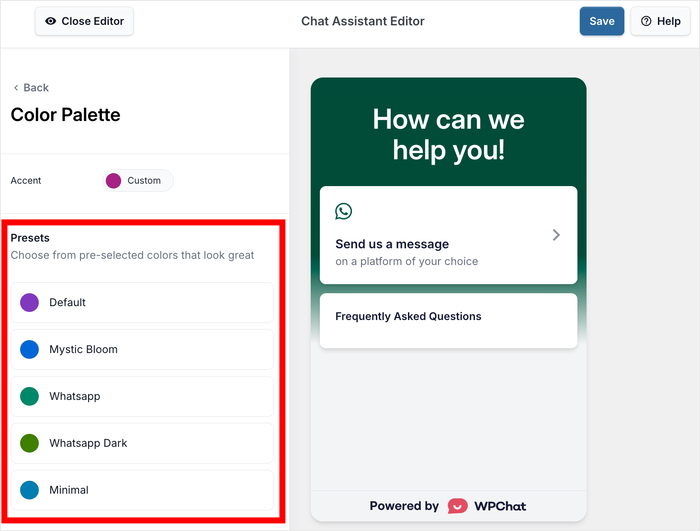
Click on Save to confirm your color changes.
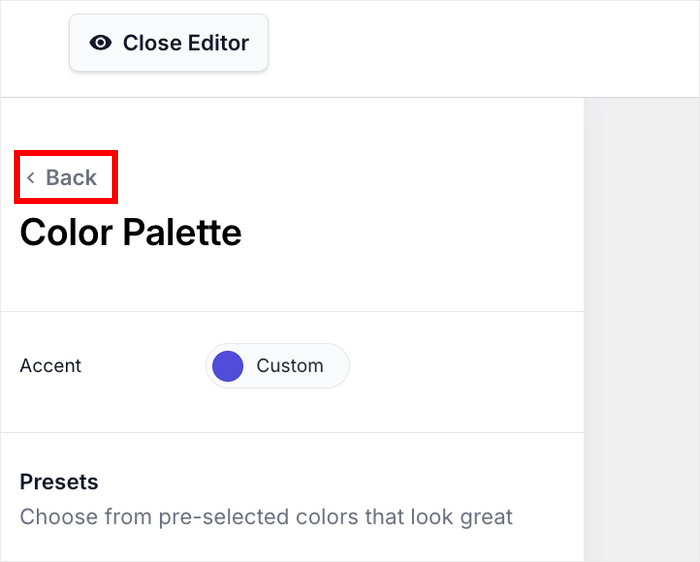
Then, you can click the Back button to return to the main customization menu.
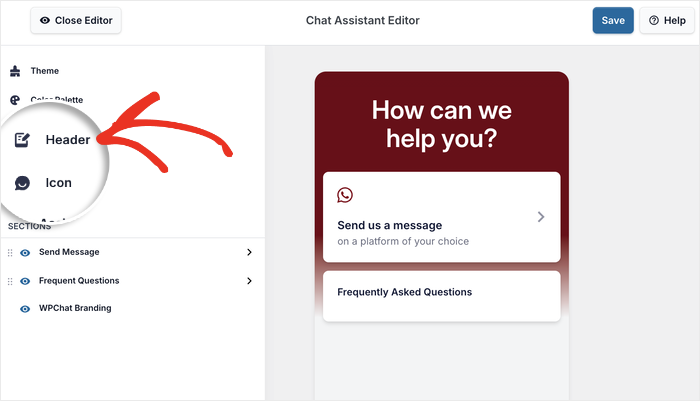
Next, click on the Header option from the main options.
Here you can enter the heading text that appears at the top of your Telegram chat assistant window.
To get started, you can just pick something welcoming and professional like “We’re here to help you!” or “How can we help you today?”
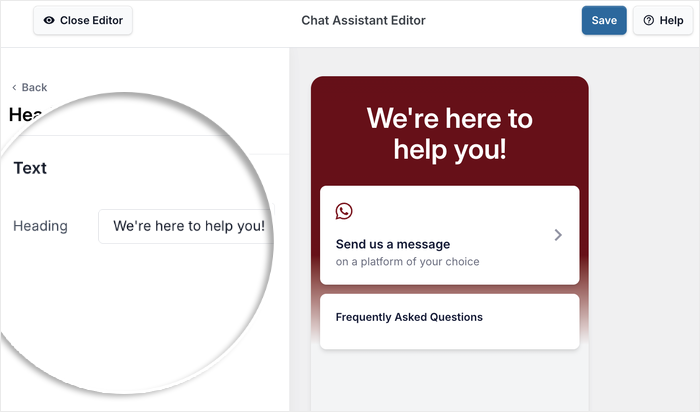
After that, click on Save to confirm your header changes.
You can explore the other customization options here to change your icon, assistant avatar, visible sections, theme, and more.
Remember to Save your changes once you’re done.
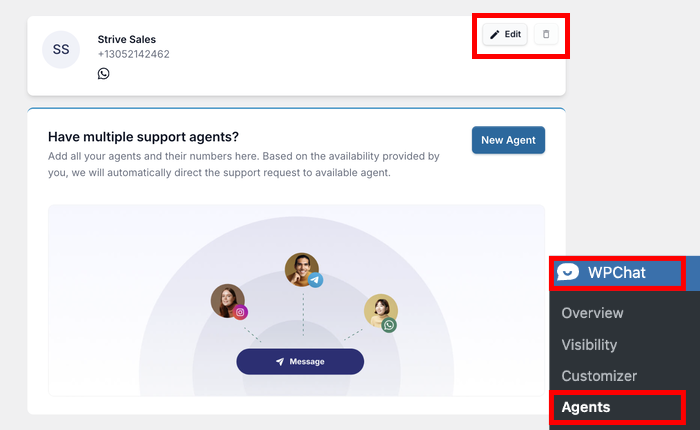
Step 5: Set Up a Telegram Chat Agent
Finally, you can set up a chat agent that visitors will see before they’re redirected to Telegram.
Navigate to WPChat » Agents from your WordPress dashboard menu.
Click on Edit to customize the default agent that WPChat created for you.
To make your agent more personal and trustworthy, click on Upload to add a professional headshot or your company logo.
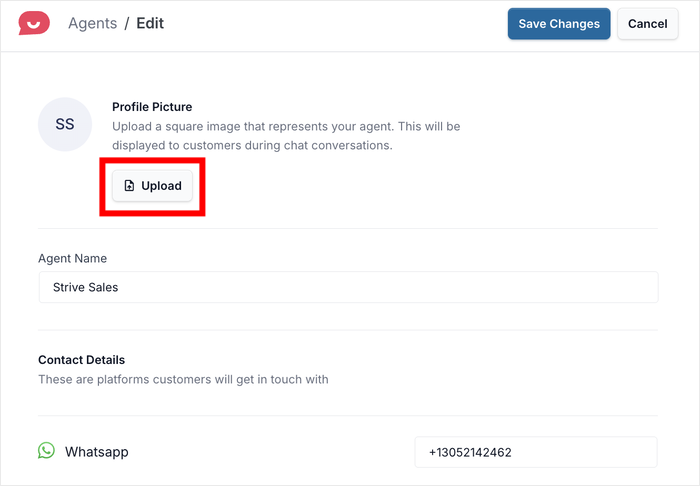
A friendly face or recognizable brand logo helps build trust with visitors.
After that, enter a fitting name for your chat agent. This could be your actual name, a team member’s name, or something generic like “Support Team.”
If you scroll down, you can change the Telegram number or other contact details for this specific chat agent as well.
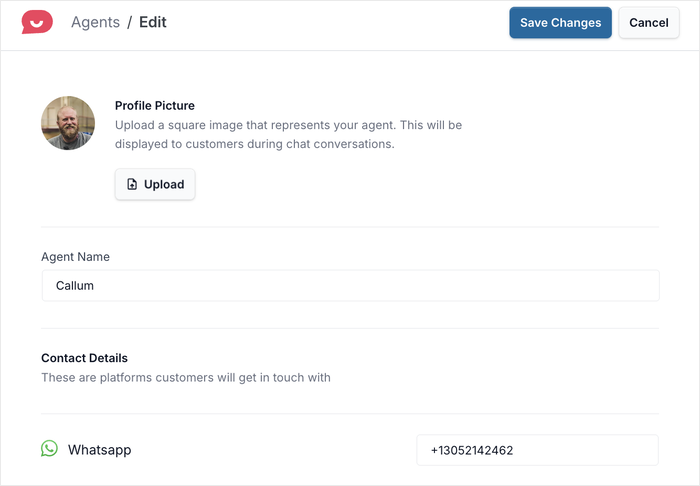
Save your changes, and you’re ready to start receiving Telegram messages from your website visitors.
The setup is now complete, and your chat assistant will appear on your website according to the visibility settings you configured earlier.
Conclusion: Key Takeaways
Now you know how to add Telegram chat to your WordPress website using the simple WPChat plugin setup process. Your visitors can reach out to you instantly using an app they already trust and use regularly.
The chat system works automatically once it’s set up, so you can focus on running your business while staying connected with your audience.
Just like that, you can provide better customer support, capture more leads, and build stronger relationships with your website visitors.
Ready to start connecting with visitors on Telegram? Get WPChat today and communicate with your site visitors.
Want to get more out of WPChat for your site? Check out this step-by-step guide on adding FAQ widgets to your website.