Running a website often feels like a 24/7 job, especially when customers expect instant answers at all hours.
I used to worry constantly about missing important customer queries during dinner or while I was sleeping.
The reality is that slow response times can kill your conversion rates faster than almost anything else. Visitors today expect instant answers, and they will simply go to a competitor if you keep them waiting.
You shouldn’t have to choose between a good night’s rest and happy customers. This is why you need to learn how to create an auto-reply chatbot for your website.
Many beginners avoid this because they fear it requires hiring expensive developers or writing complex code. I am here to tell you that is no longer the case.
In this guide, I will walk you through 5 simple steps to set up an auto-reply chatbot that works for you around the clock.
Why You Need an Auto-Reply Chatbot
Chatbots save you hours every week while giving your customers instant answers exactly when they need them.
A website chatbot lets you provide 24/7 customer service, even when you’re sleeping.
In fact, IBM reports that chatbots can answer up to 80% of routine customer questions.
This automation stops your support team from drowning in basic, repetitive inquiries, freeing them up to handle complex issues and convert website visitors into customers.
Connect to the Apps You Already Use
Modern chatbots aren’t just stuck on your website. Your chatbot can also let visitors directly reach you via popular messaging apps like WhatsApp, Telegram, or Instagram.
Connecting your chatbot to these social platforms ensures you’re always available to your audience right where they already spend their time.
What You’ll Be Able to Do After This Tutorial
By the end of this guide, you’ll be able to:
- Greet every visitor automatically with a custom welcome message
- Provide instant answers to your most common questions — 24/7
- Let visitors connect directly to your messaging app if they need more help
- Control exactly where and when the chatbot appears on your site
- Test your chatbot before it goes live so everything works perfectly
Easiest Way to Add Auto-Reply Chatbots to WordPress
The easiest way to add auto-reply chatbots to WordPress is by using the WPChat plugin.
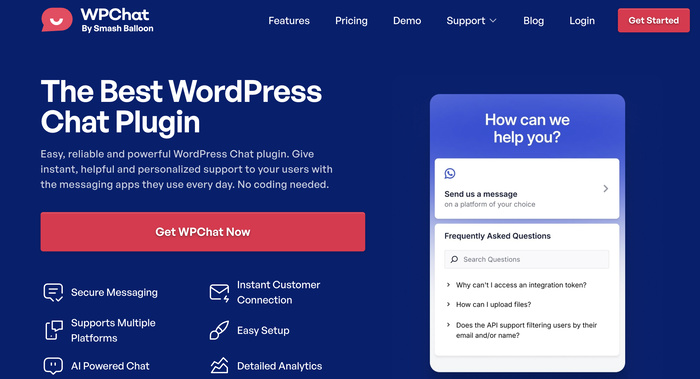
WPChat is a WordPress plugin that links your site to WhatsApp Business, making it super easy to set up automated chat conversations.
I recommend it because you can build your entire chatbot system with a simple point-and-click interface right in your WordPress dashboard — no coding needed.
This plugin is designed to make building auto-reply chatbots genuinely straightforward:
- No Coding Required: Set up your entire chatbot system through a simple point-and-click interface in your WordPress dashboard.
- Chat Integration: To let visitors reach you, you can connect your chatbots to the biggest messaging platforms out there — WhatsApp, Telegram, Instagram, and Messenger.
- Easy Chatbot Builder: Create conversation flows by adding common questions and responses and connecting them together.
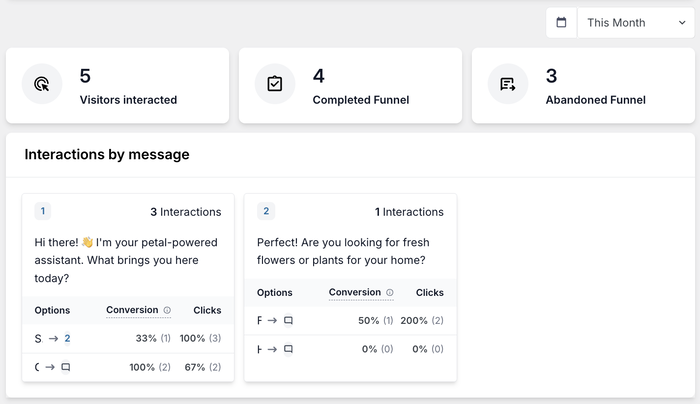
- In-Depth Analytics: Get detailed insights about your chatbot so you can find common questions and issues your visitors have.
How it Works:
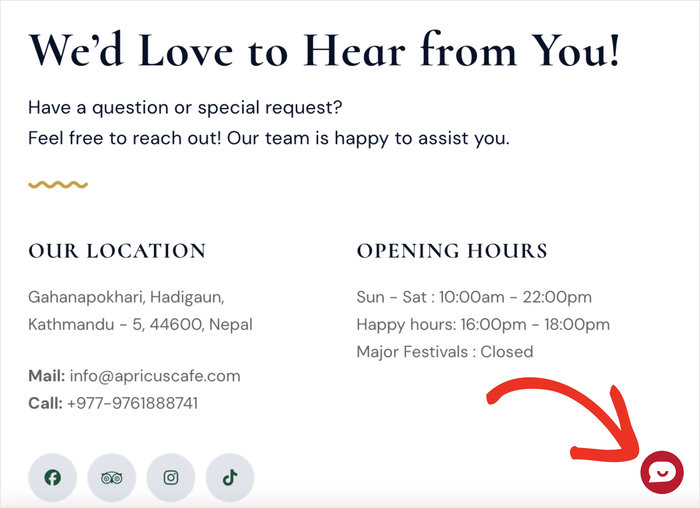
Once WPChat’s up and running, a little floating icon appears on your site. Visitors just click it to kick off a chat.
When they open the chatbot, they can pick a question or issue from the options, and the plugin instantly pops up with the answer you’ve prepared, along with more choices.
It’s a smooth, guided experience that handles routine queries without a human ever having to type a word.
Thinking about letting chatbots handle some of your visitor interactions? Get your copy of WPChat today!
Method 1: Create an Auto-Reply Chatbot Using a Plugin (Easy Way)
Now I’ll walk you through the process of setting up your auto-reply chatbot with WPChat.
Just go through each step one-by-one, and you’ll be done in just minutes.
Step 1: Install and Activate WPChat
First, you’ll need to get WPChat from here and download the plugin to your computer.
Next, log in to your WordPress dashboard and go to Plugins » Add Plugin.

From this page, you can install new plugins hosted on WordPress or using a plugin file.
Just click on the Upload Plugin button at the top and select the Choose File option.
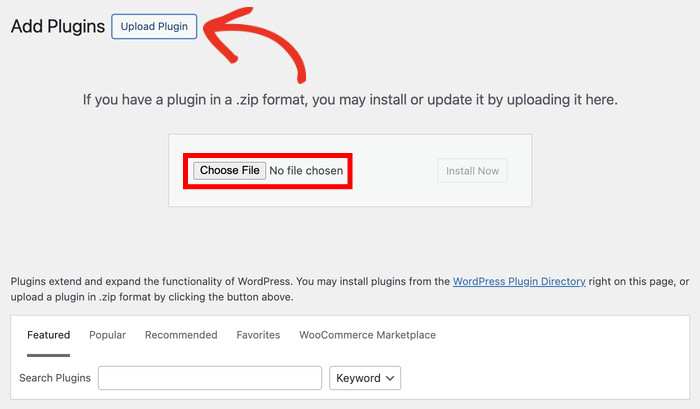
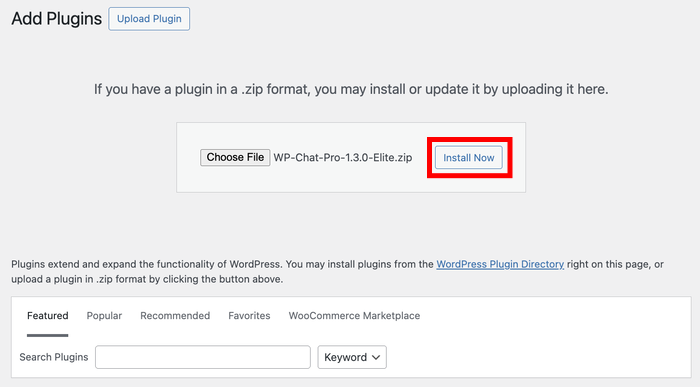
Select the WPChat plugin file that you downloaded earlier.
After you do that, click on Install Now.
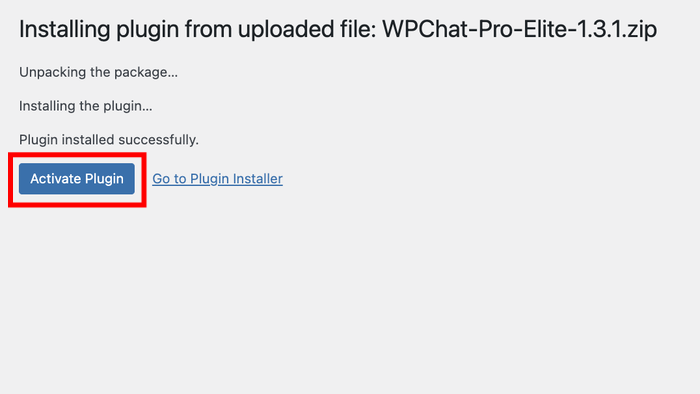
Give your website a few seconds to install the plugin. WPChat is pretty lightweight, so it should be done quickly.
Finally, you can click on Activate Plugin once the installation is over.
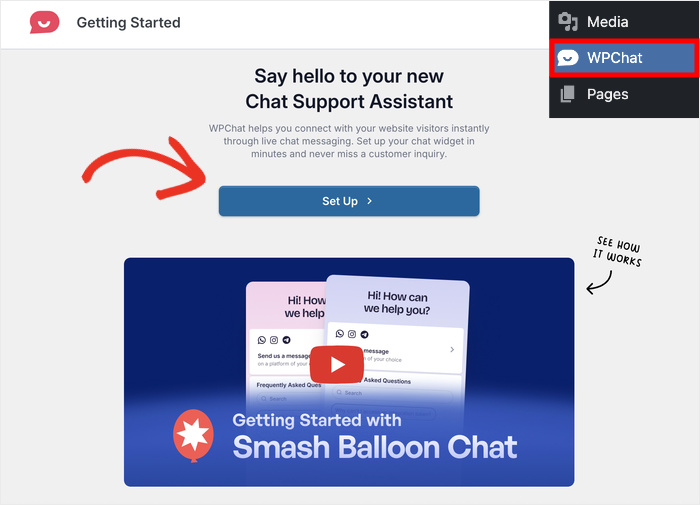
Once activated, you should see a new WPChat menu item appear in your left-hand navigation menu inside the WordPress dashboard.
Step 2: Set Up Your Chatbot
Start by clicking on the WPChat menu in your WordPress dashboard. This takes you to the main plugin settings area.
Next, select the Set Up option to begin the configuration wizard.
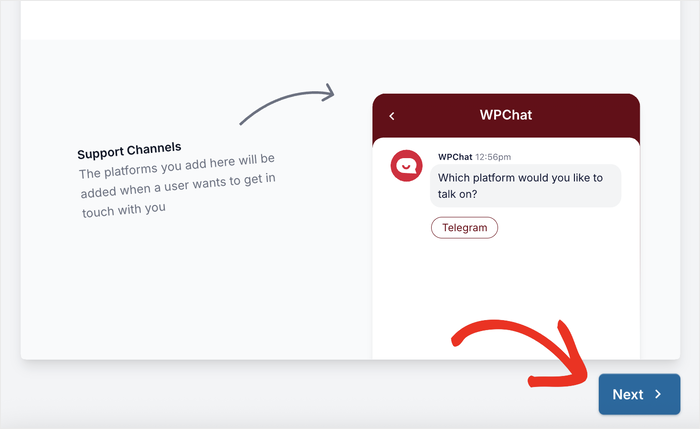
On the next page, you can connect this chatbot to different messaging apps.
That way, visitors can click a button to chat with a real person directly on WhatsApp, Messenger, Instagram, or Telegram.
Before you connect anything, here’s a quick look at the messaging platforms WPChat supports:
| Messaging App | Best For |
|---|---|
| Small businesses with mobile-first customers | |
| Facebook Messenger | Businesses with an active Facebook Page |
| Telegram | Tech-savvy audiences & international visitors |
| Businesses with an active Instagram presence |
Your chatbot handles routine questions automatically, but there’s always an option for visitors to reach a human if they need to.
Enter the contact info for the messaging apps you want to connect.
For Facebook and Instagram, it’s your username. You can also use a phone number for WhatsApp and Telegram.
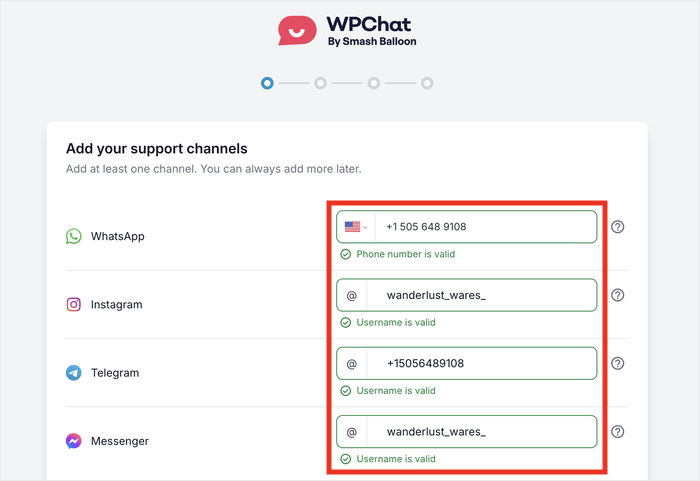
No need to connect to all of them — just enter the details for the platforms you actually use.
After entering the info, scroll down and click on Next.
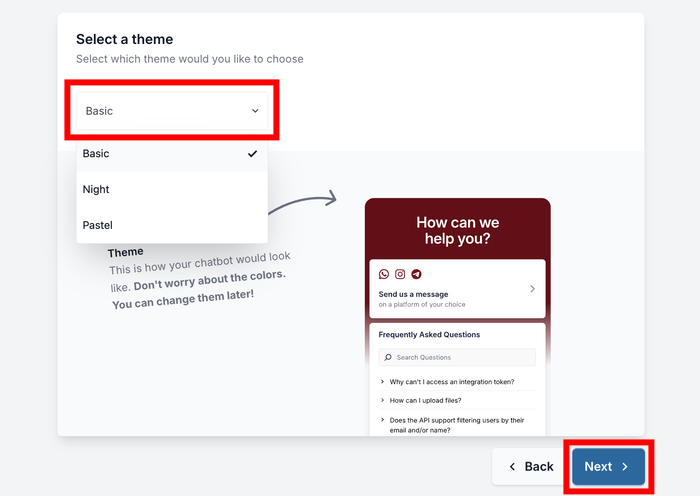
Now you’ll select a theme for your chat widget, which determines how the chatbot button appears on your website.
Use the dropdown menu to choose a theme that matches your brand colors and website design.
Click on Next again to continue.
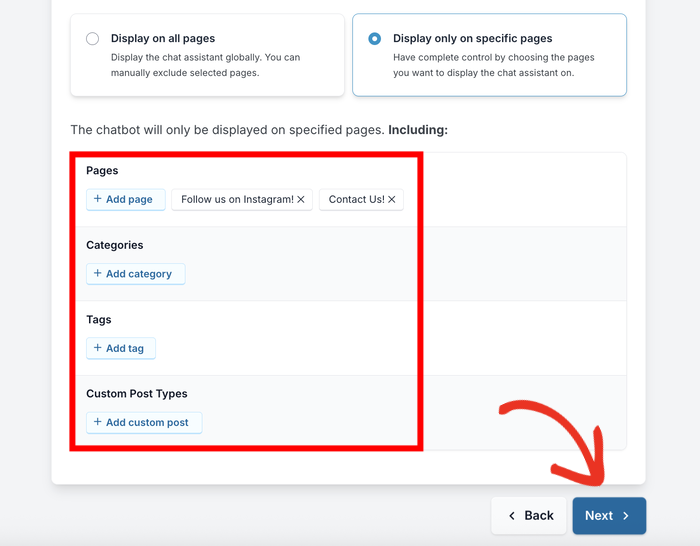
Set Chatbot Visibility Options
Getting a chatbot’s visibility right is one of the most crucial decisions you’ll make when setting up your chatbot.
If it pops up on every single page, it can feel intrusive and distract visitors. But if it’s hidden on too many pages, it’s not doing its job at all.
WPChat gives you full control over this with 2 ways of setting up visibility:
- Display on all pages
- Display only on specific pages
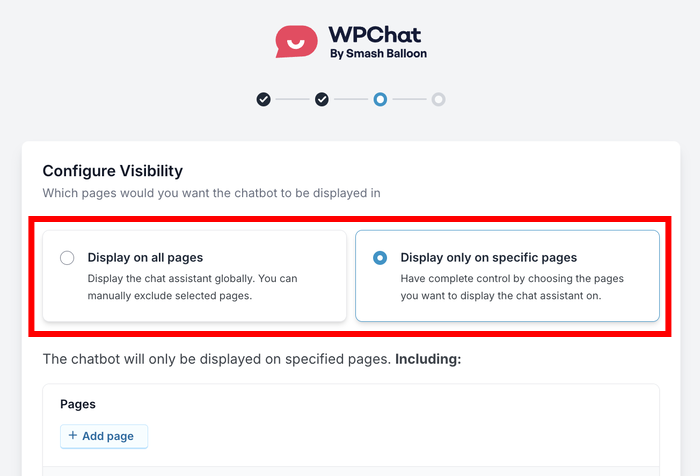
If you want more control, use the filters to include or exclude specific pages, tags, categories, and custom post types.
This ensures your chatbot only appears where it makes sense for your visitors.
After setting up filters, click on Next one more time.
For most small business sites, I’d say put the chatbot on your Home, Contact, and Pricing pages.
These are the places where visitors most often have questions, and where a quick, helpful response can make a real impact.
Now, you can enter your WPChat license key into the field. You can find this key on your WPChat account dashboard here.
Finally, click on Complete Setup to finish the initial configuration.
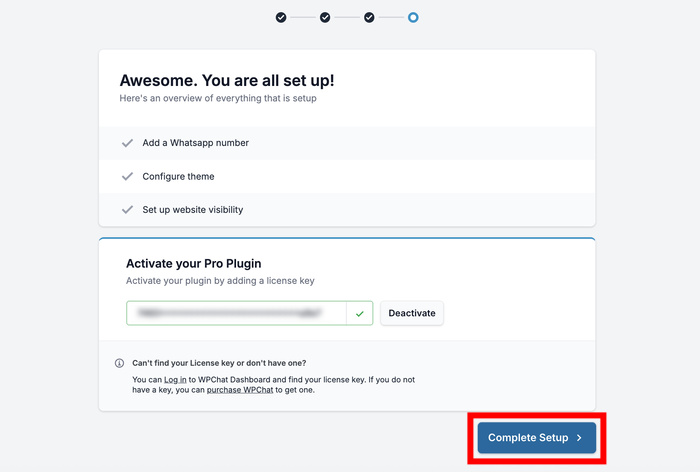
Your chatbot widget is now active on your website, though you still need to set up the automated responses
Step 3: Set Up Chatbot Responses
Now it’s time to create the automated conversation flow that will respond to your visitors.
To make this easy for you, WPChat comes with the Chat Funnels feature.
How Chat Funnels Work
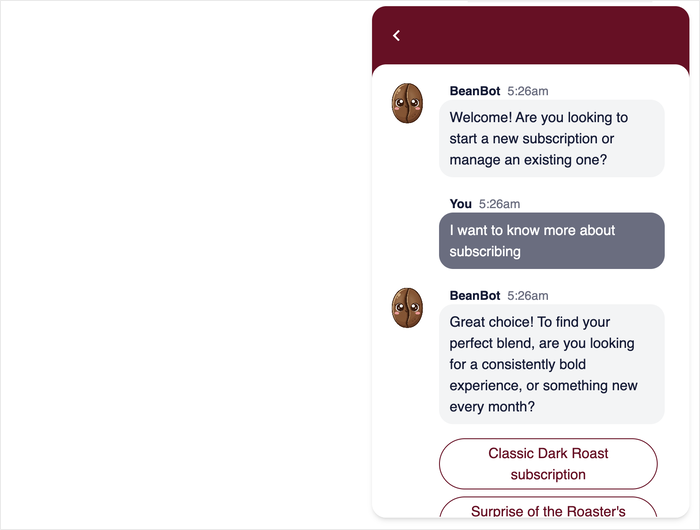
Think of WPChat Funnels as a digital “Choose Your Own Adventure” book for your visitors. Here’s how it works:
1. Set up a Welcome Message
You start by creating an automatic greeting, like “How can we help you today?” This is the first thing a visitor sees when they open the chat.
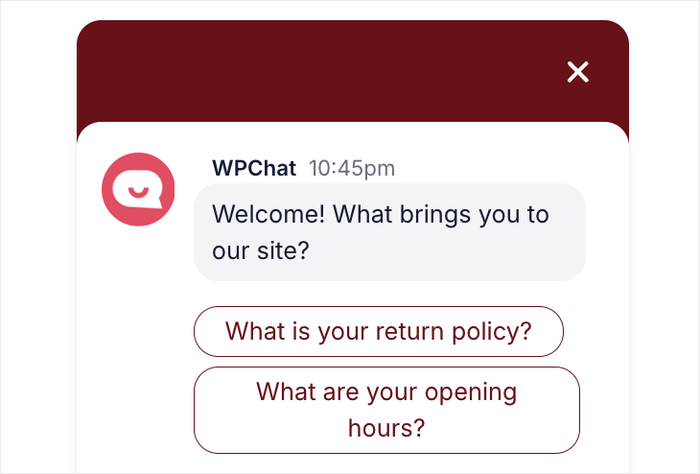
2. Give Visitors Options
Under your welcome message, you add clickable buttons. For example, you can give them two choices:
- Option 1: “I have a sales question.”
- Option 2: “I need technical support.”
3. Link the Replies
This is the “funnel” part. For each option, you choose where the visitor goes next:
- To another message: If they click “Pricing,” the bot instantly sends a new message with your price list and two more options (like “Monthly” or “Annual”).
- To Customer Care: If the bot can’t solve it, you can set the final button to alert a real person to jump in and take over.
You can create more messages like this and have entire conversations prepared in advance for your website visitors.
Ready to give it a shot and set up auto replies for your visitors?
Go to WPChat » Chat Funnels in your WordPress dashboard and click on New Funnel.
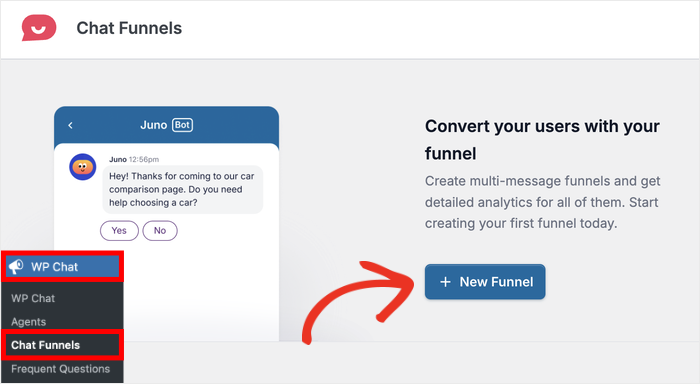
This opens the funnel builder, where you’ll design your chatbot’s dialogue.
Enter a descriptive name in the Funnel Name field, such as “Customer Support” or “Product Inquiry.”
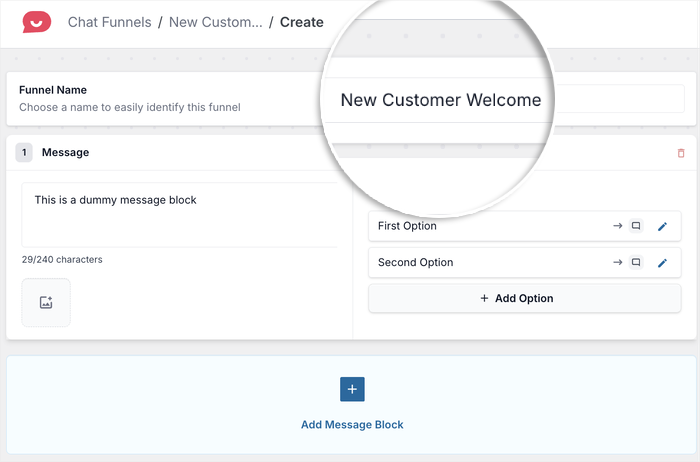
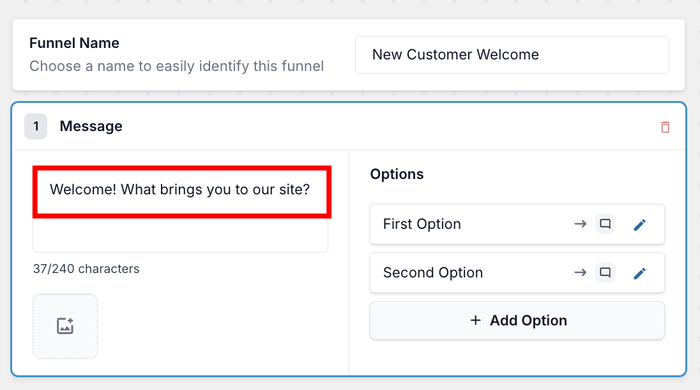
Next, enter the first message your chatbot will send to visitors.
Consider your chatbot’s intro message like the greeting at the front door of your shop. You want it to be warm, clear, and immediately useful.
Not sure what to write? Here are three examples you can copy and paste, depending on your type of website:
| Website Type | Example Intro Message |
|---|---|
| Small Business / Service | “👋 Hi there! Welcome to [Your Business Name]. Have a question? Ask me anything — I’m here 24/7!” |
| E-commerce / Online Store | “👋 Hey! Looking for something specific? Ask me about products, shipping, or returns.” |
| Blog / Content Site | “Hi! 👋 Looking for something? I can help you find the right article or answer your questions.” |
Feel free to swap in your own business name and adjust the wording to match your brand’s personality.
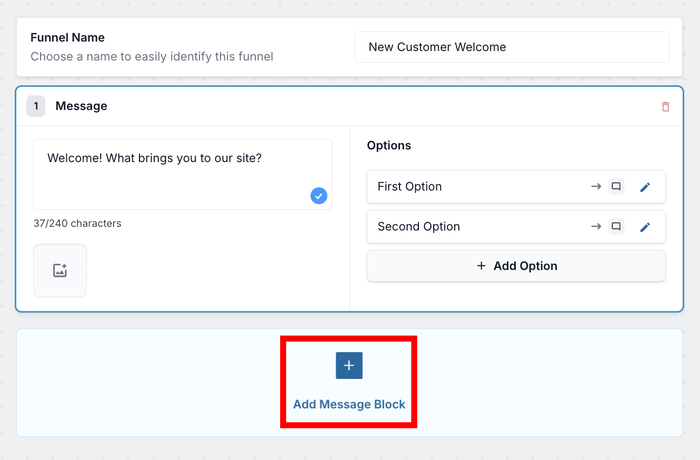
Once you’ve settled on a message, enter it below the Message option.
Click the Add Message button to create your second message.
This could be a follow-up question or provide options for visitors to choose from.
Just like before, enter your second message text.
For this example, I’m using the second message to answer a question about product replacements.
Don’t worry — we’ll set up visitor responses that will lead them to this message in the next step.
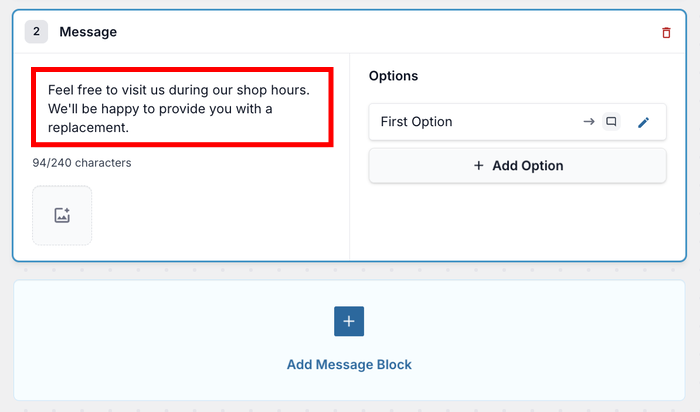
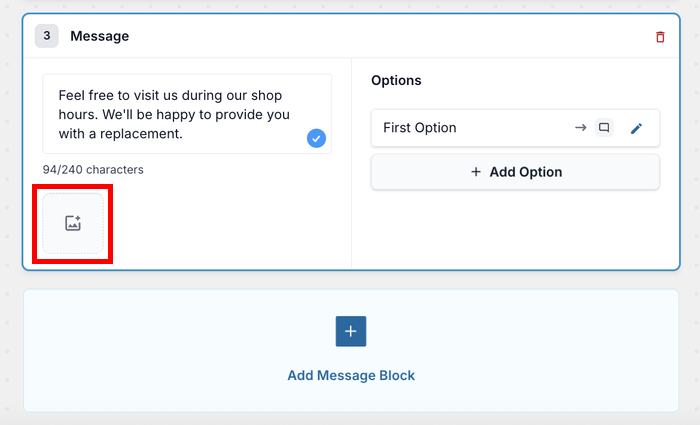
If you want to make your chatbot more engaging, click the Image icon and upload a photo.
Adding images like product photos or helpful diagrams can make responses clearer and more professional.
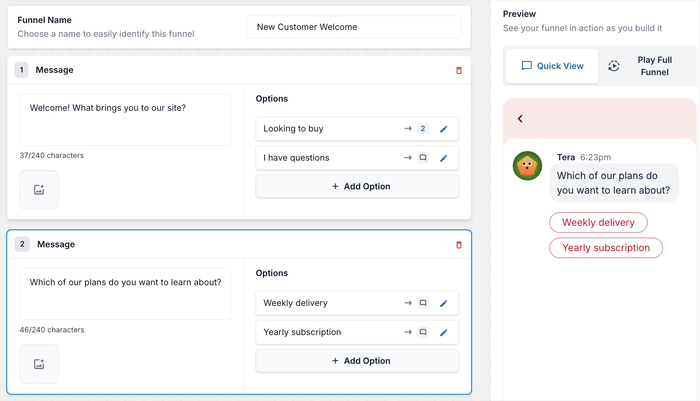
Step 4: Link Different Responses Together
This is where we create replies that your visitors can select. You can then link a reply to another message.
So, if a visitor selects “I want to learn about the pricing plans,” you can connect it to the message that explains your pricing options.
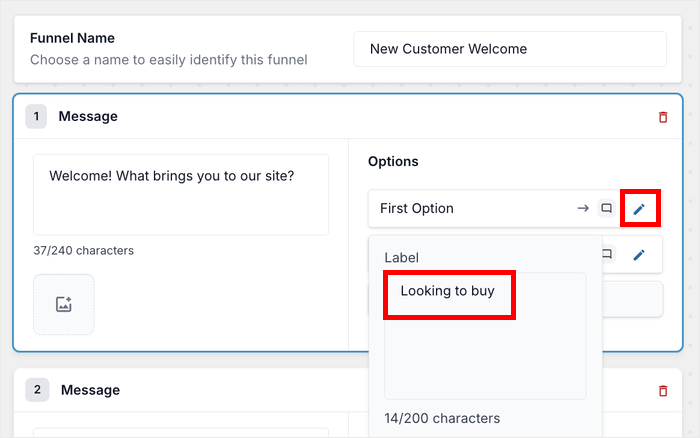
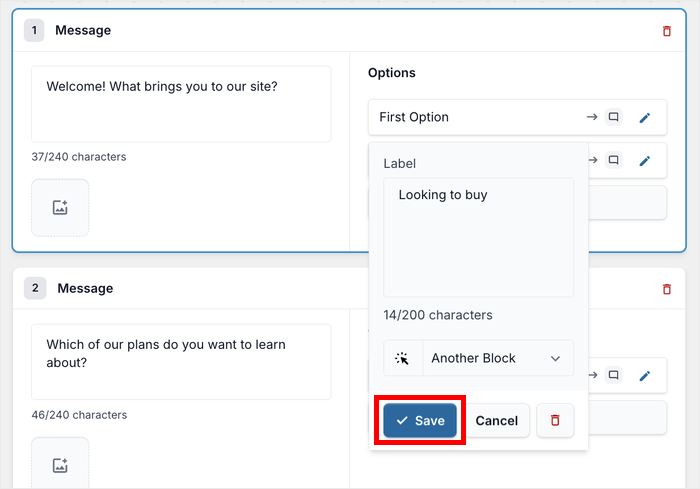
First, click on the Edit icon next to a reply option in your funnel.
Enter the text for the response option that visitors will see. Make it clear and action-oriented, like “Check Order Status” or “Request a Quote.”
Next, you can use the dropdown menu to decide where the response will lead.
You can direct visitors to another message, a specific page on your website, or even connect them to a live agent.
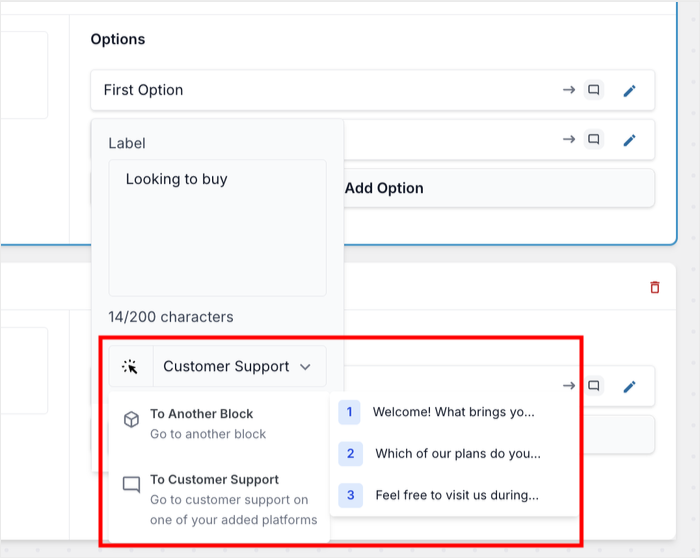
After picking where this response will lead, click on Save to store your changes.
Just like that, the connection between messages is properly established.
You can repeat these steps to add more response options and messages.
To give you a head start, here are four real-world questions you can adapt for your own chatbot:
| If a Visitor Selects… | Your Auto-Reply Should Say… |
|---|---|
| “What are your prices?” | “Our plans start at $X/month. You can see full pricing here: [link to pricing page]. Is there anything else I can help you with?” |
| “What are your opening hours?” | “We’re open Monday–Friday, 9am–5pm EST. Outside those hours? Leave a message, and we’ll reply ASAP! Do you have any other questions?” |
| “How can I contact you?” | “You can reach us at [email] or call us at [phone number]. We typically respond within 24 hours. Can I help you with anything else?” |
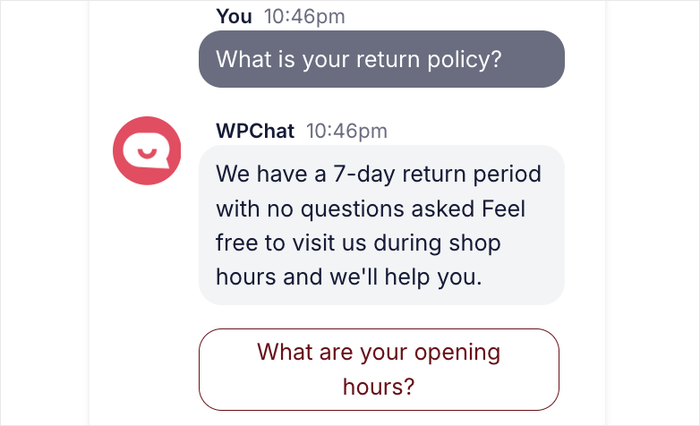
| “What is your return policy?” | “We have a 30-day hassle-free return policy. Learn more here: [link to return policy page]. Is there anything else you’d like to know?” |
Remember to check the live preview on the right side of your screen.
This shows you exactly how visitors will experience the conversation flow, helping you catch any confusing parts.
Once you’re satisfied with how everything connects, click on Save Changes.
Step 5: Select Visibility Options for Chatbot
The final step is controlling where the conversation flow you just created will appear on your website.
That way, you can tailor the auto-replies for specific pages, then create new conversation flows for other parts of your site.
Use the filter options to select specific Pages, Categories, Tags, and Custom Post Types where you want the chatbot to appear.
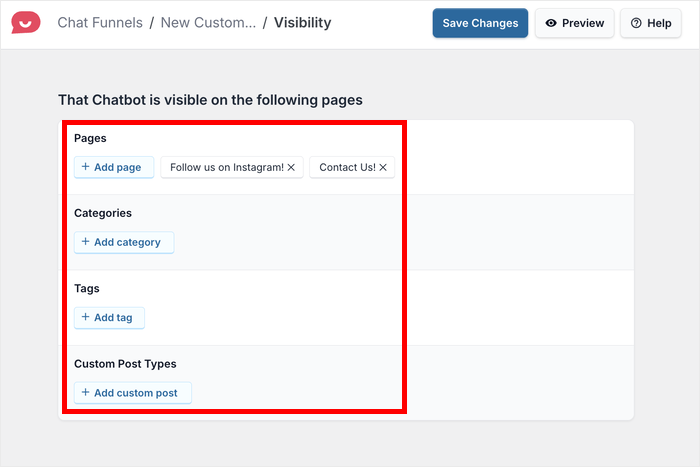
For example, you might want it on product pages but not on your blog posts.
I recommend starting with high-traffic pages like your homepage, contact page, and product pages.
Finally, click on Save Changes to apply your visibility settings. Your auto-reply chatbot is now fully configured and working on your WordPress website.
Tips for Getting the Most Out of Your Website Chatbot
Now that your auto-reply chatbot is up and running, you’ll want to continuously improve it based on real visitor interactions.
WPChat provides analytics tools that help you understand how people are using your chatbot.
Here are some best practices to get the most out of your chatbot:
- Review your chat logs regularly to see which questions come up most often, then add or refine automated responses to handle them better.
- Visitors prefer quick, scannable responses over long paragraphs, so break complex information into multiple short messages.
- As your business changes or new questions arise, adjust your chatbot responses to stay current and relevant.
- Regularly go through the entire conversation flow yourself to catch any confusing paths or broken links.
Method 2: Manually Editing Your Theme Files (The Hard Way)
You can paste chatbot scripts directly into your WordPress header files, but one typo can crash your entire site.
To do this safely, you have to create a child theme first so future WordPress updates don’t wipe out your chatbot code entirely.
Even with a child theme, I want to warn you that it’s incredibly easy to accidentally delete a vital piece of PHP while editing these files, which can completely lock you out of your site.
Because of this high risk, I don’t recommend this manual method unless you’re a seasoned developer who feels entirely comfortable troubleshooting server errors.
Conclusion
Setting up an auto-reply chatbot for your website doesn’t have to be complicated or expensive.
With WPChat, you can create a professional chatbot system in just a few simple steps without writing any code.
This means you can finally stop worrying about missing important customer inquiries and focus on growing your business.
Ready to transform your website with a chatbot? Get started with WPChat today!
Want to make your chatbots even more engaging? Check out our beginner’s guide on customizing your chat assistant.