One of the best things about Elementor is the total control you have over your website’s design.
But even after creating a beautiful website, you can still have visitors leaving without signing up or making a purchase. A common reason for that is unanswered questions.
A visitor who is confused or unsure will rarely take the time to fill out a contact form and wait for an email response.
This is where adding Facebook Messenger to Elementor becomes a simple and powerful solution.
By adding Facebook Messenger, you can connect with visitors using a chat interface they already use every day. It feels familiar and trustworthy, making people more likely to reach out.
I will walk you through the exact steps to implement this on your site. It’s a small addition that makes your Elementor pages even more effective at converting visitors.
Why Add Facebook Messenger to Your Elementor Site
- Showcase Your Expertise: Respond to questions about your services in real-time, building trust before visitors leave your site.
- Reduce Abandoned Carts: Catch visitors before they leave by making it easy for them to ask questions without filling out forms.
- Easy Customer Support: Explain features, address concerns, and solve customer issues to turn more people into brand ambassadors.
- Familiar Platform for Visitors: People trust Messenger because they use it daily, making them more comfortable starting a conversation with your business.
- Allows Follow-up Messages: Stay connected with visitors after they leave your site by sharing exclusive offers, new products, or important news.
The best part is that you don’t need any coding skills to add this feature to your Elementor website.
I’ll show you exactly how to set it up in just a few minutes using a simple WordPress plugin.
Easy Way of Integrating Elementor & Facebook Messenger
When it comes to adding Facebook Messenger to your website, you have 2 options to pick from: Manual or using a WordPress plugin.
Unfortunately, the manual method involves code and configuring Facebook’s API settings.
This can get complicated quickly, especially if you’re not comfortable working with code. On top of that, you’ll have to spend a lot of time setting it up and maintaining it.
That’s why I recommend using WPChat instead. It’s a WordPress chat plugin that handles all the technical setup for you, making the process much simpler.
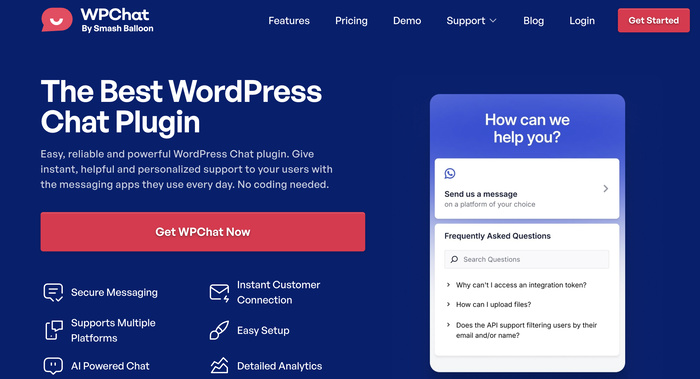
WPChat is built specifically for adding chat features to WordPress sites and integrates smoothly with Elementor.
Here’s what makes WPChat a solid choice for this guide:
- Multi-Platform Support: Add chat options for Facebook Messenger, Telegram, Instagram, and WhatsApp all from one plugin.
- Elementor Compatible: Works perfectly with all the popular site builder plugins for WordPress, including Elementor.
- Team Management Features: Create multiple agents to represent your support team members, giving your chat a personal, human touch.

- No Coding Required: Create and customize your Facebook chat assistant using a visual interface with point-and-click controls.
- Smart Workload Distribution: Automatically assign incoming chats to different agents, ensuring balanced workload and faster response times.
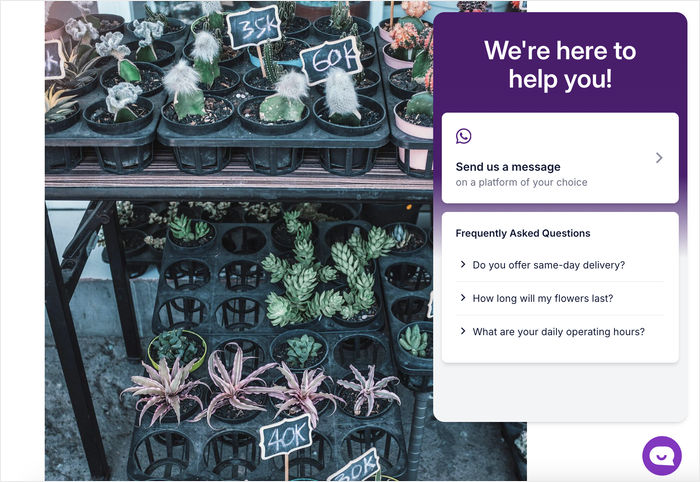
- Built-in FAQs: Set up automated responses to common questions and create conversation flows that capture leads while you sleep.

You simply connect your Facebook Messenger account, customize how the chat widget looks, and choose where it appears on your site.
Get your copy of WPChat today and start connecting with your visitors through Facebook Messenger.
How to Add Facebook Messenger to Elementor (in 5 Steps)
Let me walk you through the exact steps to set up a chat assistant for Facebook Messenger.
The entire process takes just a few minutes, and you don’t have to touch a single line of code.
Step 1: Add WPChat Plugin to Elementor Website
First, get your copy of WPChat here, then install and activate this plugin on your website.
If you need help with this step, check out this beginner’s guide on how to install a WordPress plugin.
Once the plugin is activated, you’re ready to create your chat assistant and connect it to Facebook Messenger.
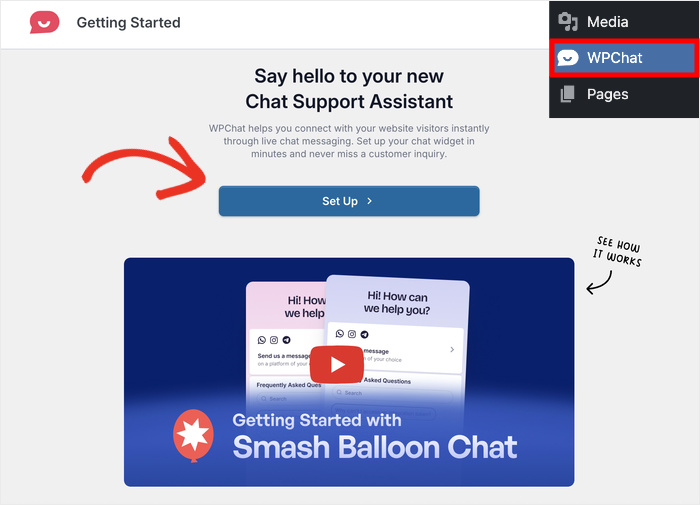
Step 2: Create a New Chat Assistant
After activating WPChat, you’ll see a new WPChat menu item in your WordPress dashboard. Click on it to open the plugin settings.
On the WPChat screen, click the Set Up button to start creating your chat assistant.
From here, you can enter the username for your Facebook Messenger.
You can also enter contact details for any of the other messaging apps here.
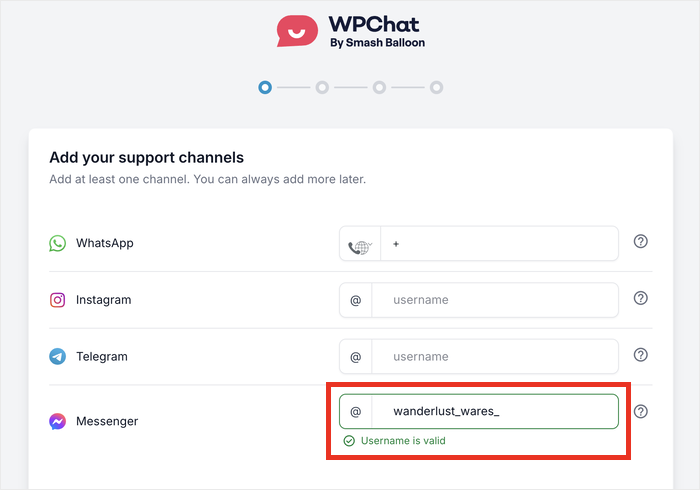
As you can see, WPChat gives your visitors a lot of ways to reach out to you from your Elementor site.
Simply enter your number and click on Next to continue.
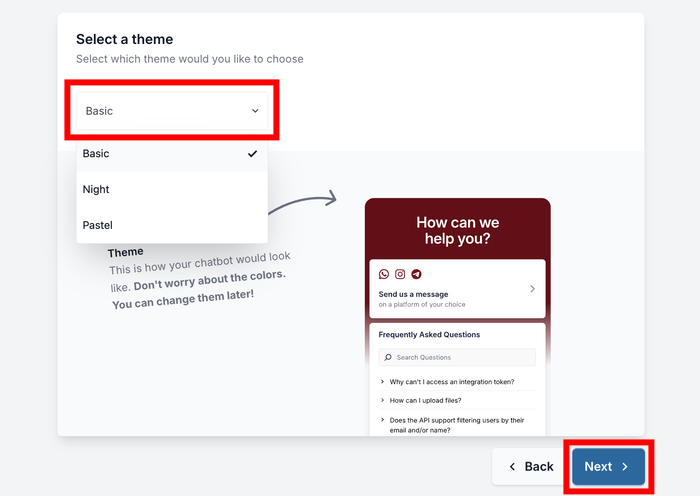
After that, you can choose a theme for your chat assistant. WPChat offers 3 pre-designed options: Basic, Night, and Pastel.
Once you’ve selected a theme, click on Next to move to the visibility settings.
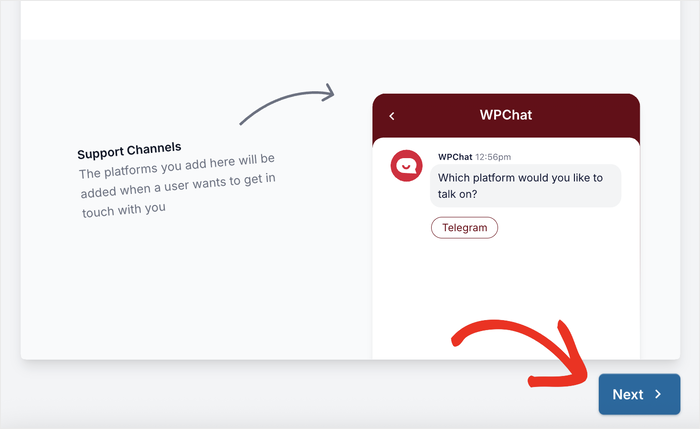
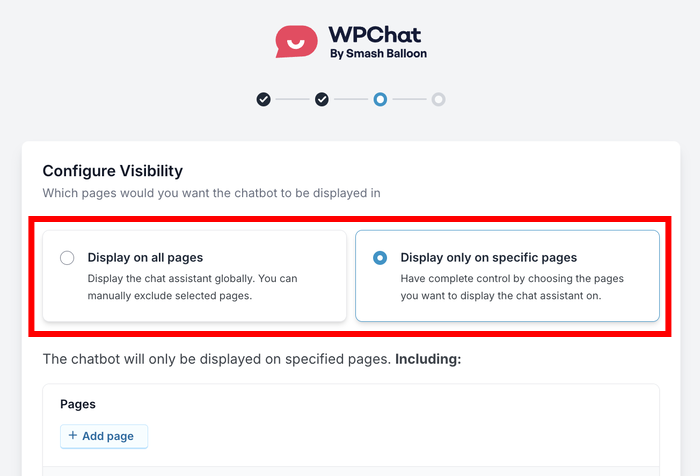
Step 3: Choose Visibility for Facebook Chat Assistant
Now you’ll decide where the chat option appears on your Elementor site. You have 2 main options for that: display on all pages or display only on specific pages.
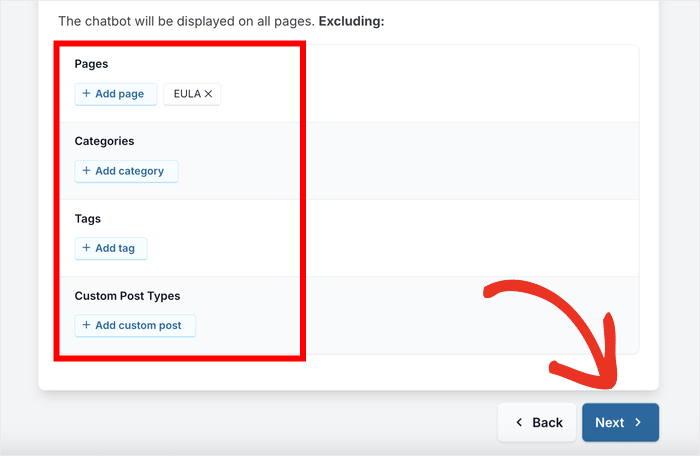
If you picked the display on all pages option, you can scroll down and exclude certain parts of your website.
Just pick the pages, categories, tags, or custom post types where you don’t want to show the chat assistant.
After setting up your filters, click on Next to continue.
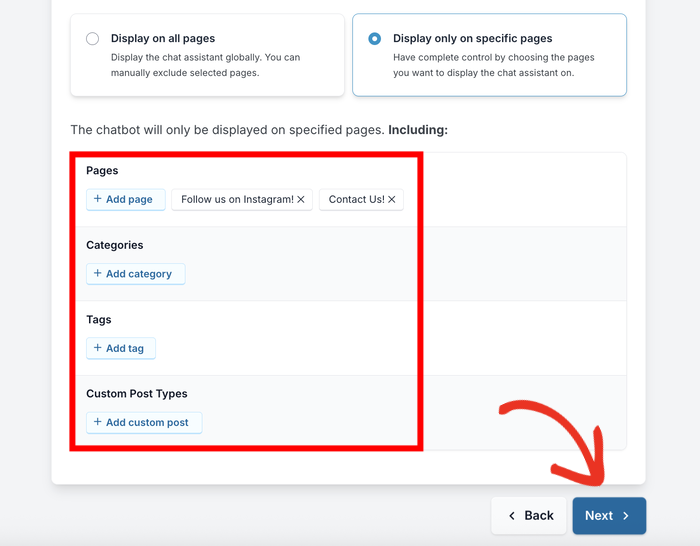
In case you choose to display only on specific pages, you can use the filters to control where the assistant shows up.
Like before, set up your filters and click on the Next button.
Finally, you can enter the license key that you received with the WPChat plugin.
Enter the key and click on Finish Setup and you’re done with the initial setup.
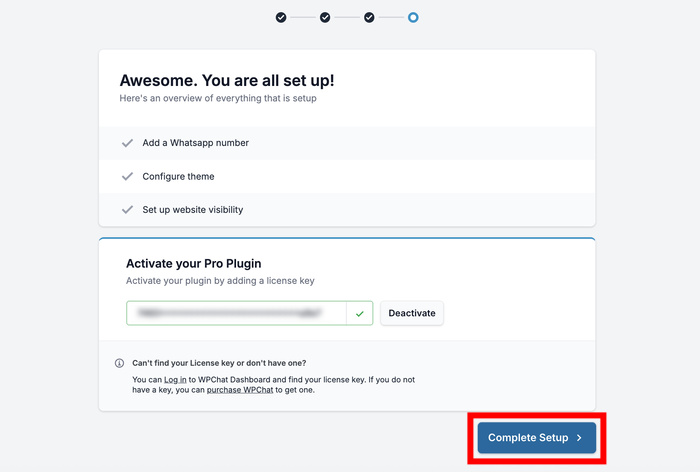
Just like that, your Messenger chat assistant is now created and ready to be customized.
Step 4: Customize Facebook Chat Assistant
On the WPChat dashboard, click the Customize button.
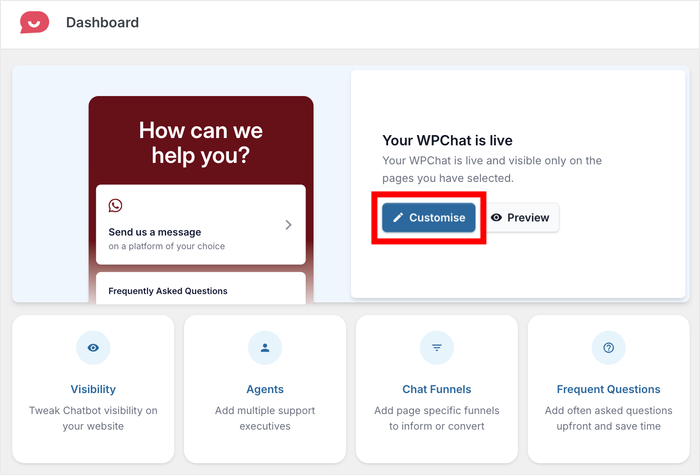
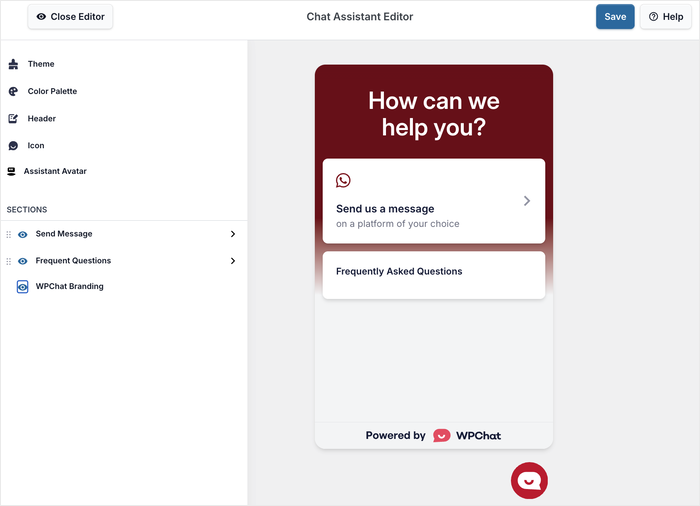
This opens the live editor, where you’ll see customization options in the left sidebar.
To track your changes, you’ll see a live preview of your Messenger chat assistant on the right.
Let’s start by adjusting the colors to show you how the customizer works.
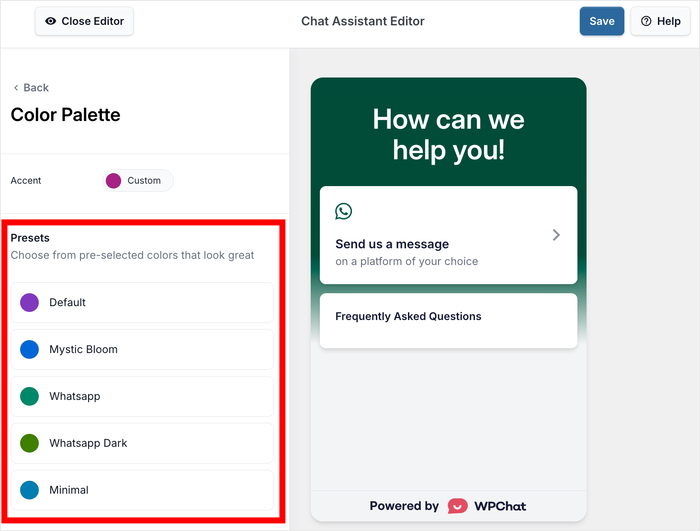
Select Color Palette in the left menu to see your options.
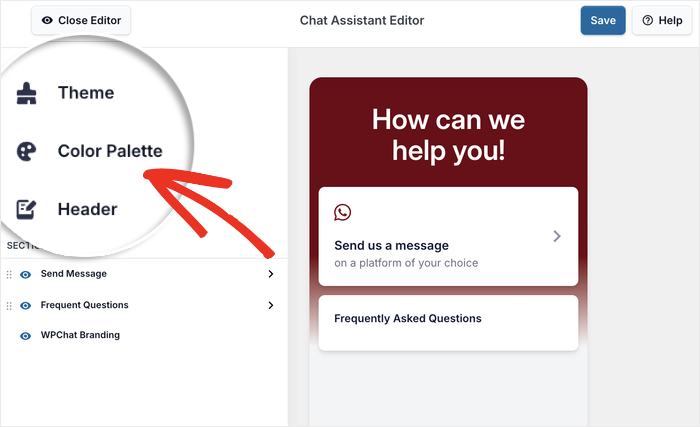
WPChat provides several pre-made color palettes that you can apply with one click:
- Default
- Mystic Bloom
- WhatsApp Dark
- Minimal
If you want even more control, click on Custom and pick the color yourself.
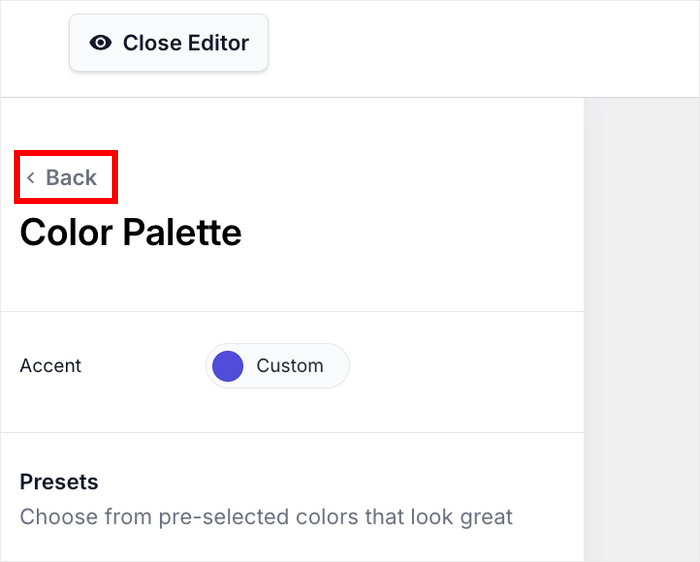
Once you’re satisfied with your color choices, click on Save to confirm the changes.
Next, click on the Back button to return to the main customization menu.
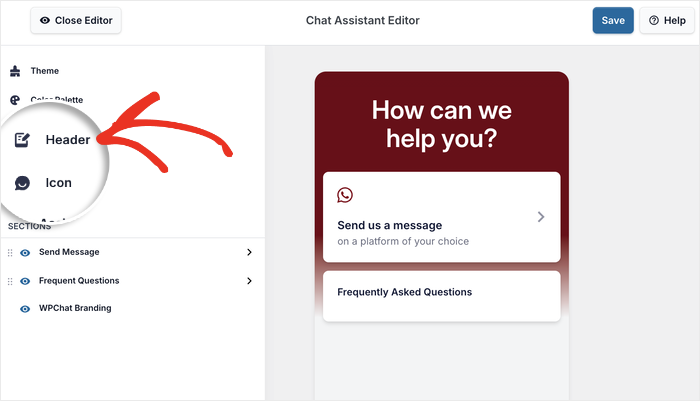
For the next bit of customization, select Header.
This is where you can add a greeting message that visitors will see after clicking your chat assistant.
Enter a friendly greeting into the Heading field.
Remember to keep it short and sweet so visitors can easily skim through it.
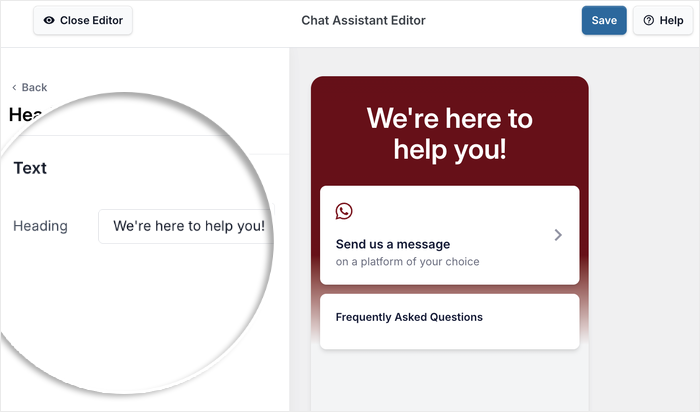
Like before, click on Save to keep your changes.
As you can see, it’s pretty easy to customize your Messenger chat assistant — all without touching any kind of code.
You can also try out other customization options, including the assistant avatar, chat icon, visible sections, and more.
Step 5: Set Up Your Chat Agent
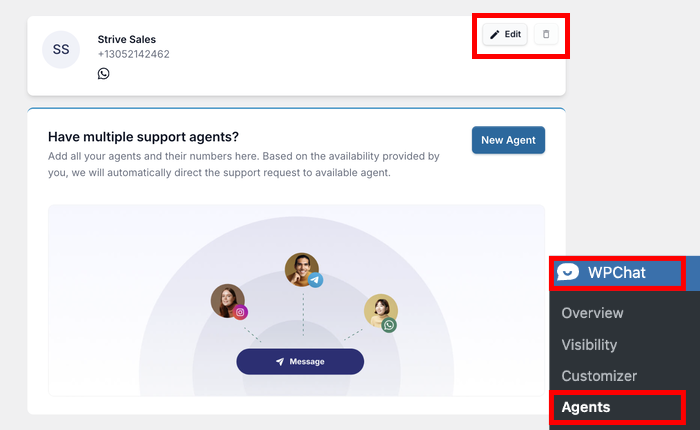
In your WordPress dashboard, navigate to the WPChat » Agents menu.
These agents can represent your support team, complete with matching photos and names.
To continue, click on the Edit button.
First, let’s personalize this agent.
Click on Upload to select an image that will represent you or your team.
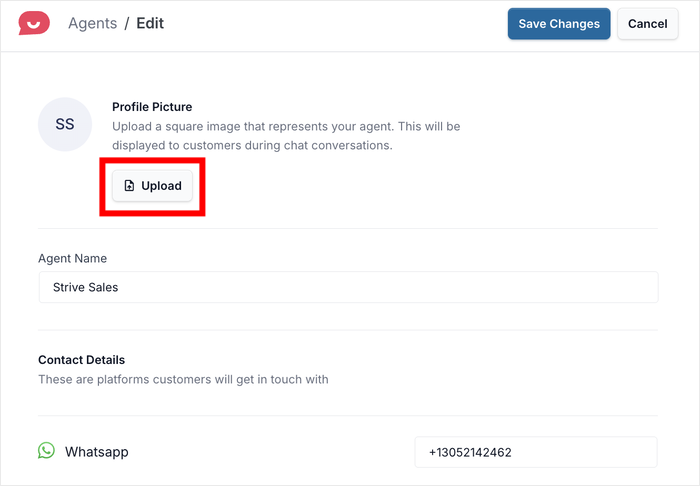
This could be a professional photo of yourself or your company logo.
Next, enter a fitting name for the agent in the Name field.
You can also update the contact info for Facebook or other messaging platforms from here.
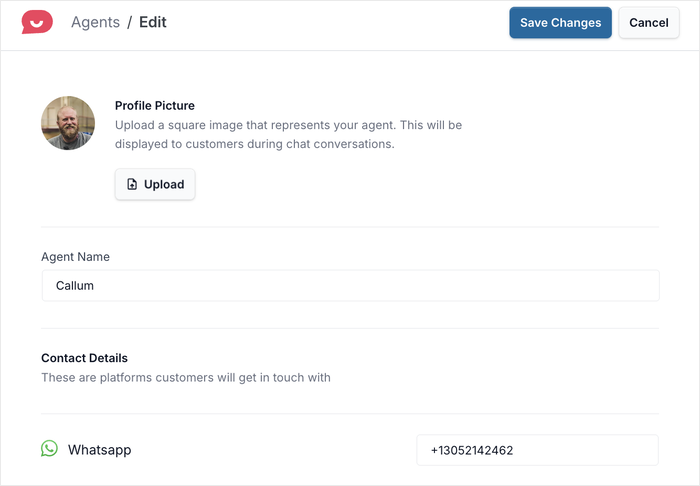
Once you’ve done that, click on the Save Changes button at the top of the page.
That’s it! Your Facebook Messenger chat assistant is now live on your Elementor site.
Visitors can now click on the assistant to start chatting with you using Facebook Messenger — just like that.
Conclusion & Final Thoughts
Now you know how to add Facebook Messenger to your Elementor website the easy way. Just like that, you can easily connect with visitors, build trust, boost sales, and much more.
If you want to take your Elementor website to the next level, you can use WPChat to add FAQs as well. That way, your website visitors can get instant answers wherever they want.
Ready to connect with visitors in real-time? Get started with WPChat today!
Want to make your chat assistant look even more engaging? You can also check out our guide on how to customize your WordPress chat assistant.