
Most visitors who want to reach you on Telegram won’t go hunting for your username. They’ll just leave.
I’ve set this up on WordPress sites before and the difference is immediate: once there’s a proper Telegram chat button on the page, visitors actually use it. Without one, they scroll past and move on.
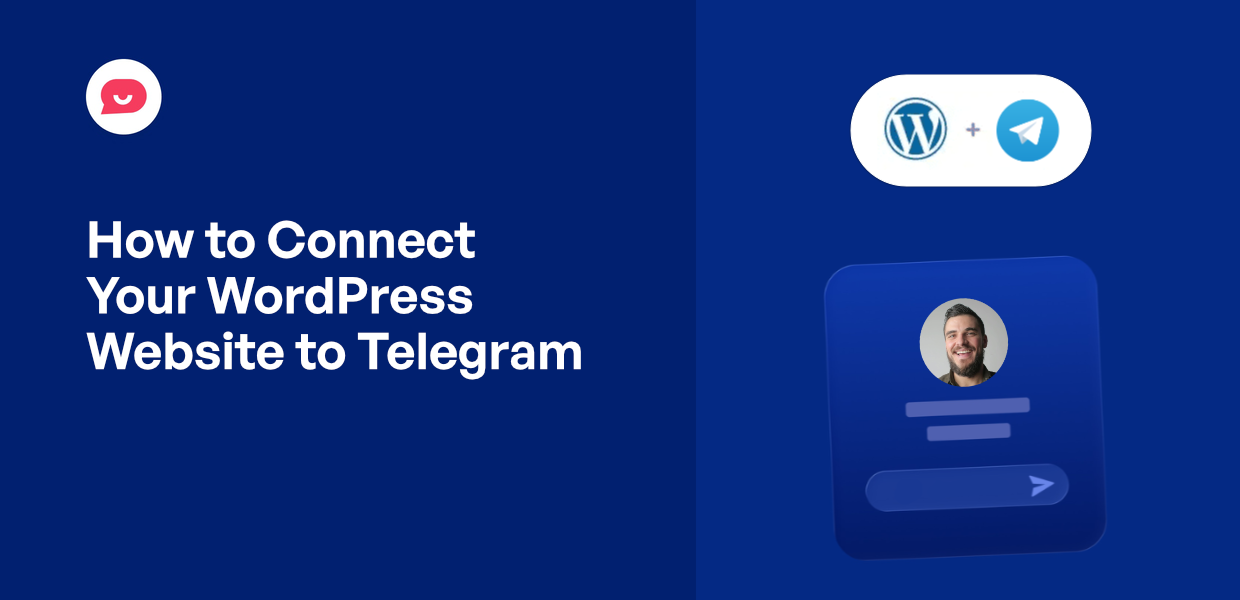
In this guide, I’ll walk you through how to connect your WordPress website to Telegram using WPChat, the WordPress click-to-chat plugin from Smash Balloon.
The setup takes about 5 minutes and requires no coding.
One thing worth knowing before we start: WPChat is not an in-dashboard live chat tool. There’s no inbox to manage and no tickets to log.
When a visitor clicks the chat button on your site, it opens a Telegram conversation in the app they already use. The chat happens where they already are.
In this Article:
- How to Connect WordPress to Telegram: The Quick Answer
- 2 Ways to Connect WordPress to Telegram
- How Telegram Can Help Your Business Grow
- Why WPChat Is the Best Way to Connect to Telegram
- How to Connect WordPress Websites to Your Telegram
- WPChat vs. Other Ways to Connect WordPress to Telegram
- Frequently Asked Questions About Connecting WordPress to Telegram
- Start Getting Telegram Conversations Now
How to Connect WordPress to Telegram: The Quick Answer
WPChat is a free WordPress plugin that adds a live chat widget to your website, allowing visitors to contact you through messaging apps like Telegram. Here’s the complete process at a glance:
- Install the WPChat plugin and activate it on your site.
- Go to WPChat settings in your WordPress dashboard.
- Select Telegram as your channel and enter your Telegram number.
- Customize the widget appearance, position, color, and display rules.
- Click on Save Changes and test the widget on your live site.

2 Ways to Connect WordPress to Telegram
Before we start, it’s worth knowing that “connect WordPress to Telegram” means two very different things depending on what you’re trying to do.
| WPChat (Recommended) | WP Telegram Plugin | |
|---|---|---|
| What does it do? | Adds a chat button so visitors can message you live on Telegram | Automatically posts content and sends admin alerts to a Telegram channel |
| Can visitors reach you directly? | Yes. One click opens a live Telegram conversation | No, one-way only |
| Do you need to create a Telegram bot? | No. Just your phone number or username | Yes, requires BotFather setup |
| Is coding required? | No | No |
| Setup time | About 5 minutes | 15-30 minutes |
| Best for | Any site that wants visitors to be able to reach you directly on Telegram | Blogs or stores that want to broadcast posts or receive admin notifications |
If you want visitors to be able to reach you directly from your site, WPChat is what you need. The WP Telegram plugin is a solid tool but it’s built for broadcasting and automation, not live visitor conversations.
The rest of this guide covers the WPChat setup.
How Telegram Can Help Your Business Grow
Telegram can be a surprisingly powerful tool for businesses looking to connect with their audience in real-time.
In fact, here are a few examples to show how adding a Telegram chat option helps your brand:
- Safe and Secure: Telegram uses powerful encryption for all your conversations, helping you build trust and comply with privacy regulations.
- Popular Overseas: With over 900 million users worldwide, Telegram helps you reach international customers who prefer this platform over email or other messaging apps.
- Large attachments: Customers can share screenshots of their issues and files up to 2GB, letting you chat without worrying about upload sizes.
- Allows You to Follow Up: Every conversation is saved in your chat history, so you can easily reference past discussions and follow up with customers to close sales or provide better support.
On top of that, Telegram notifications are instant. You’ll know the moment a customer reaches out, allowing you to respond quickly and show them you’re available when they need help.
Why WPChat Is the Best Way to Connect to Telegram
You could simply share your Telegram username on your website, but that approach has a major downside.
Visitors have to manually search for you on Telegram, which creates unnecessary friction and often leads to lost connections.
I recommend using WPChat because it eliminates this hassle entirely.

WPChat lets you create a professional chat widget that sits on your WordPress website, making it incredibly easy for visitors to start a conversation.
The widget supports Telegram, Facebook Messenger, Instagram, and WhatsApp, so you’re meeting customers on their favorite platform.
Beyond the basic connection, WPChat includes features that make customer communication more efficient:
- Add FAQs: Display common questions and answers right in your chat widget, helping visitors find information instantly without waiting for a response.
- Auto Replies with Chat Funnels: Set up automated responses that guide customers through common questions or direct them to the right department based on their needs.
- Get In-Depth Analytics: Track how many people are using your chat widget, which pages generate the most conversations, and when your busiest contact times are.

- Built for Teamwork: Create separate agents for different members of your support team so customers always reach the right person for their question.
- Powerful Customization: Use themes and a live editor to customize your Telegram widget so it matches your brand colors and style without touching any code.
How a WPChat Telegram Widget Works
When a visitor opens your website, they’ll see a floating button in the corner. You can control the parts of your website where this button shows up.
Clicking on the button will open a widget that shows the ways of chatting with you. You can also choose to show FAQs here if you like.

To continue, they can simply select Telegram from the chat options on the widget.
After that, WPChat will redirect them into Telegram chat, where they can immediately start typing and sending messages.

As you can see, this lets you add a chat feature while making sure your site is lightweight and secure.
WPChat essentially turns your website into a professional communication hub. Instead of hoping visitors will find you on Telegram, you’re putting the connection right in front of them.
Get your copy of WPChat here and start connecting with visitors today!
How to Connect WordPress Websites to Your Telegram
Now that you understand why Telegram and WPChat can be valuable for your business, let me walk you through the exact steps to set everything up.
The process is straightforward, and you’ll have your Telegram connection live on your WordPress site in just a few minutes.
Here’s what the full process looks like. You’ll install WPChat, connect your Telegram account, choose where the widget appears on your site, set up your agents, customize the widget to match your brand, then configure availability hours so messages only go to agents who are actually online.
The whole setup takes about 5 minutes.
Step 1: Install and Activate WPChat on Your Website
First, you’ll need to get the WPChat plugin to connect your WordPress site to Telegram.
Start by getting a copy of WPChat here, then install and activate it on your website.
Note: In case you need help with this, there’s a useful beginner guide on how to install WordPress plugins that you can check out.
Step 2: Connect Your Widget to Telegram
Now it’s time to set up the widget that will connect WordPress to Telegram.
Navigate to the WPChat menu in your WordPress dashboard and click on the Setup button to launch the setup wizard.

This is where the connection happens — enter your phone number or username that’s connected to Telegram.
The setup wizard also lets you connect to other popular messaging platforms: WhatsApp, Messenger, and Instagram.

As a result, your visitors will have other ways of reaching you.
From here, scroll down and click on the Next button.

On the next screen, pick a visual theme for your Telegram chat widget.
WPChat offers several pre-designed themes that you can customize in detail later.
So, just choose one that’s close to your brand style and click Next.

Step 3: Pick Where the Telegram Widget is Visible
Now you need to decide where visitors can connect to your Telegram from your WordPress site.
To give you control, WPChat comes with 2 visibility options: Display on all pages or Display only on specific pages.

If you want visitors to reach you from anywhere on your site, select the first option.
However, if you only want the Telegram connection available on certain pages, select the second option.
Below, you can find built-in filters that let you include or exclude specific parts of your website.
Select the Pages, Categories, Tags, and Custom Post Types that you want to include or exclude.
Finally, you can click on Next to move forward.

Finally, enter your WPChat license key into the field to activate the plugin.
Once you’ve entered your key, click on Complete Setup.

Your WordPress site is now successfully connected to Telegram, and visitors can start reaching you directly through the chat widget.
I recommend testing the connection yourself by clicking the widget on your site. This ensures everything redirects properly to your Telegram chat.

Step 4: Set Up Your Chat Agents
This is the step where you set up agents that will redirect your visitors to Telegram.
Each agent represents a member of your support team. That way, you can have different profiles, contact info, and online hours for different agents.
Navigate to WPChat » Agents from your WordPress dashboard menu to set up your Telegram connection.
You’ll see a default agent listed on this page. Click on Edit to open the agent settings.

First, click Upload to add a professional headshot or company logo that will represent you in the chat widget.
This helps visitors know they’re talking to a real person or legitimate business.

Next, enter a fitting name for your chat agent in the name field. You can use your actual name, your business name, or even a department name like “Support Team.”

Finally, click on Save Changes to confirm your changes to this agent.
After that, return to the WPChat » Agents menu, and you’ll see the new details shown with the agent.
To create another agent, click on the New Agent button at the top, then repeat this step.

Step 5: Customize Your Telegram Chat Widget
Now that your agents are set up, you can adjust how the widget looks on your site.
Navigate to WPChat » Customizer in your WordPress dashboard. The live editor will open with a preview that updates instantly as you make changes.
Here’s what you can adjust:
- Color Palette: Choose from preset color palettes or click Custom to set your own brand colors using the color picker.
- Assistant Avatar: Select from the preset avatar grid or click “Add Your Own” to upload a custom image. Square images work best.
- Header: Edit the text displayed at the top of your chat widget.
- Icon: Change the floating button icon visitors see on your site.
- Sections: Drag sections up or down to reorder them, or toggle them on and off entirely.
Once you’re happy with the look, click Save in the top right corner.
Step 6: Add Schedules for Your Chat Agents
Finally, you can start setting up schedules for the agents. That way, you can make sure the Telegram messages are sent to the staff that’s actually online.
First, click on the Agent Settings button at the top.

On this page, use the dropdown menu under the Timings option.
Select the Enable option here.

This will show a new option that lets you control off hour rules.
You have 2 options to choose from:
- Disable contact option: Messages won’t be sent when all your agents are off-duty
- Redirect to an off-hours agent: Select a specific agent that’ll handle all the messages when everyone else is off duty.
Select whichever option fits your brand’s support schedule from here.

After that, click on Save Changes to confirm your new settings.
You can then return to the main agents page by clicking on Agents at the top.

Once again, you’ll see a list of your Telegram chat agents.
This time, click on the Edit button on one of the agents to set up their duty hours.

You can now see a new Timings setting for each agent.
Use the dropdown menu to select the duty hours, then select the active days on the right.

Finally, click on Save Changes and repeat the steps for other agents as well.
Your Visitors Can Now Reach You on Telegram
Your Telegram chat widget is now live. Visitors can reach you in one click from any page you chose. If you want chat funnels, a full analytics dashboard, or unlimited agent profiles, that’s where WPChat Pro comes in.
Start Getting Telegram Conversations TodayWPChat vs. Other Ways to Connect WordPress to Telegram
WPChat is not only the best way to add Telegram to your WordPress site, it’s also the easiest for beginners.
If you’ve been wondering whether there’s a better option for your specific situation, this quick comparison will help you decide.
| Method | Ease of Setup | Requires Coding? | End Result |
|---|---|---|---|
| WPChat Plugin | Very Easy | ✅ No | A visible, floating chat button that lets visitors easily chat with you |
| Telegram Bot + Custom Code | Advanced | ❌ Yes | Messaging and custom workflows — but complex to build |
| Crisp (with Telegram integration) | Moderate | ✅ No | Heavy helpdesk-style chat platform with Telegram connected |
| Manual Telegram link in footer/menu | Very Easy | ✅ No | A plain text link or button that visitors can miss. |
For most WordPress site owners, WPChat is the clear winner. It requires no coding, takes less than 5 minutes to set up, and gives you a professional-looking chat widget that visitors will actually notice and use.
A manual link in your footer might seem like the simplest option, but in practice it rarely works well.
Visitors rarely scroll to the bottom of a page looking for a way to contact you, and a plain text link doesn’t grab attention the way a floating chat button does.
Frequently Asked Questions About Connecting WordPress to Telegram
Can I connect WordPress to Telegram for free?
Yes. WPChat has a free version available on WordPress.org that lets you add a Telegram chat button to your site at no cost. It supports Telegram along with WhatsApp, Messenger, and Instagram. If you want advanced features like a full analytics dashboard, unlimited agent profiles, or chat funnels, those are available on the paid plans at wpchat.com/pricing/.
What’s the difference between WPChat and the WP Telegram plugin?
They solve different problems. WPChat puts a chat button on your site so visitors can start a live Telegram conversation with you. The WP Telegram plugin handles one-way automation, like sending your new blog posts to a Telegram channel or getting alerts when a form is submitted. If visitors need to be able to reach you, use WPChat.
Do I need to create a Telegram bot to use WPChat?
No. You just enter your Telegram phone number or username in the plugin settings. WPChat handles everything from there. Some other methods require creating a bot through Telegram’s BotFather, but WPChat skips that step entirely.
How do I set availability hours for my Telegram chat agents?
Go to WPChat > Agents > Agent Settings in your WordPress dashboard and enable the Timings option. From there you can set duty hours for each agent and choose what happens when all agents are offline, either disable the contact option or redirect to a designated off-hours agent.
Can I add multiple Telegram agents to my WordPress site?
Yes, with WPChat Pro. Go to WPChat > Agents and click New Agent to add team members. Each agent gets their own name, photo, Telegram contact info, and availability schedule. The free version includes one agent profile.
Start Getting Telegram Conversations Now
If someone lands on your site with a question right now, the most likely outcome is that they leave without asking it. Adding a Telegram chat button changes that.
That’s precisely where WPChat shines.
You’ve already set up the widget, added your agents, and configured their availability hours. Your visitors can now reach you on Telegram in one click from any page you want.
Here’s what to do next:
- Test the widget on your site to confirm it routes to your Telegram correctly
- Share the live URL with your team so everyone knows the chat is active
- Review your agent schedules to make sure coverage matches your busiest hours
- Check your WPChat analytics after a week to see which pages drive the most conversations
Which messaging app do your visitors use most? Let me know in the comments.


 - WPChat")
